
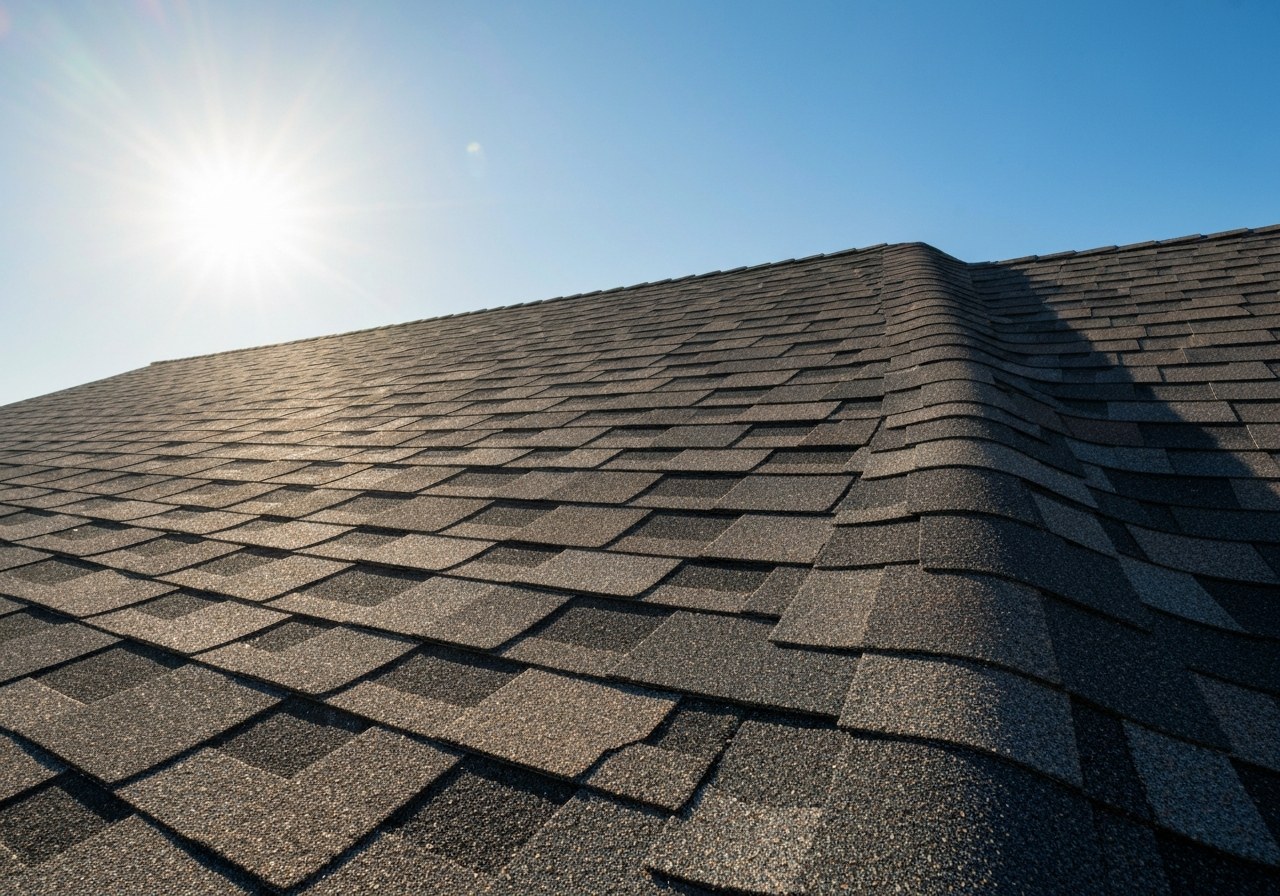
Roof underlayment is the layer installed directly beneath roof coverings that provides a secondary weather barrier, temporary protection during installation, and a component of vapor- and moisture-management in the roof system. It includes asphalt‑saturated felts, non‑bitumen synthetic rolls, and rubberized peel‑and‑stick membranes with self‑sealing properties.
Underlayment matters because it directly affects how a roof sheds wind‑driven rain, tolerates prolonged exposure during replacement, and interacts with shingles and attic ventilation to control condensation and warranty compliance. Choosing the wrong material or detailing can increase leak risk, shorten service life, and complicate insurance or manufacturer claims.
This guide follows the practical sequence used by Houston roofing professionals: a clear definition and role of underlayment; a comparison of felt, synthetic, and peel‑and‑stick products; performance and lifespan considerations including UV, hail, and wind; guidance on where to install ice and water shield for Texas storms; installation and detailing best practices; local code, insurance, and warranty implications; region‑specific recommendations for asphalt‑shingle roofs in Houston/Katy; a synthesis of how underlayment affects residential roofing outcomes; and concise FAQs and a next step for action. It begins with the basic definition and the system context that frames every subsequent decision.
Roof underlayment basics
What is roof underlayment?
Roof underlayment is a secondary water-resistant barrier installed directly under roofing material. It sits between the roof deck and shingles (or other roof covering) to block water that gets past the primary roofing layer and to protect the deck during installation.
Why underlayment matters in a roofing system
Roof underlayment serves two primary functions: it acts as a secondary weather barrier behind shingles and provides temporary protection for the roof deck while the roof is being installed or repaired.
Underlayment also influences how the roof performs as a whole: it works with shingles, flashing, ventilation, and the roof deck—because a roof is a system, not a collection of parts. Proper underlayment helps prevent water intrusion from wind-driven rain, supports shingle adhesion, and can affect ventilation performance and moisture control in the attic.
How this guide is organized
This guide compares the main underlayment types, explains installation methods, and gives material and cost‑considerations tailored for homeowners in Greater Houston / Katy, TX—where heat, humidity, and heavy storms shape product choice and installation priorities. Next up: Main types of roof underlayment and how they compare.
Main types of roof underlayment and how they compare
Asphalt‑saturated felt (15# and 30#)
Asphalt‑saturated felt is a traditional underlayment made from organic or fiberglass mat saturated with asphalt. 15# is lighter and thinner; 30# is heavier and denser (the number is a historic weight reference, not exact pounds).
Pros
- Good water resistance for low- to moderate-risk conditions.
- Inexpensive compared with synthetics and peel‑and‑stick.
- Widely available and easy to install by roofing crews.
Cons
- Heavier and more prone to tearing when wet compared with some synthetics.
- Shorter UV exposure tolerance — typically must be covered quickly.
- Absorbs water over time (organic felts more than fiberglass-backed).
Is 30# worth the extra cost?
30# felt offers better tear resistance and a longer expected service life than 15#, so it can be worth it when you want more durability at low extra material cost. However, many contractors now prefer synthetics for improved tear resistance and lighter weight; 30# felt remains a reasonable low-cost choice for budget jobs or short-term projects.
Synthetic (non‑bitumen) rolled underlayment
Synthetic underlayments are typically woven or nonwoven polypropylene/polyethylene composites (non‑bitumen). They are lighter and engineered for higher tear strength and longer UV tolerance.
Downsides of synthetics (quick scan): typically higher cost than felt, variable slip resistance, and some brands may trap heat under shingles.
Pros
- Higher tear resistance and lighter weight than felt.
- Longer UV exposure tolerance — often allowed for days to months depending on product.
- Better water-shedding characteristics; many are breathable and won’t absorb water.
- Easier handling and faster installation for crews.
Cons
- Generally more expensive than felt (see table).
- Slip‑resistance varies by product — can be slick when wet; installers should use high‑grip products on steep slopes.
- Quality varies by manufacturer; not all synthetics perform equally.
- Some types can trap heat under certain roofing systems.
Is synthetic more durable than felt?
Yes — in many cases synthetic underlayments are more durable than traditional felt, offering higher tear resistance and longer UV tolerance. However, durability varies by product and installation; some premium felts (like quality 30# felt) can still perform well in certain scenarios. Lifespan and performance depend on brand, roof slope, exposure, and installation quality.
Rubberized asphalt / peel‑and‑stick (ice & water shield)
Rubberized asphalt underlayment (peel‑and‑stick) is a self‑adhering membrane with a rubberized asphalt layer and a polymeric top sheet. It bonds to the roof deck and seals around fasteners and penetrations.
Pros
- Self‑sealing around nails and fasteners — excellent protection at eaves, valleys, and penetrations.
- Superior waterproofing compared with non‑adhesive rolls.
- Ideal for vulnerable areas (rakes, hips, chimneys, low‑slope sections).
Cons
- Higher material cost and longer labor time in some installations.
- Can be difficult to remove/rework once adhered.
- Some products can be sensitive to extremely low or high temperatures during installation (manufacturer limits apply).
Advantages of peel‑and‑stick vs rolled
Peel‑and‑stick provides superior waterproofing at critical roof details and around penetrations because it bonds directly to the deck and seals nail holes. Rolled underlayments shed water but won’t self‑seal; use peel‑and‑stick where watertight protection is required (eaves, valleys, around chimneys).
Side‑by‑side comparison table
| Field | 15# felt (approx.) | 30# felt (approx.) | Synthetic rolled | Peel‑and‑stick (rubberized) |
|---|---|---|---|---|
| Cost per square (100 sq ft) | $10–$20 (est.) | $15–$30 (est.) | $25–$60 (est.) | $50–$150 (est.) |
| Expected lifespan (under shingles) | 5–15 years (est.) | 10–20 years (est.) | 15–40+ years (est., product dependent) | 20–40+ years (est., product dependent) |
| UV exposure limit | Few days; cover quickly | Few days to a week; cover quickly | Days to months (check product) | Short — designed to be covered quickly; peel face can degrade |
| Weight (per square) | Heavier than synthetic; moderate | Heavier than 15#; moderate‑heavy | Lightweight (often <10 lbs/sq) | Heavier than synthetic; moderate |
| Best uses | Budget shingle installs, short-term protection | Standard shingle installs, more durable felt option | New roofs, long installs, exposed work, steep slopes | Eaves, valleys, penetrations, low‑slope areas, high‑risk zones |
| Pros | Low cost; widely available | Better tear resistance than 15#; cost-effective | High tear strength; long UV tolerance; lightweight | Self‑sealing; excellent at details; superior waterproofing |
| Cons | Lower tear strength; low UV tolerance | Heavier; still absorbs moisture | Higher cost; variable slip resistance | Higher cost; tricky to reinstall/remove |
Notes: Cost and lifespan figures are estimates based on typical industry ranges and product data; actual values vary by brand, region, and installation. See additional_instructions for source notes.
Which underlayment for which roof type
- Asphalt shingles: Synthetic rolled or 30# felt (synthetic preferred for longer UV exposure and tear resistance; 30# is a cost-effective alternative).
- Metal roofs: Synthetic rolled (lighter, non‑absorbent) or manufacturer‑recommended underlayment.
- Low‑slope roofs: Peel‑and‑stick or specialized low‑slope membranes (use self‑sealing products for waterproofing).
- Roof penetrations, eaves, valleys, chimneys: Peel‑and‑stick (use as flashing/boot underlayment for best protection).
Additional instructions / sources: Estimates above are approximate industry ranges and will vary by manufacturer, product line, and local labor/material costs. For specific product specifications and install limits (UV exposure, temperature range), consult the manufacturer technical data sheet for the brand you plan to use. (Estimates compiled from common industry product data and contractor pricing averages.)
Performance, lifespan and weather resistance (UV, hail and wind)
Typical lifespan
- Asphalt-saturated felt (15#) — Typical lifespan: approx. 5–10 years when used under long-lasting roof coverings and kept out of extended UV exposure. Actual life depends on installation quality and climate. Source needed (see industry testing: Industry underlayment performance and UV exposure testing reports).
- Asphalt-saturated felt (30# / heavier) — Typical lifespan: approx. 10–15 years under similar conditions; heavier felts resist mechanical wear better than 15# felt but still degrade with prolonged UV and weather exposure. Source needed (cite industry lab reports).
- Synthetic underlayment — Typical lifespan: approx. 15–25 years when protected by finished roofing; many synthetics show better tear resistance and slower moisture uptake than felt, but formulations vary. Source needed.
- Rubberized (self‑adhesive) underlayment — Typical lifespan: approx. 20+ years when installed in continuous, adhered applications (commonly used for valleys, eaves, and details). Lifespan depends on product formulation and adhesion performance. Source needed.
(If you have the manufacturer's or lab test documents for the products above, replace "Source needed" with the exact citation. For industry-level data and exposure testing, see Industry underlayment performance and UV exposure testing reports.)
UV exposure and exposure time limits
- Manufacturer exposure windows (typical reporting):
- Many manufacturers publish a maximum UV/exposure limit (commonly 30–180 days depending on product). Exact limits vary by product and should be confirmed on the product data sheet — source needed for each product.
- Some high‑end synthetic underlayments advertise 60–120 days of UV exposure resistance; others claim longer. Source needed.
- Rubberized peel‑and‑stick membranes are generally not intended for prolonged open‑UV exposure; check product specs. Source needed.
- Practical guidance for Houston summers:
- Houston has strong UV intensity and heat. If underlayment will be exposed while waiting for shingles (or repairs), minimize exposure to weeks, not months. For typical synthetics, aim to cover within the lower end of manufacturer exposure windows (e.g., <60 days) when possible — source needed.
- When to replace exposed underlayment:
- Replace underlayment that shows brittleness, cracking, significant discoloration, or loss of surface texture after exposure. If manufacturer UV limits were exceeded, plan to replace the exposed sheets before installing shingles. Document the product and exposure period and match replacement to the same or better specification. Source needed.
(Please add manufacturer data sheets or lab reports for specific exposure limits. For industry testing context and guidance, see Industry underlayment performance and UV exposure testing reports.)
Hail and wind performance
- Tear and puncture resistance: Synthetic underlayments generally have higher tear and puncture resistance than asphalt-saturated felt, making them less likely to rip from foot traffic or debris impact. Rubberized membranes resist water intrusion at penetrations but can be damaged by sharp hail depending on hail size and velocity. Source needed.
- Nail‑hole behavior: Felts tend to relax around nail holes and rely on the overlying shingles for waterproofing; synthetics typically hold their shape better around fasteners but may allow more movement if not installed correctly. Rubberized underlayments can seal around fasteners if the material remains adhered; however, self‑adhesive laps are the primary water barrier. Source needed.
How each type handles common storm stresses:
- Wind uplift
- Felt: Vulnerable to wind uplift if not nailed and lapped per code; heavier felts perform better than 15# felt.
- Synthetic: Better resistance to wind uplift when installed with correct fasteners and spacing; some synthetics have higher rated uplift performance.
- Rubberized: When fully adhered, offers strong resistance to wind-driven water entry in valleys and eaves; uplift resistance depends on adhesion.
- Nail-holes and fastener pull-through
- Felt: More likely to tear or elongate at nail holes under stress.
- Synthetic: Typically resists tear-through better and holds nails more securely.
- Rubberized: Adhesion helps seal fastener penetrations, but if adhesion fails, water entry can occur.
- Wind-driven rain
- Felt: Acts as secondary barrier but is not a waterproof membrane; performance relies on shingle overlap and proper flashing.
- Synthetic: Acts as a more effective secondary barrier against driving rain due to lower water absorption.
- Rubberized: In continuous application (e.g., ice & water shield), provides the best protection against wind-driven rain.
(Each point above should be backed by product tests or lab reports for the exact products you recommend. Replace "Source needed" with test reports or manufacturer literature.)
Waterproof vs water-resistant
Front‑load: Underlayment is generally water‑resistant, not fully waterproof, except for rubberized peel‑and‑stick membranes that, when installed in a continuous, fully‑adhered application (no gaps at laps), provide waterproof properties for the area they cover. Standard felt and most synthetic underlayments are intended as a secondary, water‑resistant barrier beneath shingles, not a primary waterproof layer. Source needed.
(Flags: several numeric lifespan and exposure claims above require specific manufacturer or independent lab citations. Please add exact product data sheets or industry test reports to replace "Source needed" where indicated. For industry testing context, use the linked Industry underlayment performance and UV exposure testing reports or upload equivalent lab reports.)
Ice & water shield: when and where to use it in Texas
What is ice & water shield and how it works
Ice & water shield (peel-and-stick underlayment) is a rubberized, self-adhering membrane that bonds to roof deck and seals around fasteners and shingles. It creates a waterproof, self-sealing layer at roof details to prevent leaks from wind-driven rain and ponding.
Standard installation locations
- Eaves (rake-to-rake at the low edge) — minimum 2–3 ft up from the eave.
- High-wind rakes and exposed edges — minimum 12–24 in along rake edges.
- Valleys — full-length coverage centered on the valley to roof-to-valley transitions.
- Roof-to-wall junctions and step flashings — continuous coverage at the wall intersection.
- Around chimneys, skylights, and penetrations — extend at least 12–18 in beyond penetration flashing.
- Low-slope areas (near gutters, flat sections) — broader coverage as needed; consider full-field in low-slope zones.
Recommended widths and laps for Houston installs
- Eaves: 24–36 inches (2–3 ft).
- Rakes/exposed edges: 12–24 inches.
- Valleys: full-width valley application; use tapered or woven method per manufacturer.
- Penetrations & flashings: extend 12–18 inches beyond the penetration.
- Overlap (side laps): 3–4 inches minimum (about 75% overlap on 4" lap).
- End laps: 6 inches minimum, staggered where possible.
- Full-field (if used): follow manufacturer for recommended end/side laps and fastening — typically 3–4 in side laps and 6 in end laps.
How peel-and-stick performs in hurricanes and heavy rain
Peel-and-stick provides a self-sealing waterproofing layer that helps prevent wind-driven rain intrusion at critical details during hurricanes and severe storms. Insurance companies and local inspectors often view ice & water shield favorably for its ability to reduce interior damage from wind-driven rain; while Texas building codes generally do not require ice dam protection, many contractors and insurers recommend peel-and-stick in coastal and high-wind zones as a best practice. Mention any insurer or code requirements during your estimate — this will affect coverage and compliance.
This leads into the next section on the main types of roof underlayment and how they compare, where we’ll weigh peel‑and‑stick against felt and synthetic options.
Installation best practices and detailing around penetrations
General fastening and nail sealing
- Prepare the roof deck and underlayment so shingles will lie flat. Ensure ice & water shield and underlayment laps meet manufacturer and local code requirements before fastening shingles.
- Follow the shingle manufacturer's fastening pattern and nail specifications. Typical residential patterns are 4 nails per strip for three-tab shingles or the manufacturer's specified number and placement for laminated/architectural shingles. If you state a specific nail count or spacing, flag it as manufacturer-dependent.
- Place nails straight and flush — avoid overdriving or underdriving. Seal around nail heads where the underlayment or accessory requires it (some self-adhering underlayments seal by compression around fasteners; others require sealant). Follow the underlayment manufacturer’s instructions for fastener type and sealant use.
- For peel-and-stick (self-adhering) underlayment: do not rely on nails to create the watertight bond across the field. Instead, follow the peel-and-stick manufacturer's guidance for permitted fastener locations and patterns. Avoid mechanically fastening through the field unless the product allows it; some manufacturers permit fasteners only in the designated seam or edge areas.
- Control temporary exposure. If shingles or underlayment will be left exposed, limit exposure time to the product’s recommended UV/temporary exposure window (see UV exposure section below). Protect partially completed areas with tarps or breathable temporary covers during multi-day work breaks.
- Inspect all fastened areas before leaving site. Check for missed nails, displaced underlayment, and proper sealing at eaves, rakes, hips, and ridges.
Detailing around skylights, chimneys and vents
Follow this order of layers at each penetration, from the roof deck up:
- Ice & water shield — extend past the base of the penetration and up the walls where required by code.
- Underlayment/rolled underlayment — install continuous underlayment over the field and lap over the edges of the ice & water where required.
- Step flashing — for vertical surfaces like chimneys and walls, install continuous step flashing pieces interleaved with the shingle course.
- Counterflashing — embed or surface-mount counterflashing into the masonry/chimney chase or roof-to-wall termination to protect the top of step flashing.
Best-practice sealing tips:
- Skylights: install a full-width ice & water flange at the lower edge, step flashing at the sides, and counterflashing integrated with the skylight curb. Use manufacturer-supplied flashing kits when available.
- Chimneys: set a continuous ice & water layer at the chimney base, place step flashing in every shingle course, and fit counterflashing into a reglet or use surface-mounted counterflashing sealed with compatible sealant.
- Round vents and pipe penetrations: use flashing boots sized to the pipe, seat the boot over the rolled underlayment, and seal the upper edge with shingle-overlap per manufacturer guidance.
- Always check for and correct roof deck irregularities around penetrations before flashing; a flat, stable substrate ensures proper flashing contact and seal.
Underlayment and attic ventilation/vapor control
Vapor drive in hot-humid climates: warm, moist outdoor air moving into a cooler attic can condense on cold surfaces — this is called vapor drive. In hot-humid regions, vapor typically moves from the outside (hot/moist) toward cooler interior or attic surfaces during cooling seasons, increasing condensation risk if assemblies are impermeable on the wrong side.
Permeable vs. impermeable underlayments (and vapor retarder definition):
- Permeable underlayment: allows water vapor to pass through; reduces trapped moisture risk when attic assemblies are ventilated and can dry.
- Impermeable underlayment / vapor retarder: resists vapor movement; can help in cold climates to stop indoor moisture from entering the roof assembly, but in hot-humid climates it can trap moisture and increase condensation risk.
Choose underlayment permeability based on climate and ventilation strategy, and coordinate with your ventilation plan (intake at soffits + balanced exhaust). If this article did not define these earlier, treat the above as the working definitions.
Recommendation: consult underlayment and shingle manufacturers for climate-specific guidance. Coordinate with an HVAC/ventilation professional when changing vapor control strategies.
UV exposure limits and temporary protection during installation
- Typical temporary UV exposure limits for many underlayments and shingles range from a few days to a few weeks; check the product label for specific hours/days allowed.
- When work will pause more than the product’s exposure limit, cover with tarps rated for roofing or install a temporary breathable membrane.
- For peel-and-stick underlayments, limit heavy traffic and avoid prolonged sunlight exposure beyond the manufacturer’s stated UV tolerance.
- Protect edges and fastener lines from wind uplift with mechanical or adhesive methods recommended by the manufacturer.
Always verify exposure limits with the product's technical data sheet — warranty coverage and code compliance can depend on following those limits.
Installation checklist (printable)
- Confirm ice & water shield: extends at least to manufacturer/ code-required distances at eaves and penetrations
- Underlayment laps: overlap per manufacturer (typical 2–4 inches side lap; 4–6+ inches at end laps — verify product spec)
- Fastening pattern: follow shingle manufacturer specs (typical: 4 nails per strip for some three-tab shingles; check product data)
- Nail placement: straight and flush; use specified fastener type/length
- Peel-and-stick: follow manufacturer for permitted fastener locations; avoid mechanical fasteners through the field unless allowed
- Temporary exposure limit: confirm UV/exposure hours from product TDS; install covers if exceeding limit
- Penetration order: 1) ice & water, 2) underlayment/rolled, 3) step flashing, 4) counterflashing
- Skylight/curb flashing kit installed per skylight manufacturer
- Chimney: step flashing in every course; counterflashing embedded or surface-mounted and sealed
- Vent/pipe boots: correct size, seated over underlayment, sealed at upper edge
- Ventilation check: intake and exhaust balanced; coordinate with ventilation plan
- Final inspection: verify nail heads, sealant where required, and secure temporary protections
Next: Main types of roof underlayment and how they compare
Local codes, insurance and warranty implications
Do local codes mandate specific underlayment types or weights?
Codes typically reference minimum underlayment installation, lap and flashing methods rather than naming a single brand or thickness. See the official [IRC/IBC roof underlayment and flashing code sections](https://codes.iccsafe.org/content/IRC2018/chapter-9-roof-assemblies) for the language on underlayment layering, laps and flashing. Local jurisdictions often adopt the IRC/IBC with amendments — local building departments may require heavier or additional underlayment (or peel‑and‑stick) in high‑wind or high‑exposure zones.
- Inspectors in coastal or high‑wind areas commonly expect peel‑and‑stick in valleys, eaves, rakes, and hips.
- Always confirm with your local building department before bidding or installing.
Insurance and wind ratings
Wind‑mitigation inspections and insurer underwriting often look at roof details that affect gust performance. Underlayment choice can influence wind resistance claims when combined with proper starter strips, fasteners and attachment patterns.
- What wind inspectors commonly document: photographs of eaves, ridge, valleys, fastener patterns, hip/ridge details, and any peel‑and‑stick or secondary barrier.
- Documentation tips for insurance: keep roof contract, material invoices (showing brand/model), before/after photos, and any manufacturer/installer certification or inspection reports.
- Note: different insurers have varying criteria — check your insurer’s wind‑mitigation checklist before work begins.
Manufacturer and contractor warranty interactions
- Improper underlayment or non‑approved underlayment can void material warranties — e.g., manufacturers may require specific starter strips, underlayment types, or fastening patterns for wind coverage.
- Using non‑approved accessories (starter, hip/ridge, underlayment) can remove wind warranty endorsements.
- Poor installation (incorrect nailing, improper laps, buckled felt) can make a workmanship claim invalid or complicate a manufacturer claim.
- Keep this documentation to preserve warranty options:
- Manufacturer product labels and invoices (show model/lot if possible)
- Signed installation contract describing materials and scope
- Installer certification or registration if the manufacturer requires certified contractors for certain warranty levels
- Photos during and after installation showing underlayment application, laps, flashings, and fastener pattern
- Any manufacturer technical bulletins or installation instructions used on the job
- Contractor workmanship warranties: get the warranty in writing, with clear start/end dates and what it covers (labor vs. materials). Avoid absolute words — workmanship warranties reduce risk but do not replace manufacturer terms.
Where to verify local specifics
Always check with your local building department for adopted code editions and amendments, and confirm your insurer’s wind‑mitigation requirements. Also review manufacturer guidance for product‑specific rules — for example, consult [Manufacturer technical bulletins (e.g., CertainTeed, GAF) on underlayment and warranty conditions](https://www.certainteed.com/documents-downloads/warranty-information) to see required accessories, installation notes and any conditions that affect warranty coverage.
Underlayment recommendations for asphalt‑shingle roofs in Houston/Katy
Typical professional choice in Greater Houston
Many local contractors and supply-house trends indicate that a two-layer approach is common: a full-coverage synthetic rolled underlayment for the field plus peel‑and‑stick (self‑adhered) underlayment at eaves, rakes, valleys and other vulnerable details. Reasons: better UV and moisture resistance for long, hot summers and improved adhesion at critical flashings. This recommendation is practical whether you’re doing a simple repair or planning a full replacement — for larger jobs consider sequencing and planning with your installer and with any roof tear-off work or new decking in mind (see our guide to full project planning at Roof replacement).
Note: saying “many local contractors favor…” is based on installer and supply-house observations; if you need attribution, we can add quotes from local contractors or supplier invoices to support the claim.
Region-specific product list (common professional-grade products used locally)
Below are commonly used professional underlayment products in the Houston/Katy market with approximate local price ranges per square foot. Prices vary by supplier and quantity; label estimates as approx. and request sourcing from vendors or recent invoices for exact local numbers.
- GAF Tiger Paw® HT (synthetic rolled) — approx. $0.25–$0.45 / sq ft
- CertainTeed Roofers Select™ Synthetic — approx. $0.30–$0.50 / sq ft
- Owens Corning ProArmor™ Synthetic — approx. $0.28–$0.48 / sq ft
- Grace Ice & Water Shield® (peel‑and‑stick) — approx. $4.00–$6.50 / linear ft at eaves/valleys (or $2.50–$4.50 / sq ft when sold in sheet form for critical areas)
- Seal‑N‑Stay Premium Peel and Stick (regional equivalent) — approx. $3.00–$5.00 / linear ft at details
- 15# Asphalt-Saturated Felt (traditional) — approx. $0.10–$0.20 / sq ft
- 30# Asphalt-Saturated Felt (heavier felt) — approx. $0.12–$0.25 / sq ft
Request: these price ranges are approx.. For publication, obtain current local supplier quotes or recent job invoices and update the ranges accordingly.
When to use 15# vs 30# vs synthetic (budget-tier guidance)
- Budget / temporary / basic reroofs: 15# felt — lowest cost; acceptable where code permits and for short expected roof life, but less durable under UV and foot traffic.
- Mid‑range / standard residential: 30# felt — better tear resistance and marginally longer service life than 15#; still asphalt-based and less tolerant of prolonged exposure.
- Higher‑end / long‑life or high‑moisture areas: Synthetic rolled underlayment — superior UV resistance, lighter weight, and better tear resistance; recommended for longer service life.
- Critical details regardless of budget: Peel‑and‑stick (self‑adhered) at eaves, rakes, valleys, dormers — use with synthetic or felt to protect against leaks from ice dams, wind‑driven rain, and flashing failures.
- Contractor preference / warranty requirements: follow manufacturer or shingle warranty specs — some shingle warranties are conditional on using specific underlayments.
Reuse, repairs and lift‑and‑relay scenarios
Underlayment can only be reused if it is in clearly serviceable condition. Replace underlayment if any of the following are true:
- It is torn, cracked, or missing in any area.
- It shows brittleness or flaking from prolonged UV exposure (exposed beyond manufacturer’s recommended exposure period).
- It has deterioration from heat or oil staining (baked or saturated).
- It was previously exposed to weather during a long-term delay (beyond the product’s exposure window).
- The existing underlayment is non‑compliant with current code or the shingle manufacturer's warranty requirements for a new installation.
For lift‑and‑relay (removing and resetting shingles without full tear-off): inspect the underlayment across the entire field. If the underlayment fails any of the conditions above or shows evidence of prior active leaks, replace it. If you’re uncertain, err on the side of replacement — the labor to replace underlayment during a full tear-off is already accounted for, but replacing it after relay can be costly and risky.
Effects on shingle warranties
- Many manufacturers require specific types of underlayment (often certain synthetics or specified felts) for full warranty coverage — check the shingle installation instructions before selecting materials.
- Using a non‑approved underlayment can void portion(s) of the shingle warranty; always document product make/model and installer paperwork.
- Keep purchase receipts, product data sheets, and installer sign-off to substantiate warranty claims later.
- For enhanced warranty options (extended or non‑pro‑rated), manufacturers may mandate peel‑and‑stick at eaves/valleys; verify requirements in the shingle warranty literature.
Final quick checklist for selecting underlayment in Houston/Katy
- Choose synthetic rolled + peel‑and‑stick at details for best durability in Houston’s climate.
- Match underlayment to your budget tier (15# = budget, 30# = mid, synthetic = premium).
- Replace underlayment if torn, baked, previously over‑exposed, saturated, or non‑compliant.
- Confirm manufacturer warranty requirements before purchase and keep documentation.
- Get local supplier quotes and installer confirmation — update price estimates with invoices before publishing.
How underlayment ties back to residential roofing performance
Note: If the term vapor drive hasn’t been defined earlier in the article — vapor drive refers to the movement of moisture (water vapor) from warm, humid areas to cooler, drier areas through building materials; it influences where condensation may form in roof assemblies.
Intersections with roof replacement decisions
When planning a roof replacement, underlayment choice and installation timing are part of the sequencing discussion. Installers typically remove the old roof, evaluate and repair decking and flashing, then install the chosen underlayment before shingles. Selecting a different underlayment type can change labor steps (for example, additional layers or membrane laps) and may require addressing decking or ventilation deficiencies found during tear-off.
Interactions with shingle selection and warranties
Underlayment can affect how shingles perform and how manufacturers view warranty coverage. Some shingle manufacturers specify underlayment types or installation practices as conditions of their warranty. Choosing an underlayment that meets the shingle maker’s specifications helps ensure compatibility and reduces the risk of voiding certain warranty provisions.
How underlayment decisions affect ventilation strategy
- Permeability vs. vapor control: Some underlayments are permeable (allow water vapor to pass) while others act as vapor retarders or barriers. Permeable underlayments can let moisture escape from the roof deck, whereas low-permeability materials can trap moisture if not paired with proper ventilation.
- Condensation risk: Low-permeability underlayments in humid climates or in assemblies with warm, moist interior air increase the risk of condensation (vapor turning to liquid) on or beneath the underlayment. Consider both climate and attic moisture sources when choosing underlayment.
- Attic airflow coordination: Underlayment choice should align with the attic’s designed airflow (intake and exhaust). For example, if ventilation is minimal, choosing an underlayment that reduces moisture accumulation is more important; if ventilation is robust, a more permeable option may be acceptable.
- Ridge/soffit placement and detailing: The location and effectiveness of ridge vents, soffit vents, and other exhaust/intake elements affect how vapor and heat move. Underlayment installation needs to be coordinated with these elements so ventilation pathways are uninterrupted and moisture is directed out of the roof system.
Implications for maintenance and inspection schedules
Underlayment type and installation quality influence how often you should inspect the roof and attic. Assemblies that use low-permeability underlayments or that are in high-humidity climates merit more frequent checks for signs of condensation, rot, or underlayment deterioration. Regular inspections (at least annually and after major storms) help catch issues early and inform any future underlayment or ventilation upgrades—see the FAQs and the next section for specifics on common underlayment types and comparisons.
Frequently Asked Questions
What is the safe exposure window for synthetic underlayment in Houston?
Most synthetic underlayments can be left exposed for several months, but you should follow the specific product’s manufacturer instructions. Some manufacturers and industry sources list exposure guidance ranging from about 90 days up to 12 months depending on product and UV rating — please provide the manufacturer’s installation/exposure guidance for the exact product you plan to use (numeric ranges are approximate).
Sources: Polyglass exposure guidance (example), industry note on testing/ASTM simulation
Will switching from 15# felt to synthetic underlayment affect my shingle warranty?
Generally no — switching from 15# felt to a listed synthetic underlayment does not automatically void a shingle warranty, but coverage can depend on the shingle manufacturer’s installation requirements. Check the shingle manufacturer’s technical bulletins and installation instructions to confirm approved underlayment types and any conditions that could affect warranty coverage.
Request: please cite the shingle manufacturer technical bulletin you’d like us to reference for a project-specific answer. (See general guidance: Asphalt Roofing Manufacturers Association - Underlayment info)
Is peel-and-stick underlayment required in hurricane-prone parts of Texas?
Short answer: Sometimes — mandatory for specific locations/conditions (for example, TDI/TWIA coastal rules require self-adhered at eaves or other specific conditions). Local windstorm and TDI requirements determine when a self-adhered (peel-and-stick or ice-and-water) underlayment is required, so check the applicable TDI windstorm or local code for your property.
Source: Texas Department of Insurance - Wind engineering and guidance, summary guidance: RemodelCalculators on TDI peel-and-stick at eaves
How do inspectors identify failed or degraded underlayment?
Direct answer: Inspectors look for water stains, soft/rot spots on the deck, and visible underlayment deterioration at seams or nail penetrations. A common example sign is dark water staining beneath shingles or soft/crumbly roof deck where underlayment allowed moisture through.
What’s the best underlayment for areas around skylights and chimneys?
Use a self-adhered (peel-and-stick) ice-and-water shield around skylights, chimneys, and other penetrations because it forms a waterproof seal and sticks to surfaces to resist wind-driven rain. That adhesive seal at transitions and flashings reduces leaks better than non‑adhesive roll underlayments.
Call to Action
Get a free underlayment-focused inspection of your roof from Blue Rhino Roofing—no obligation.
- We’ll check underlayment condition, document findings with photos, and recommend any upgrades or repairs.
Financing is available, and all work is backed by our workmanship and product quality guarantee.
Schedule your inspection here: Book a free roof inspection.
We respect your privacy and this inspection carries no pressure or sales obligation.
Frequently Asked Questions About Roof Underlayment
How long can synthetic underlayment be safely left exposed during a summer installation in Houston?
Limit exposure to about 30 to 90 days during summer, with many manufacturers specifying a 60 day maximum under direct sun. Most modern synthetics tolerate sunlight better than felt, but prolonged UV still degrades them, and Houston's high roof surface temperatures shorten that window. If you see chalking, embrittlement, or loss of the slip-resistant surface, replace the exposed underlayment rather than relying on it.
Will switching from 15# felt to synthetic affect a shingle warranty?
Usually not, since most major shingle manufacturers accept either 15 pound felt or an approved synthetic underlayment when it is installed to their instructions. Some high-wind or premium architectural warranties do require a specific underlayment or an additional secondary barrier in critical areas. Check the manufacturer's technical bulletin before switching and keep the installer invoice and product data sheets.
Is peel-and-stick underlayment required in hurricane-prone areas of Texas?
Building codes do not universally mandate peel-and-stick for all roofs in hurricane zones, but many local permit authorities and insurers strongly recommend or require rubberized peel-and-stick at eaves, rakes, valleys, and around penetrations for wind-driven rain protection. For homes in high-wind neighborhoods or with low-slope sections, installing peel-and-stick in those critical areas is a common and prudent practice to meet insurance guidelines and to improve resistance to wind-driven water entry.
How can an inspector tell if underlayment has failed during a roof inspection?
An inspector checks the roof for exposed, torn, or brittle underlayment, lifted seams where water has tracked under flashings, and popped or displaced fasteners. Inside the attic they look for staining, active moisture, mold, and soft or rotted sheathing under the suspect areas. Repeated patching, adhesive residue from failed peel-and-stick, or sagging under flashings points the same way, and findings in both places together support a targeted repair or full replacement.
Which underlayment offers the best protection around skylights and chimneys?
Rubberized peel-and-stick provides the most robust waterproofing at vulnerable penetrations because it self-seals around fasteners and conforms to irregular surfaces. Combine peel-and-stick at the base and up the sides of skylights and around chimneys with properly installed step flashings and counterflashings, and use a high-quality synthetic rolled underlayment on field areas for additional tear resistance. That layered approach reduces leak risk and simplifies future inspections, setting you up to discuss upgrade options with a roofing professional.
Schedule a Free Underlayment-Focused Roof Inspection
Get a no-cost roof inspection that zeroes in on underlayment condition and practical upgrade options for Houston and Katy homes. Our inspection includes prioritized repair recommendations, financing options to fit your budget, and a workmanship and product quality guarantee for any work we perform. Ready to protect your roof and peace of mind? Roof replacement.
Shawn Swearingen
Shawn Swearingen leads Blue Rhino Roofing, a BBB A+ accredited, Texas-licensed roofing company based in Katy. He's on the roof and on the phone, and known for telling homeowners the straight truth about whether they need a repair or a replacement.