
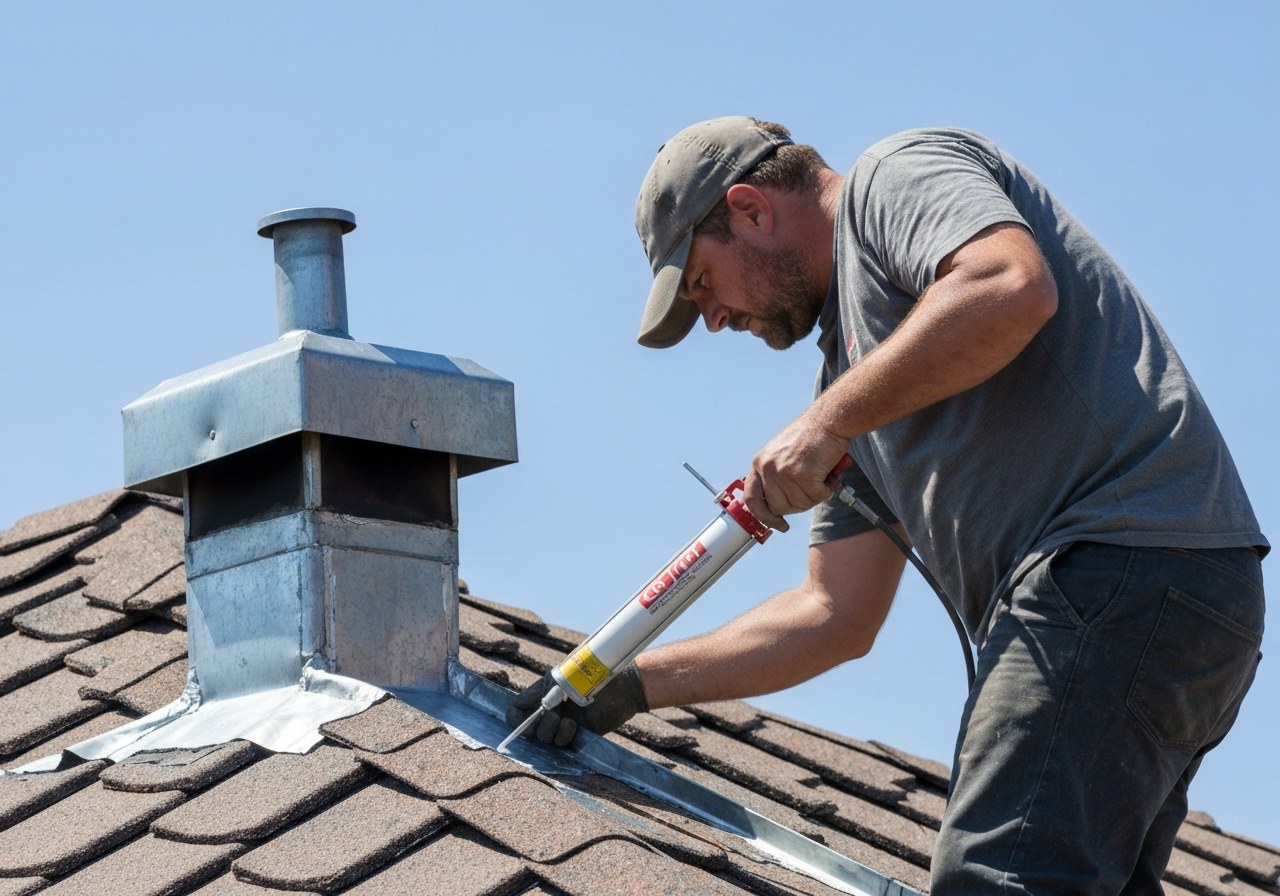
Roof flashing is the thin metal or flexible material installed at roof intersections and penetrations to direct water away from vulnerable joints and prevent leaks. It is an integral waterproofing component that ties shingles, underlayment, chimneys, vents, skylights, and gutters into a continuous system.
Flashing matters because most roof leaks originate where materials meet or move relative to one another: flashings are installed at those exact points to manage water but are exposed to corrosion, movement, and installation defects. Failure of flashing therefore creates risk to interior finishes, structural timbers, and indoor air quality, and can increase repair costs when left unaddressed.
This guide explains the main flashing types and where they are used, compares common flashing materials and expected lifespans, lists typical failure points and signs to look for, provides a practical inspection and maintenance checklist, offers a repair-versus-reseal-versus-replace decision framework with cost guidance, summarizes installation rules and best practices, presents contractor vetting questions and local considerations, recommends inspection frequency and seasonal checks, covers special topics such as coastal and mixed-metal issues, connects flashing to overall roof system planning, and closes with resources, next steps, and FAQs.
Understanding the function of flashing and how it interacts with other roof elements sets the stage for spotting problems and deciding whether to patch, reseal, or replace.
Introduction — what roof flashing is and why it matters
Short definition paragraph
Roof flashing is thin material — metal or rubber — installed to direct water away from roof joints and penetrations. It’s fitted where roofing meets interruptions such as chimneys, vents, skylights, and wall intersections to form a weatherproof barrier.
Why flashing is the most common leak origin
A large share of leaks originate at flashing and roof penetrations because those are the roof’s most complicated and stressed transition points. The main reasons are:
- Penetrations and openings: Anything that breaks the plane of the roof (chimneys, pipes, vents, skylights) requires flashing and creates an entry point for water.
- Movement and thermal cycling: Roof materials and building elements expand, contract, and shift over time; flashing seams and seals are subject to fatigue and can crack or separate.
- Joints and seams: Flashing is made of multiple pieces joined or sealed together; every joint is a potential failure point if not installed or maintained correctly.
How flashing fits into the roof-as-a-system concept
Flashing is not a stand-alone fix — it works with shingles, underlayment, gutters, and roof penetrations (like the chimney) to route water safely off the roof. Proper flashing installation and maintenance are essential because a weak flashing detail can compromise the whole roof system and lead into the chimney flashing considerations covered in the next section.
Main types of roof flashing and where they are used
Step flashing
Step flashing is used where a sloped roof meets a vertical wall (like dormers or sidewalls). Individual L-shaped pieces are installed in a stacked, overlapping pattern with each shingle course to channel water down and away from the wall.
- Common materials: Galvanized steel, aluminum, copper, lead-coated copper
- Typical failure modes: Corrosion or rust, separation from shingles or wall, improperly lapped pieces allowing leaks
Counter flashing
Counter flashing is installed into or over vertical wall surfaces to cover and protect the top edge of step flashing or apron flashing. It’s fastened into the wall (often bedded into mortar or a reglet) and prevents water from getting behind base flashing.
- Common materials: Copper, stainless steel, aluminum, lead-coated materials
- Typical failure modes: Mortar failure or separation at reglet, improper embedment, corrosion or gaps where water migrates behind flashing
Valley flashing
Valley flashing lines the channel where two roof planes meet, directing heavy runoff off the roof. Proper valley installation is critical because valleys concentrate water and debris.
- Common materials: Galvanized steel, aluminum, copper, prefabricated valley liners (metal or membrane)
- Typical failure modes: Clogging with debris, seam failure or separation, improper slope or underlayment exposure leading to leaks
Drip edge
Drip edge is installed along roof eaves and rakes to guide water into gutters and prevent moisture from getting under the roof edge. It also protects the roof deck and fascia from water damage.
- Common materials: Galvanized steel, aluminum, sometimes copper
- Typical failure modes: Bent or missing pieces, improper nail placement causing gaps, corrosion where water ponds
Vent / pipe boot flashing
Pipe boots or vent flashing seal the roof around round penetrations like plumbing vents and small exhaust pipes. They have a flexible rubber/EPDM collar that fits the pipe and a metal flange that is fastened under shingles.
- Common materials: Rubber or EPDM collar with a metal (aluminum or stainless) flange, all-metal collars for larger pipes
- Typical failure modes: Cracked or dried-out rubber collar, UV degradation, improper sealing around the pipe leading to leaks
Apron / continuous / base / headwall flashing
This continuous flashing sits at the base of a vertical wall where it meets the roof (also called base, apron, or headwall flashing). It provides a continuous barrier directing water onto the roof and away from the wall base.
- Common materials: Galvanized steel, aluminum, copper, lead-coated copper
- Typical failure modes: Improper slope or pitch back toward the wall, gaps at fasteners or seams, corrosion or separation from wall
Kick-out flashing
Kick-out flashing is a short piece installed where a roof meets the end of a wall to funnel water into the gutter instead of down the wall. It prevents water from running behind the gutter and causing wall or foundation damage.
- Common materials: Galvanized steel, aluminum, copper
- Typical failure modes: Missing or improperly sized kick-out, incorrect integration with gutter, separation from siding allowing water intrusion
Skylight flashing
Skylight flashing integrates metal or preformed flashing with skylight curb details and roofing materials to create a watertight transition. Proper flashing and sealing around the skylight are essential because skylights are common leak points.
- Common materials: Aluminum or stainless steel flashing, neoprene or EPDM seals, preformed skylight kits
- Typical failure modes: Failed seals or gaskets, improper curb flashing integration, water pooling at curb leading to leaks
Chimney flashing
Chimney flashing seals the gap between the chimney and roof surface using a combination of apron/base flashing and counter flashing or step flashing above. For details on repairs and when to call a pro, see our guide to chimney flashing repair.
- Common materials: Lead or lead-coated flashing, copper, galvanized or stainless steel, mortar and counter-flashing materials
- Typical failure modes: Deteriorated mortar or counter-flashing, corrosion of flashing material, improper installation or missing counter flashing
Caption idea: "Step flashing (left) stacked with shingles vs. counter flashing (right) embedded into the wall — both work together to keep water out."
Next: materials and lifespan
Now that you know the common types and where they’re used, the next section covers materials, expected lifespans, and cost considerations so you can decide which flashing is best for your roof and when replacement is needed.
Flashing materials, expected lifespan, and climate considerations
Choosing flashing: quick intro
When selecting flashing, balance durability, corrosion resistance, cost, and compatibility with roofing materials. Climate (salt air, humidity, temperature swings) and how flashing interfaces with other metals on the roof are as important as the base material.
Galvanized steel
- Definition: Steel coated with a protective zinc layer to reduce rusting.
- Typical lifespan: 10–30 years (wide range — depends on coating thickness and exposure; estimate — source needed).
- Pros:
- Low initial cost.
- Good mechanical strength for shaping and fastener retention.
- Widely available and easy for roofers to work with.
- Cons:
- Zinc coating wears off over time; once exposed, steel rusts faster.
- Not recommended near copper or stainless without mitigation (galvanic risk).
- Shorter lifespan in coastal or highly humid climates.
- Climate notes: Best in moderate, non-coastal climates; avoid prolonged salt exposure.
Aluminum
- Definition: Lightweight, non-ferrous metal that resists rust.
- Typical lifespan: 15–30 years (varies with gauge and finish; estimate — source needed).
- Pros:
- Lightweight and easy to form.
- Does not rust (resists oxidation).
- Good for drip edges, step flashing, and custom shapes.
- Cons:
- Softer—can dent or crease.
- Can suffer galvanic corrosion when touching more noble metals (e.g., copper).
- Paint/finish may degrade in UV-intensive climates.
- Climate notes: Performs well in coastal and humid areas if isolated from incompatible metals.
Copper
- Definition: Durable, malleable non-ferrous metal that develops a protective patina.
- Typical lifespan: 50+ years (often lasts a lifetime if installed correctly — estimate — source needed).
- Pros:
- Extremely durable and long-lasting.
- Forms a protective patina that slows further corrosion.
- Attractive for visible flashing and architectural accents.
- Cons:
- High material and labor cost.
- Can cause galvanic corrosion when in contact with some metals.
- Theft risk in some areas due to scrap value.
- Climate notes: Excellent in many climates, including coastal, but requires isolation from dissimilar metals.
Stainless steel
- Definition: Steel alloy with chromium (and often nickel) for corrosion resistance.
- Typical lifespan: 40–70 years (grade-dependent; estimate — source needed).
- Pros:
- Very corrosion-resistant and strong.
- Low maintenance and long service life.
- Good in harsh environments and around other metals.
- Cons:
- Higher material cost than galvanized steel or aluminum.
- Requires appropriate grade selection (e.g., 304 vs 316) for salt-exposure.
- Climate notes: Very good for coastal and corrosive environments, choose marine-grade (316) near salt air.
Lead
- Definition: Dense, malleable metal historically used for flashing.
- Typical lifespan: 30–60 years (depends on alloy and installation; estimate — source needed).
- Pros:
- Very flexible—easy to form tight seals around chimneys and valleys.
- Long history of proven performance when installed by experienced roofers.
- Cons:
- Heavy and more expensive than some options.
- Environmental/health handling concerns; some jurisdictions restrict use.
- Can react with certain roofing materials (e.g., some tile finishes).
- Climate notes: Performs well in cold and temperate climates; check local regulations.
Galvalume (zinc–aluminum coated steel)
- Definition: Steel coated with an alloy of zinc and aluminum for improved corrosion resistance.
- Typical lifespan: 20–50 years (better than galvanized in many conditions; estimate — source needed).
- Pros:
- Better corrosion resistance than standard galvanized steel.
- Good longevity at a mid-range cost.
- Strong and suitable for structural flashing uses.
- Cons:
- More expensive than galvanized steel.
- Coating can be damaged by improper cutting or fasteners.
- Possible galvanic issues with certain metals.
- Climate notes: Suited for most climates, performs better than galvanized in humid and some coastal settings.
Rubber / EPDM (Flexible flashing)
- Definition: Synthetic rubber membranes used for seals and terminations (commonly EPDM or modified bitumen products).
- Typical lifespan: 10–30 years (product- and installation-dependent; estimate — source needed).
- Pros:
- Flexible—excellent for irregular shapes and around penetrations.
- Good watertight seals when properly installed.
- Lightweight and easy to work with.
- Cons:
- Can degrade under prolonged UV exposure unless protected.
- May require adhesive or mechanical fastening that can fail if installed poorly.
- Not always appropriate where high heat or foot traffic occurs.
- Climate notes: Works well in many climates; protect from sustained UV and heat where possible.
Galvanic corrosion: what it is and how to reduce risk
Galvanic corrosion occurs when two dissimilar metals are electrically connected in the presence of an electrolyte (water), causing the more active metal to corrode faster. On roofs this commonly affects flashing that touches different metals or fasteners.
- Mitigation steps:
- Isolate dissimilar metals with non-conductive barriers (e.g., rubberized gasket, bituminous tape, or neoprene).
- Use compatible fasteners and trim (match metal types or use stainless steel fasteners and approved sealants).
- When to replace corroded flashing:
- Replace if flashing is pitted, perforated, or has significant section loss that compromises the waterproofing.
- Minor surface corrosion that doesn't affect sealing can sometimes be repaired or coated; major structural corrosion requires replacement.
Rule-of-thumb: replacement timing and comparison to roofing materials
- If flashing lifespan approaches the lower end of its range or shows visible failure (gaps, rust holes, or separation), replace it during roof repairs or at re-roof to avoid leaks.
- In many cases, metal flashings outlast asphalt shingles (shingles: ~15–30 years depending on type), while premium metals (copper, stainless) often last as long as or longer than tile or metal roofing systems.
Flashing materials comparison table
| Material | Typical lifespan | Pros | Cons | Best climates | Cost (approx.) |
|---|---|---|---|---|---|
| Galvanized steel | 10–30 years (estimate — source needed) | Low cost; strong; easy to form | Zinc coating can wear; rusts once exposed; shorter in coastal areas | Moderate, non-coastal | Low |
| Aluminum | 15–30 years (estimate — source needed) | Lightweight; resists rust; easy to form | Softer (dents); can corrode galvanically with other metals | Coastal and humid (if isolated) | Low–Medium |
| Copper | 50+ years (estimate — source needed) | Extremely durable; develops protective patina; attractive | High cost; galvanic risk; theft risk | Many climates; performs well in coastal if isolated | High |
| Stainless steel | 40–70 years (estimate — source needed) | Very corrosion-resistant; strong; low maintenance | Higher cost; grade selection matters for salt exposure | Excellent for coastal/corrosive | Medium–High |
| Lead | 30–60 years (estimate — source needed) | Very malleable; proven performance | Heavy; handling/environmental concerns; regulated in some areas | Cold/temperate (check local rules) | Medium–High |
| Galvalume | 20–50 years (estimate — source needed) | Better corrosion resistance than galvanized; strong | More costly than galvanized; coating damage risk | Most climates; improved in humid/coastal | Medium |
| Rubber / EPDM | 10–30 years (estimate — source needed) | Flexible; good seals for odd shapes; lightweight | UV/heat degradation risk; adhesive/installation sensitive | Many climates (protect from UV/heat) | Low–Medium |
(Notes: lifespan and cost categories are generalized — actual service life depends on installation quality, local climate, maintenance, and product grade. Specific lifespan or cost figures should be confirmed with manufacturer data or local contractor experience.)
Common flashing failure points and how to spot them
Bullet list of failure points with causes
- Step flashing gaps or separation — improper installation, thermal expansion/contraction, or missing sealant allow water to follow the roof plane into the wall.
- Valley flashing damage or clogging — debris, corrosion, or poor overlap directs heavy runoff under shingles.
- Counterflashing failure at chimneys or walls — mortar settlement, loose metal, or no backer flashing lets water bypass the flashing.
- Roof-to-wall transition failures — tapered or poorly integrated flashing details at siding transitions let wind-driven rain seep in.
- Skylight and vent flashing deterioration — worn boots, cracked seals, or wrong-sized flashing create small but persistent leak paths.
- Pipe-boot or vent flashings cracked — UV degradation and freeze/thaw cycles split rubber or plastic boots.
- Improperly lapped or underlapped flashing — incorrect sequencing during installation causes reverse flow beneath shingles.
- Flashing fastener corrosion or nail pops — exposed or corroded fasteners punch holes in the flashing over time.
- Flashings with incompatible materials — mixing metals (galvanized vs. copper) causes galvanic corrosion and premature failure.
Visible exterior signs
Exterior indicators are usually the first clue that flashing is failing; check these after heavy rain or high winds.
- Rust streaks or corrosion on flashing metal
- Loose or missing flashing pieces along valleys, chimneys, or walls
- Shingle lifting or curling near flashing (edge separation at transitions)
- Pooling water or slow drainage in roof valleys
- Stains or dark streaks on siding below rooflines
- Gaps where flashing meets masonry or siding
- Granule loss or concentrated wear near flashing terminations
Interior signs and health consequences
Short answer: water intrusion from flashing failures can lead to moisture buildup and create conditions where mold growth and allergens become more likely (see CDC guidance linked below).
Early interior indicators — act quickly if you see any of these:
- Water stains on ceilings or walls, especially near exterior walls or below rooflines
- Peeling paint or blistering drywall close to a roof transition
- Musty or damp odors in attics, upper floors, or closets
- Wet or sagging attic insulation or visible wet spots on roof sheathing
- Discolored insulation or dark streaks on rafters
When to act:
- If you find visible water stains, wet insulation, or a persistent musty odor, schedule a roof inspection immediately.
- If mold is visible or occupants have unexplained respiratory symptoms, contact a professional for moisture remediation and consult guidance from the CDC on mold cleanup and health risks: CDC — Mold.
Typical timing
Many flashing leaks show up within 24–72 hours after heavy rain, but detection can vary widely depending on the leak path and conditions. Factors that influence when leaks become detectable include:
- Leak path complexity — small gaps can let water travel along roof sheathing or inside walls before showing up indoors, delaying visible signs.
- Weather intensity and duration — short, light rain may not reveal slow leaks; sustained heavy rain or wind-driven storms are more likely to expose flashing failures.
- Roof slope and drainage — low-slope areas and clogged valleys hold water longer, increasing the chance of seepage.
- Seasonal temperature changes — freeze/thaw cycles can open hidden cracks that only leak when temperatures fluctuate.
- Attic ventilation and insulation — well-ventilated, dry attics can mask early signs; conversely, poor ventilation may accelerate visible interior damage.
How to inspect and maintain flashing
Safety and preparation
Safety first: inspecting flashing can be hazardous—always prioritize fall protection, stable access, and never work alone if you're on the roof.
- Use a safety harness and tie-off to a rated anchor point whenever you're above one story.
- Check ladder placement and angle: set the ladder at a 4:1 ratio (one foot out for every four feet up), secure the top, and have someone hold the base if possible.
- Avoid walking on brittle or wet roofs: if shingles feel brittle, crumbly, or the roof is wet, do not walk on it — inspect from the ladder or use binoculars/photographs instead.
Inspection frequency: inspect flashing at least twice a year (spring and fall) and after major storms or high winds.
Tip: Bring a smartphone or camera and photograph any damage you find — photos help with insurance claims and make communicating problems to contractors much clearer.
Inspection checklist
Perform these numbered steps in order. Be methodical and note findings for each item.
- Roof edge (eaves and rakes) — Look for: loose or missing drip edge, gaps between flashing and roofing, rust, or exposed fasteners. Check for curled or lifted shingles at the very edge.
- Roof valleys — Look for: cracked, separated, or corroded flashing, pooling water, split seams, and debris buildup that can hide damage. Ensure valley metal sits flat and has no punctures.
- Chimneys — Look for: missing or cracked step flashing where the chimney meets the roof, deteriorated mortar joints, gaps between counterflashing and chimney masonry, and signs of water staining on the chimney.
- Pipe boots and vents — Look for: cracked or hardened rubber boots, split collars, missing clamps, and gaps where the boot meets the pipe. Replace deteriorated boots promptly.
- Skylights and roof penetrations — Look for: loose or missing curb flashing, sealant gaps, fogging or water stains inside the skylight, and improper overlap of flashing and shingles.
- Gutters and downspouts (at flashings' discharge points) — Look for: backed-up debris causing water to pool against flashing, loose gutter hangers pulling flashing away, and rust or holes in gutter sections adjacent to flashing.
- What to look for across all flashing areas — Look for: corrosion or rust, loose or missing fasteners, gaps or separations, lifted edges, cracked sealant, punctures, and signs of past leaks (stains, mold, or rot in the attic/soffit).
After each numbered step, note condition (Good / Needs repair / Urgent) and take at least one close-up photo of any problems.
Simple maintenance actions homeowners can do
- Replace cracked or weathered pipe boots with pre-formed rubber boots.
- Reseal small gaps with a quality roofing sealant (use sparingly; don’t rely on sealant as a long-term fix).
- Clear debris from valleys and gutters so water can run freely away from flashings.
- Tighten loose gutter hangers and remove nails or screws backing out (replace with proper fasteners).
- Photograph and log every repair for warranty and insurance records.
When to call a professional
Call a licensed roofer when you find rusted, severely corroded, loose, or missing flashing; obvious water intrusion; damage you can’t safely access; or if repairs require cutting and re-lapping metal or replacing step flashing around chimneys.
Contractor vetting questions to ask:
- Are you licensed and insured for roofing work in my area?
- Can you show examples or photos of similar flashing repairs you’ve done?
- Do you provide a written estimate and a workmanship/materials warranty?
- Will you inspect my attic for signs of past leaks as part of the service?
Next: Main types of roof flashing and where they are used
Repair, reseal, or replace: decision guide
Decision factors
Deciding whether to repair, reseal, or replace flashing comes down to a few practical considerations: the flashings’ age and condition, how many times the same area has leaked, whether a roof replacement is already planned, and the relative cost and disruption of each option. Use this short checklist to assess your situation and guide the next step.
- Age of flashing and roof — Older systems (for example, flashings on roofs older than 15–20 years) often show more wear and may be better candidates for replacement, especially if the shingles or roof deck are also aged.
- Extent of corrosion or damage — Small, localized corrosion or gaps can usually be repaired or resealed; widespread corrosion across many flashings or large sections of flashing often points toward replacement. (Avoid absolute thresholds; a full inspection is needed to confirm severity.)
- Number and frequency of leaks — A one-off leak that’s repaired successfully is different from repeated leaks at the same detail. Multiple leak events at the same flashing usually indicate underlying failure and increase the chance replacement is needed.
- Roof replacement schedule — If you plan to replace roofing soon (within 1–3 years), it’s often more cost-effective to replace flashing at the same time rather than patching now and replacing later.
- Cost vs. remaining service life — Compare repair/reseal cost to the expected remaining life of the roof and flashing. If repair cost approaches the cost of a long-term replacement and the roof is nearing the end of life, replacement often makes better sense.
Cost ranges and examples
Costs vary by material, roof access, and labor rates. Below are example ranges to give a reality check — these are illustrative estimates, not firm quotes. For Houston-area homeowners, expect labor to reflect local market rates; Blue Rhino Roofing operates in Katy and the greater Houston area and can provide exact local pricing after inspection.
- Minor reseal or patch (single penetration, caulking/replace boot): typically $75–$300 depending on accessibility and boot type.
- Repair of damaged flashing (small section replacement): typically $200–$700 for a localized repair that includes removing and reinstalling shingles or membrane.
- Full flashing replacement around a roof area or multiple penetrations: typically $700–$2,500+ depending on linear feet replaced, complexity, and roof height.
- Lead, copper, or custom metal flashing replacement: these specialty materials can cost more — often several hundred to several thousand dollars depending on scope.
Note: Houston-area jobs can skew toward the lower or higher end of these ranges based on roof pitch, access (single-story vs. multi-story), and local permitting or disposal costs. Always get a written estimate that itemizes materials, labor, and any roof-access fees.
When repair becomes replacement
Consider replacement (rather than repair or reseal) when one or more of these commonly observed conditions applies:
- Repeated leaks after repairs — if the same flashing has leaked multiple times despite repairs, replacement is often the longer-lasting solution.
- Widespread corrosion or deterioration — when corrosion, rust-through, or material breakdown affects many flashing locations rather than a single spot, replacement is typically recommended.
- Roof is (or will be) replaced soon — if a full roof replacement is planned within a few years, replacing flashings now usually saves labor and material costs versus doing it twice.
- Flashing does not meet current installation standards or building code — if flashing was poorly installed originally or is below modern flashing details (for example, lacking kick-out flashing where required), full replacement to current standards is usually warranted.
(These are general guidance points — the best choice depends on a professional inspection that evaluates specific materials and site conditions.)
Job duration expectations
- Single penetration repair or reseal: typically 1–3 hours on-site for an accessible, single-penetration job (inspection, removal of old sealant, reseal or boot replacement, and clean-up).
- Full flashing replacement (multiple details or perimeter flashing): typically 1–3 days for a typical single-family roof depending on roof size, pitch, and complexity; larger or multi-story roofs can take longer.
Transition to contractor vetting questions
Before you schedule work, prepare a short list of contractor questions to confirm scope and quality (next section): what flashing materials they plan to use, whether they’ll tie flashing into new or existing underlayment, warranty details, proof of insurance, and examples of local jobs they’ve completed.
How much does roof flashing repair or replacement cost?
Quick summary of cost drivers
The main factors that drive flashing repair or replacement cost are scope of damage, type of flashing, access and roof pitch, materials used, and local labor rates. Minor repairs are inexpensive; full flashing replacement (often done with a roof replacement) is the most costly because it’s labor‑intensive and may require removing shingles and addressing underlying decking.
Representative price ranges
The following are typical U.S. cost ranges as a guideline; actual prices vary by contractor and site conditions. For projects in the Houston metro area, expect labor and material costs to be roughly 10–25% higher than these national ranges in many cases due to local demand and climate-related work practices.
- Minor flashing repair (patching, tighten fasteners, small sections of metal): $75–$350
- Pipe boot replacement (single plumbing vent boot): $100–$450
- Chimney flashing repair (step flashing or counterflashing repairs, localized sealing and patching): $250–$1,200
- Full flashing replacement with roof replacement (continuous metal flashings like rake, eave, step, apron replaced during a roof job): $800–$4,000+ (often bundled into the overall roof replacement cost)
Note: These ranges are hedged estimates. Get a written estimate from a local licensed roofer to confirm exact pricing for your home.
Can I just seal flashing?
Caulking or sealing is a temporary fix for small gaps but is not a long-term replacement for failing or deteriorated flashing.
When sealing is acceptable (short-term, limited cases):
- Small gaps or split seams where flashing metal is otherwise sound.
- Emergency stopgaps to prevent active leaks until a permanent repair can be scheduled.
- Areas with recent, minor roof work where flashing was disturbed but not corroded.
When sealing is only temporary or not acceptable:
- Corroded, bent, or missing flashing — metal must be replaced.
- Repeated leaks at the same location — indicates flashing failure or flashing-to-roof integration problems.
- Flashing integrated with roof replacement — full replacement or reinstallation is typically required to ensure a watertight system.
Permits and local code
For minor repairs you usually won’t need a permit, but full flashing replacement (especially when done with roof replacement) can trigger permit and inspection requirements. Check with your city or county building department (or ask your contractor) about local code and permitting for roof and flashing replacement in the Houston area.
Key installation rules and best practices
Sequencing and overlap
Proper sequencing and overlap reduce water entry risks and make future repairs easier. Start with a clear plan for which flashing pieces go first, and follow consistent overlap directions so water always sheds outward and down.
- Flashing direction: top pieces must be covered by lower pieces so water flows over joints, not into them (e.g., step flashing sits over the underlayment and is overlapped by the shingle above).
- Horizontal overlaps: allow 3–4 inches of lap on horizontal flashing laps unless manufacturer or local code requires more.
- Vertical overlaps: use 2–3 inches minimum vertical lap for metal flashing seams; increase in exposed locations or high-wind areas.
- End laps: stagger end laps and provide at least 6 inches of overlap where practicable for long runs.
- Underlayment tie-in: underlayment or membrane should be lapped over the top edge of the lower flashing and under the upper flashing to create a shingle effect.
- Penetration work: install boot flashings and counter-flashing after primary roof covering and underlayment are in place, following the overlap rules above.
- Local codes and product instructions: always follow manufacturer guidance and local code where it requires larger laps or different sequencing.
Fasteners and sealants
Choose fasteners and sealants compatible with the flashing material and climate; improper fasteners or placement can create leak paths.
- Acceptable fasteners:
- Stainless-steel nails or screws for metal flashings in coastal or humid climates.
- Hot-dipped galvanized fasteners for non-coastal installations where corrosion risk is lower.
- Stainless-steel roofing screws with neoprene washers for metal-to-wood attachments where a watertight seal is needed.
- Acceptable sealants:
- Polyurethane or butyl-compatible sealants recommended by the flashing manufacturer.
- Elastomeric flashing adhesives for membrane-to-metal transitions when specified.
- Use only sealants rated for outdoor UV exposure and the substrate in question.
- Installation cautions:
- Do not drive nails or screws through the face of continuous flashing where the fastener head will be exposed to weather — this can create a direct leak path and lead to corrosion. Fasten in flanges, hems, or through secondary supports where possible.
- Avoid over-reliance on sealant as a primary waterproofing method; sealants are best used as a secondary barrier or at transitions and fastener points.
Kickout flashing and drip edge details
Correct placement of kickout flashing and drip edges guides water away from walls, foundations, and trim.
- Drip edge placement:
- Install drip edge at the eave under the underlayment or shingle starter where required by manufacturer and code to direct water off the roof edge.
- At rakes, install drip edge so it overlaps the shingle course and directs runoff away from fascia.
- Kickout flashing placement:
- Place kickout flashing where a roof slope meets a wall to divert runoff away from the wall and into the gutter.
- Kickout flashing should extend past the wall cladding and be secured to the roof deck/shingle underlayment before siding or trim is installed.
- Additional guidance:
- Size kickouts to handle anticipated flow from the roof area above (larger drainage area = larger kickout).
- Seal the top edge of drip edge at vertical transitions with compatible flashing and maintain the overlap rules from the sequencing section.
Tying into masonry
Tying flashing into masonry (brick, CMU, stone) requires careful steps to prevent water tracking behind the cladding.
- Step 1: Remove mortar joint where flashing will be placed to create a clean bed and to allow the flashing to slip behind the cladding where required.
- Step 2: Install a continuous self-adhered membrane or metal flashing into the prepared bed at least 2–3 inches behind the face of the masonry (follow local code/manufacturer for required depth).
- Step 3: Apply counterflashing over the masonry course, embedded into a reglet or mortar joint, and seal with compatible sealant at the top edge.
- Step 4: Provide a positive slope on the flashing so water returns to the roof plane; avoid flat runs that pond.
- Step 5: Finish the joint so masonry movement and thermal expansion are accommodated (use flexible sealant and allow proper clearance for expansion).
For more detailed industry guidance, see the NRCA resource on flashing and waterproofing best practices.
Lead into contractor vetting
When hiring a contractor for flashing work, ask for examples of similar installations, written details on materials and fasteners they plan to use, and confirmation they follow the overlap and fastening practices above. The next section covers the main types of roof flashing and where they are used.
Questions to ask roofers and contractor vetting checklist
Suggested questions to ask
- What is your full company name, address, and phone number?
- Are you licensed and bonded to work in Houston/Harris County? Can you provide proof?
- Do you carry general liability and workers’ compensation insurance? Can you provide certificates naming the homeowner or lender as additional insured if requested?
- How long have you been in business in the Houston area, and can you provide recent local references?
- Will the project include a written, itemized estimate and a detailed scope of work?
- What brands and types of roofing materials will be used, and are they covered by manufacturer warranties?
- What labor warranty do you provide, and what exactly does it cover? Is it written?
- Who will supervise the job site and how can that person be contacted during the project?
- What is the expected timeline for start and completion? How will weather and hurricane season affect scheduling?
- How will debris and job cleanup be handled? Will gutters, landscaping, and neighbors’ property be protected?
- Will subcontractors or day laborers be used, and are they insured and vetted?
- What payment schedule do you require? Are financing options available or recommended?
- How are change orders handled and documented?
- Can you show proof of local licensing, trade association memberships, or manufacturer certifications?
- How are warranty claims handled after completion, and is there a local service contact?
Expected answers and red flags
- What is your full company name, address, and phone number?
- Acceptable: Local physical address, landline and mobile phone, and business registration info.
- Red flags: P.O. box only, evasive or inconsistent contact details.
- Are you licensed and bonded to work in Houston/Harris County? Can you provide proof?
- Acceptable: Clear license numbers and digital or printed verification from the state or county.
- Red flags: Hesitation to provide proof, claiming “we don’t need one” or offering vague comments.
- Do you carry general liability and workers’ compensation insurance? Can you provide certificates naming the homeowner or lender as additional insured if requested?
- Acceptable: Current COIs (certificates of insurance) with valid dates and coverage amounts.
- Red flags: No COI, expired policies, or suggestion that insurance isn’t necessary.
- How long have you been in business in the Houston area, and can you provide recent local references?
- Acceptable: Multiple local references with recent jobs within the service area and verifiable contact info.
- Red flags: No local references, only out-of-town jobs, or references that cannot be reached.
- Will the project include a written, itemized estimate and a detailed scope of work?
- Acceptable: A written, itemized estimate showing material, labor, permits, disposal, and a clear scope.
- Red flags: Vague or verbal estimates, lump-sum quotes without line items.
- What brands and types of roofing materials will be used, and are they covered by manufacturer warranties?
- Acceptable: Specific brand names, shingle type, accessories, and warranty terms in writing.
- Red flags: “We’ll use whatever’s cheapest,” or inability to name brands and warranty specifics.
- What labor warranty do you provide, and what exactly does it cover? Is it written?
- Acceptable: Written labor warranty with duration and covered items (e.g., workmanship, flashing).
- Red flags: Only an oral promise, or overly vague language like “we’ll take care of it.”
- Who will supervise the job site and how can that person be contacted during the project?
- Acceptable: Named project supervisor with direct contact details and regular update plan.
- Red flags: No designated supervisor or “the crew boss” without contact info.
- What is the expected timeline for start and completion? How will weather and hurricane season affect scheduling?
- Acceptable: Realistic timeline with contingency plans for rain/hurricane alerts and permit-related delays.
- Red flags: Overly optimistic timelines, refusal to discuss seasonal risks.
- How will debris and job cleanup be handled? Will gutters, landscaping, and neighbors’ property be protected?
- Acceptable: Detailed cleanup plan, use of dumpster, magnetic sweeps, and protection for landscaping and gutters.
- Red flags: No cleanup plan or “we’ll leave it to the homeowner.”
- Will subcontractors or day laborers be used, and are they insured and vetted?
- Acceptable: Names of subcontractors, proof they’re insured, and agreement that the primary contractor is responsible.
- Red flags: Ambiguity about who performs the work or refusal to confirm subcontractor insurance.
- What payment schedule do you require? Are financing options available or recommended?
- Acceptable: Reasonable deposit (commonly 10–30%), progress payments tied to milestones, and clear financing options.
- Red flags: Large upfront cash-only demands, pressure to pay outside normal channels.
- How are change orders handled and documented?
- Acceptable: Written change orders with itemized costs and homeowner approval required.
- Red flags: Verbal change orders or statements like “we’ll sort it out later.”
- Can you show proof of local licensing, trade association memberships, or manufacturer certifications?
- Acceptable: Copies of certifications, manufacturer installer credentials, and local trade memberships.
- Red flags: No verifiable credentials or reliance on third-party claims without documentation.
- How are warranty claims handled after completion, and is there a local service contact?
- Acceptable: Clear post-completion contact, response time commitments, and written warranty terms.
- Red flags: No local contact for follow-up or refusal to put warranty procedures in writing.
Additional vetting items (apply to all contractors):
- Request itemized estimates and compare line items across bids.
- Require proof of insurance before work begins and verify certificates with the insurer.
- Avoid vague warranties; insist on written warranties that specify duration and coverage.
- Consider asking for a copy of the contractor’s lien release policy and final lien waiver upon payment.
Local considerations for Houston-area homeowners
Houston-area homeowners should confirm licensing and local permits: verify city/county trade registration where applicable and ask for any local inspection records. Financing is commonly available through contractor partners or third-party lenders; request full written terms and avoid large cash-only demands. Climate and hurricane risk make timely scheduling, storm tie-downs, high-wind-rated materials, and proper flashing especially important—ask how the contractor addresses wind uplift, storm debris, and rapid response after hurricanes. Finally, confirm local references and the contractor’s ability to provide prompt warranty service after severe weather.
How often to inspect flashing and simple maintenance schedule
Recommended frequency
Inspect flashing at least once a year and after major storms.
- Annual: do a visual check during your yearly roof inspection (spring or fall works well).
- After major storms: inspect as soon as safely possible after hail, high winds, or heavy rain.
- Older roofs or known trouble spots: increase to twice a year.
(For a full walkthrough of inspection steps, see the earlier "Inspection & maintenance" section rather than repeating the whole checklist.)
Seasonal checklist
- Spring: clear debris from valleys and around chimneys, check for loose or lifted flashing edges, tighten exposed fasteners.
- Fall: remove leaves and gutter blockages, inspect seams and sealant for cracks, check roof penetrations before winter.
- Hurricane / severe-weather season: secure loose flashing, photograph any damage for insurance, schedule a professional inspection immediately after a storm.
Short maintenance tasks and when to call a pro
- Quick DIY tasks:
- Remove loose debris and leaves near flashing.
- Replace cracked sealant around small seams.
- Re-seat minor, non-corroded step flashing tabs if accessible and safe.
- When to call a pro:
- Visible gaps between flashing and roof surface.
- Corroded, bent, or missing flashing pieces.
- Repeated leaks at the same penetration or widespread damage after a storm.
- If work requires walking steep or high roofs — leave it to a licensed roofer.
If you're unsure or find corrosion, gaps, or storm damage, schedule a free professional inspection with Blue Rhino Roofing to avoid small problems turning into costly leaks: https://bluerhinoroofing.net/services/free-roof-inspection/
Special topics: coastal salt air, mixed metals, retrofits, permits, solar and warranties
Coastal and salt-air guidance
If your home is in a coastal or salt-air environment, prioritize corrosion-resistant materials and installation methods up front — that’s the single best step to extend flashing life. Salt air accelerates metal corrosion compared with inland environments, so choose materials and fasteners meant for marine exposure and schedule more frequent inspections.
- Preferred materials: stainless steel (Type 304 or 316) for flashing where budget allows; aluminum with a marine-grade coating as a mid-range option; copper only where sacrificial corrosion or aesthetic patina is acceptable and compatible with nearby metals.
- Fasteners and sealants: use stainless-steel fasteners and silicone-compatible sealants rated for salt-air exposure. Avoid plain galvanized nails in critical flashing locations.
- Maintenance: plan for annual visual checks and earlier replacement of flashing showing pitting or perforation. (Note: corrosion rates vary with exposure and material — local tests or manufacturer guidance are the best source for exact life-expectancy.)
Galvanic corrosion and mixed metals
When two dissimilar metals contact each other in the presence of an electrolyte (like saltwater), galvanic corrosion can occur and cause the less noble metal to corrode faster. Avoid mixing metals in direct contact near flashing details, and if mixing is unavoidable, separate them or use compatible barriers.
- Install non-conductive barriers (like butyl tape or polymer gaskets) between dissimilar metals to stop electrical contact.
- Use matching fasteners and hardware (for example, stainless steel fasteners with stainless flashing) or specify sacrificial materials intentionally where appropriate.
Flashing retrofits around siding
Retrofitting flashing where new or replacement siding meets roofing requires careful sequencing so water sheds correctly and siding warranty remains intact. Proper retrofits prevent leaks from wind-driven rain and stop water from getting behind cladding.
- Ensure a water-resistive barrier (WRB) is continuous behind siding and lapped correctly over the roofing underlayment at the transition.
- Use step flashing tucked under each siding course or a continuous head flashing depending on siding type; seal with compatible sealant at visible joints.
- When replacing siding, replace damaged WRB and flashing rather than patching — small defects can cause recurring leaks.
Permits and code
Local building codes and permit requirements vary — many re-roofs and flashing retrofits require a permit, especially if you alter roof structure, replace large areas, or add penetrations. Always check with your city or county building department and, if applicable, your HOA before work begins. A licensed contractor can usually pull permits for you and ensure the work meets local code.
Solar installations and flashing
Solar panels change how flashing is designed and inspected: panels add penetrations, alter water-shedding, and require mounts that integrate with flashing details. Coordinate flashing work with your solar installer and use materials that preserve roof integrity and warranties.
- Use engineered flashing-integrated mounts or roof hooks designed for your roof covering to avoid ad-hoc penetrations.
- Place mounts and conduit runs to minimize new roof penetrations; where penetrations are needed, flash and seal them with stainless-steel or manufacturer-approved flashing kits.
- Consider elevated racking to maintain airflow and allow inspections beneath panels; ensure flashings remain accessible for future roof maintenance.
Warranties and job duration estimates
Warranties and timelines vary by material, manufacturer, and contractor. Typical items to expect:
- Material/manufacturer warranties: commonly 20–50 years for shingles or metal panels, shorter for specialty flashings — check the specific product warranty.
- Workmanship/contractor warranty: commonly 1–10 years, with many reputable contractors offering multi-year workmanship guarantees. Blue Rhino Roofing offers a quality guarantee — confirm the length in your contract.
- Solar-related warranties: panel manufacturers often offer 10–25 years on power output and product; mounting hardware may have separate warranty terms.
- Job duration estimates: small flashing repairs can be completed in a single day; partial re-flash or limited reroof sections typically take 1–3 days; full reroofs including comprehensive flashing replacement usually take 3–7 days, depending on roof size, complexity, and weather.
How roof flashing ties into residential roofing systems
Why flashing matters for roof replacement and repair decisions
Roof flashing directly affects roof performance and often determines whether a repair or full replacement is the right choice.
Key intersections — action-focused
- Performance (stop leaks): Inspect and repair flashing first to quickly stop active leaks; replace flashing if metal is corroded, split, or poorly seated.
- Warranty & maintenance: Confirm flashing work meets manufacturer and installer warranty requirements — improper flashing can void shingle warranties and reduce coverage.
- Compatibility with shingles and gutters: Use flashing materials and profiles that match shingle type and gutter configuration to prevent water backup, premature wear, and ice-damming issues.
- Lifecycle planning: Factor flashing condition into your roof’s remaining lifespan — budgeting for flashing replacement during a reroof can save labor and extend overall roof life.
Ready for a no-risk inspection?
Schedule a free inspection to assess flashing and roof condition: /contact/
Internal resources and where to get help
Quick internal links
- **Roof repair services and process** — Overview of our repair services, step-by-step process, and what to expect during a service visit.
- **Roof leak repair process** — Fast-response options and the leak-specific repair workflow we use to stop water intrusion quickly.
- **Roofing resources** — Guides, checklists, and homeowner resources for maintenance, inspections, and decision-making.
Chimney flashing resource
- We also reference an external chimney flashing resource that explains common flashing failures and repair techniques; this is useful because chimney-to-roof intersections are frequent leak points and often require specialized flashing work. For our related services and local repair options, see our page on chimney flashing repair — it explains why proper flashing matters and when to call a professional.
Conclusion and next steps
Short summary bullets of core takeaways
- Roof flashing directs water away from joints and roof penetrations to prevent leaks.
- Common flashing materials include galvanized steel, aluminum, and lead; each has trade-offs in cost and longevity.
- Poor or damaged flashing is a leading cause of roof leaks and often shows near chimneys, vents, and roof valleys.
- Regular inspection and timely repair extend roof life and avoid more costly water damage.
What to expect with a free inspection
- Book: Contact us to schedule a convenient time.
- Inspection: A trained technician will check flashing at chimneys, vents, valleys, step flashing, and other potential leak sources.
- Written condition report & itemized estimate: You’ll receive a clear, written condition report plus an itemized estimate if repairs or replacement are recommended.
Closing sentence with neutral free-inspection CTA
Request a free roof inspection to check flashing and possible leak sources — learn your options and available financing or the company’s quality guarantee by visiting our contact page.
Frequently Asked Questions
Q: How much does roof flashing cost?
A: A typical roof flashing repair or replacement usually ranges from a few hundred to about $1,500, depending on the flashing type, roof access, and how much work is required.
Most jobs fall between those ranges per chimney or vulnerable detail, while long runs or premium metals (like copper) raise the price; for local repair estimates and examples see our Roof Repair page.
Q: Can flashing be sealed with caulk?
A: Sometimes—but caulk is only a short-term fix and not a reliable permanent solution.
Caulking can stop small leaks temporarily, but flashing that’s bent, corroded, or improperly installed usually needs replacement or professional re-flashing; for when to choose repair vs. replace, see our Roof Repair page.
Q: How often should roof flashing be replaced?
A: Most flashing lasts 15–30 years, but replacement timing depends on material, wear, and storm damage.
Aluminum and galvanized flashing can degrade faster in harsh conditions, while copper lasts longer; inspect flashing after storms and during regular roof checkups to catch failures early.
Q: How do I know if flashing is causing a roof leak?
A: If water stains or active drips appear near chimneys, vents, valleys, or where the roof meets a wall, flashing problems are a likely cause.
Look for rust, gaps, cracked sealant, or missing counter-flashing; a free inspection from a local roofer can confirm the source and recommended fix.
Q: Is flashing always replaced when a roof is replaced?
A: Not always, but flashing is typically inspected and any damaged or improperly installed flashing is replaced during a full roof replacement.
A full-system replacement usually includes new step and drip flashing where needed to meet manufacturer and code requirements; for full replacements and what’s included see our Roof Replacement page.
Frequently Asked Questions About Roof Flashing
How much does roof flashing repair or replacement typically cost?
Small spot repairs or local resealing commonly run about $100 to $400, a single pipe boot $150 to $500, and chimney flashing repair or partial replacement $400 to $1,200 depending on masonry and counterflashing work. Full flashing replacement as part of a roof job can add $800 to several thousand dollars depending on roof size, material, and whether gutters or siding need work, and Houston and other coastal markets run higher because of labor demand and corrosion-resistant materials. Always get an itemized estimate listing labor, materials by type, and any teardown or masonry work.
Can flashing be sealed with caulk instead of being replaced?
Caulk or roofing-grade sealant is a legitimate short-term fix for small gaps or to stop an active leak immediately, but it rarely solves the underlying problem when flashing is corroded, incorrectly installed, or separated from the roof system. Relying on caulk long term leads to repeat leaks and costlier repairs later. Use sealant only as a stopgap while you schedule a proper repair or replacement.
How often does roof flashing need to be replaced?
Aluminum and galvanized flashing often last 10 to 20 years, copper and stainless steel commonly last 30 years or more, and rubber or EPDM options last 10 to 20 depending on UV exposure. Coastal salt air, heavy sun, or repeated roof work shortens those lifespans. Rather than following a fixed schedule, inspect flashing annually and after storms and replace it when you see corrosion, split seams, widespread sealant failure, or repeated leaks.
How do I know if flashing is causing a leak in my home?
Leaks that cluster near roof penetrations and transitions such as chimneys, skylights, vents, and roof-to-wall junctions point to flashing. Outside, look for rust, bubbling or missing sealant, pulled or loose step flashing, and water stains on siding or masonry; inside, check attic insulation for wet spots, dark staining along rafters, or active drips after rain. A drip that lines up with a penetration, or one that appears only during wind-driven rain, is a strong flashing signal, and a trained inspection can trace the water path to confirm.
Will flashing be replaced when I get a new roof?
Many reroof projects include replacement of common flashings such as step flashing along walls, pipe boots, and drip edge because installers remove old shingles and underlayment and must reinstall or upgrade flashing to meet current details. Some items, like chimney counterflashing set into masonry, may require separate scope or masonry work and could be billed separately. During a reroof, insist on an itemized scope so you know which flashings are being replaced, which will be reused, and any recommended upgrades; that clarity makes the inspection and estimate you receive more useful when deciding next steps.
Request a Free Roof Inspection
Request a free roof inspection to check flashing and possible leak sources. You will receive a written condition report and an itemized estimate that explains recommended repairs and costs. For a clear plan and transparent pricing, schedule an inspection at Roof repair services and process.

Shawn Swearingen
Shawn Swearingen leads Blue Rhino Roofing, a BBB A+ accredited, Texas-licensed roofing company based in Katy. He's on the roof and on the phone, and known for telling homeowners the straight truth about whether they need a repair or a replacement.