
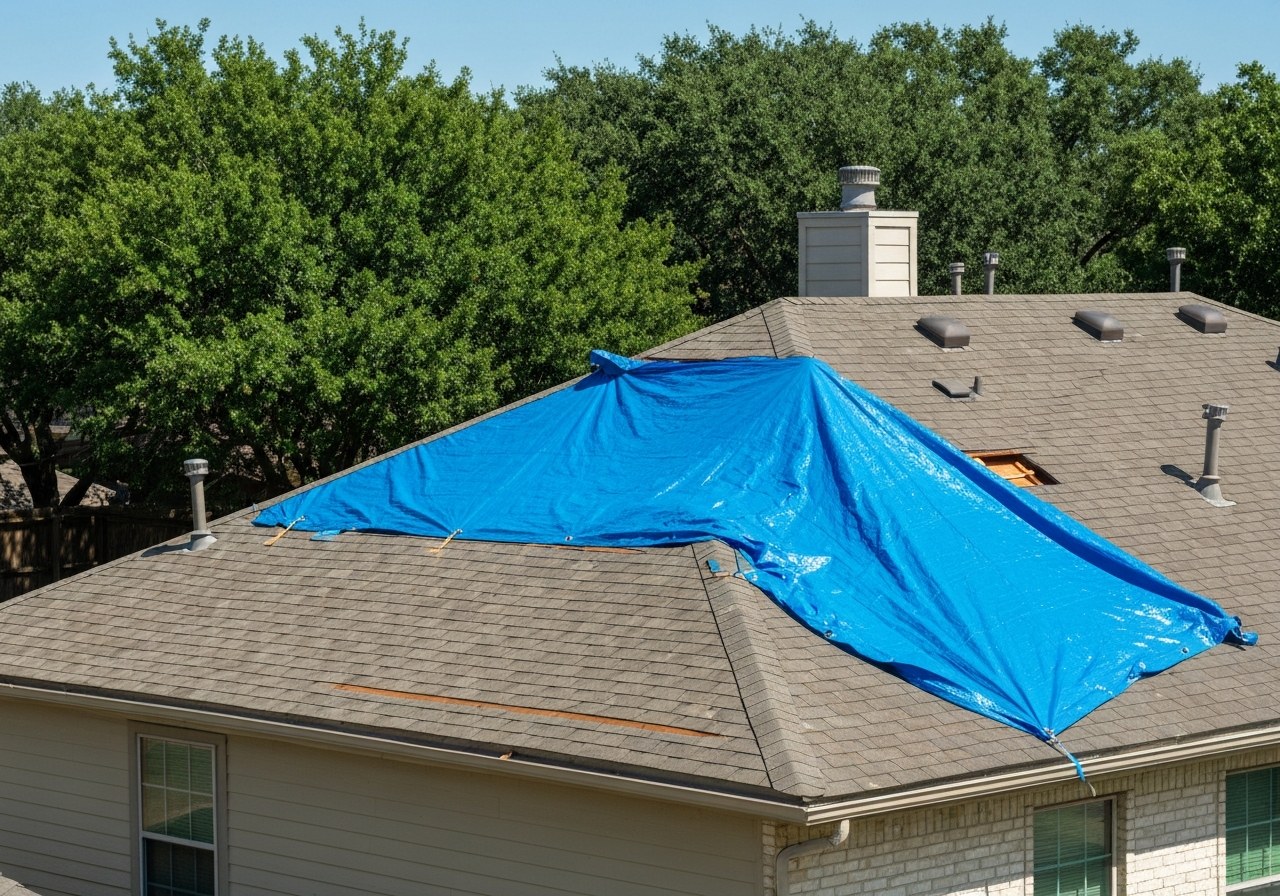
Severe wind, hail, or falling trees can leave a roof open to rapid water intrusion that damages structure, finishes, and personal property. When that happens you must act to protect people and possessions while preserving evidence for insurance.
If water can enter a home uncontrolled, property loss expands quickly and repair costs increase. Timely, documented temporary protection limits interior damage, improves insurer reimbursements, and preserves options for repair or replacement.
This guide walks you through prioritized immediate safety steps, how to document damage for claims, what emergency tarping is and when it is appropriate, insurance and cost considerations, installation and safety guidance, a step-by-placement tarping procedure, tarp selection and tools, interior water protection, filing a claim and adjuster expectations, when to call a professional, DIY alternatives and common mistakes, seasonal preparedness for hurricane and hail threats, and how tarping fits into long‑term roof care.
Begin with the safety-first actions to protect people and pets and to stabilize the property before any temporary roof work.
Emergency Roof Tarp: quick overview and what this guide covers
What is an emergency roof tarp?
An emergency roof tarp is a heavy-duty waterproof cover temporarily installed over damaged roofing to protect your home from water and wind until permanent repairs can be made. Use it to keep interiors dry, prevent further structural damage, and buy time to arrange professional repairs.
Who this guide is for
This guide is for homeowners and property managers in the Houston area who need fast, practical steps to secure a storm-damaged roof and make informed decisions about temporary tarping and permanent repair.
What you'll find in this guide
- When and why to use a tarp
- Choosing the right tarp and materials
- Quick DIY tarp installation steps
- When to call a professional roofer
- Cost considerations and insurance tips
- Common tarp mistakes to avoid
Read on for the safety-first steps immediately after roof storm damage.
Safety-first steps immediately after roof storm damage
Immediate safety checklist
- Call 911 if anyone is injured or there is an immediate life-safety hazard (downed power lines, heavy structural collapse, gas smell).
- Shut off utilities only if it’s safe to do so — main breaker and gas valve if you suspect electrical arcing or a gas leak. If you smell gas or see sparking, leave the property and wait for emergency responders.
- Secure people and pets — move family members and animals to a safe, dry area away from damaged walls, windows, and trees.
- Do not climb on the roof — avoid stepping on the roof until a professional confirms it’s structurally stable. Wet, wind-damaged roofs can collapse or cause serious falls.
- Keep clear of downed power lines and assume all lines are live. Report them to your utility company and emergency services.
- Make temporary protections from the ground only — use tarps or weights installed by professionals. If you must cover an area temporarily, do not attempt roof work yourself; call a contractor that offers emergency services (like Blue Rhino Roofing).
- Limit entry to the property — prevent untrained helpers from entering unstable areas; post a visible sign or tell neighbors if necessary.
What you can safely inspect from the ground
Before calling professionals, you can do a quick, safe ground-level survey. Keep your distance and use binoculars or a phone camera to zoom in.
- Missing or lifted shingles (look for large exposed areas or shingles on the ground)
- Large debris on the roof (tree limbs, loose flashing, satellite dishes)
- Sagging rooflines or decks visible from the yard or street
- Visible tree strikes or branches impaled in the roof structure
- Pooled water on flat roofs that may indicate drainage damage
- Fallen gutters or downspouts hanging or detached
How to clear small debris safely
Only remove debris that you can safely reach from the ground. Never climb on the roof or stand on ladders in high winds or wet conditions.
- Wear PPE — heavy gloves, sturdy shoes, eye protection, and a hard hat if debris may fall.
- Pick up loose shingles and small branches from the yard and place them in a bin or away from the house to prevent trip hazards.
- Use a broom or roof rake from the ground to push small, loose debris off low roof edges—do not lean over or climb.
- Avoid moving large branches or objects yourself; they may be heavier than they look and could have hidden wiring or nails.
- Bag debris promptly and keep it accessible for your contractor or insurance adjuster to inspect later.
- Never attempt to lift or dislodge items caught in gutters or downspouts while standing on a ladder—call a pro for higher-elevation work.
When to call emergency services or a professional crew
If you see structural collapse, fire, active leaks soaking the interior, downed power lines touching the house, or a strong gas odor — call 911 immediately. For all roof damage that affects structural integrity, extensive debris, or anything above ground-reach, call a licensed roofing contractor with emergency response capabilities. Blue Rhino Roofing offers emergency roof tarp and repair services in the Katy/Houston area and can secure the roof until permanent repairs are scheduled.
Prepare to document damage for insurance: take clear photos and video from the ground before any repairs or tarp work, and keep receipts and notes of any emergency measures taken.
Documenting roof damage for insurance: photos, video, timestamps
Why documentation matters
Good documentation speeds insurance claims, proves pre- and post-damage condition, and helps contractors give accurate repair estimates. Clear photos, timestamps, and organized files make your claim smoother and reduce disputes.
Photo and video checklist
When documenting damage, capture both wide context shots and close-up detail shots. Numbered checklist (follow this order when safe):
- Exterior — whole-roof wide shots from multiple angles (front, back, both sides).
- Exterior detail close-ups — missing shingles, lifted flashing, dents, punctures, broken vents.
- Roof-to-ground context — show property address, nearby landmarks, or house number for location confirmation.
- Interior — water stains on ceilings, bubbling paint, drips, and any active leaks.
- Attic — insulation damage, water entry points, wet insulation, and dripping locations.
- Belongings and structure — damaged furniture, electronics, walls, floors, and personal items.
- Before/after tarping or temporary repairs — take photos before any tarping (if it’s safe), then immediately after the tarp is installed.
- Video walkthroughs — record a short video (30–60 sec) narrating what you see and where it is; pan slowly to capture context.
- Environment/damage causes — fallen trees/branches, hail size next to a ruler, nearby structure damage.
- Date/location proof — include at least one photo showing a readable address number, mailbox, or GPS-enabled image.
Filename convention examples (use a consistent pattern so files sort chronologically and are easy to reference):
- YYYYMMDD_Address_Exterior_Wide.jpg — e.g., 20260724123MainStExterior_Wide.jpg
- YYYYMMDD_Address_Ridge_CloseUp.jpg — e.g., 20260724123MainStRidge_CloseUp.jpg
- YYYYMMDD_Address_Attic_WetInsulation.jpg — e.g., 20260724123MainStAttic_WetInsulation.jpg
- YYYYMMDD_Address_Interior_Leak.jpg — e.g., 20260724123MainStInterior_Leak.jpg
(Short pattern: YYYYMMDD_location_shot — include room/feature and “before” or “after” when appropriate, e.g., 20260724123MainStRoof_BeforeTarp.jpg)
How to timestamp and organize media
Step-by-step actions to make your evidence claim-ready:
- Enable phone timestamps and GPS — turn on location services and automatic date/time in your camera app so images include metadata.
- Take photos in logical order — exterior wide → exterior close-ups → interior → attic → belongings → before/after tarping.
- Rename files quickly using the filename pattern (YYYYMMDDlocationshot). Do this immediately while details are fresh.
- Add brief notes to each photo (phone photo apps or notes app) describing damage and exact location (e.g., “south slope, 3rd shingle row from ridge”).
- Back up immediately to the cloud — upload to Google Photos, iCloud, Dropbox, or OneDrive and confirm upload. Keep originals; avoid heavy edits that remove metadata.
- Create a single claim folder named with the date and address (e.g., 20260724123MainStClaim) and subfolders: Exterior, Interior, Attic, Receipts.
- Share a read-only link with your insurer and contractor rather than attaching dozens of files to emails. Keep a local copy on your phone and a second cloud copy for redundancy.
Documenting temporary repairs and contractor actions
Record every temporary repair and contractor activity to support claims and future invoices. Keep a short paragraph summary and these items:
- Before-and-after photos of the repair or tarp (use the filename convention and include timestamps).
- Receipts and invoices for tarping materials, supplies, and labor.
- Contractor name, company, phone number, license number, and date/time of on-site work.
- A short video or voice note of the contractor describing the work performed and materials used.
- Notes about warranty or guarantees offered for the temporary repair.
Note: Take photos before tarping whenever it’s safe to do so. Next, review safety-first steps and how to get a temporary emergency roof tarp installed.
What emergency tarping is and when it’s appropriate
Definition and goals
Emergency tarping is a temporary roof covering installed after storm or impact damage to stop water intrusion and protect the structure until permanent repairs can be completed.
The primary goals are to keep rain and debris out of the home, prevent further interior and structural damage, and buy time to arrange a professional inspection and permanent repair or replacement.
Common situations requiring tarping
- Missing or lifted shingles after high winds
- Large holes or penetrations in the roof deck (from falling debris or collapse)
- Exposed roof decking where shingles have been removed or blown off
- Fallen trees or large branches that have punctured the roofing surface
How quickly tarping should be done
ASAP — as soon as it is safe to do so. Tarping should be performed promptly to stop ongoing water intrusion, but only when conditions allow safe access for trained personnel. If professional roofers cannot reach the site immediately, protecting valuables inside and documenting damage for insurance is important until experts arrive.
Tarp lifespan overview
- Temporary solution only. Tarps are a stopgap measure, not a permanent roof replacement.
- Duration varies by tarp quality and exposure. How long a tarp lasts depends on the material, installation quality, and weather (wind, UV, heavy rain). Any specific lifespan ranges are typical guidance and should be verified with the tarp manufacturer or your contractor.
- Inspect regularly. Tarps can tear, shift, or collect water; regular checks are necessary until permanent repairs are completed.
- Professional follow-up required. Plan for a professional inspection and a permanent repair or replacement as the next step.
Finally, keep in mind insurance reporting and potential costs when arranging emergency tarping — document damage and receipts, and contact your insurer promptly to confirm coverage and next steps before scheduling permanent work.
Next: Safety-first steps immediately after roof storm damage
Insurance and cost: will my policy pay for emergency tarping?
Are temporary mitigation costs reimbursable?
Often yes, because many insurers reimburse reasonable emergency mitigation costs such as temporary tarping when you can show the expense was necessary and documented. Reimbursement is still subject to your policy's deductible, limits, and claim terms, and the final decision rests with the insurer, so confirm coverage before assuming. The Texas Department of Insurance publishes guidance on emergency repairs and claim handling: https://www.tdi.texas.gov/
Should you photograph before tarping?
If it’s safe to do so, take photos and short videos of the damage before any work begins. Insurers commonly accept before-and-after documentation when deciding reimbursement. However, do not put yourself at risk to get images — prioritize safety and only photograph from a secure location.
Can a contractor tarp and bill insurance?
Yes — many homeowners hire a contractor to perform emergency tarping and then submit the contractor’s invoice to the insurer for reimbursement. Common practices include:
- The contractor provides a detailed invoice listing labor, materials (tarps, nails, sealants), date/time of service, and scope of work.
- The insurer may request proof of payment (receipts or a paid invoice) and before/after photos.
- Some contractors can communicate directly with your insurer or supply a written estimate to include with the claim.
Always confirm that the contractor is licensed and willing to provide the documentation your insurer requires, and verify with your insurer whether they prefer direct billing or reimbursement to you.
What to save and submit to the insurer
- Before photos and videos of the damage (if safe to capture)
- After photos and videos showing the tarp in place and any temporary repairs
- Receipts and paid invoices for materials and labor
- Contractor contact and license information (name, phone, license/registration number)
- A written invoice or estimate that itemizes costs and describes the mitigation work
- A dated log of calls/communications with the insurer and contractor (who you spoke with, date, and summary)
Next: Safety-first steps immediately after roof storm damage
Installation and safety: can you tarp a roof yourself and what to avoid
Can I do it myself?
Only attempt roof work if you have roofing experience, proper personal protective equipment (PPE), and a reliable fall-protection plan. Roof work carries a high risk of serious injury or death from falls. If you are unsure about any step, call a professional like Blue Rhino Roofing.
- If you are a homeowner with limited roofing experience: do not climb on a steep or wet roof.
- If you lack PPE (harness, anchor, non-slip footwear) or a helper to belay/spot you: do not attempt it.
- If the damage is extensive (large structural failure, missing sheathing, large open edges): hire a pro.
For official fall-protection requirements and guidance, consult OSHA: https://www.osha.gov/fall-protection
Do not work on the roof alone; use fall protection.
Should I wait for safe weather?
Yes, wait for dry, calm conditions whenever possible, because wind, rain, ice, or extreme heat increases slip and fall risk and reduces tarp effectiveness. If the roof is actively leaking and water is entering the home, call a professional. Temporary interior protection such as buckets or tarping the ceiling from inside may be safer until conditions improve.
Risks of tarping a wet or unstable roof
- Slips and falls from wet surfaces.
- Hidden structural collapse where sheathing or decking is water-damaged.
- Tarp uplift from wind creating hazards for workers and neighbors.
- Incorrectly secured tarps causing more water intrusion under shingles.
- Electrical hazards if lines were damaged in the storm.
Should you nail a tarp to the roof?
Nailing a tarp offers a quick, temporary hold but has trade-offs.
- Pros:
- Can secure a tarp in high-wind scenarios when done correctly.
- Fast method for emergency stabilization.
- Cons:
- Nails create new penetration points that can allow water entry and lead to further damage.
- Driving nails into compromised decking risks worsening structural failure.
- If not done properly, nails can loosen and the tarp can fail.
Safer alternatives to nailing:
- Use straps, ratchet tie-downs, or sandbags over the tarp edges.
- The 2x4 “sandwich” method: lay a 2x4 over the tarp edge and screw through the board into solid decking—not into wet, soft, or delaminated wood—spreading load and reducing direct tarp puncture.
- Professional-grade tarps and fastening systems installed by a contractor reduce risk and protect roof integrity.
What to inspect from the ground before attempting tarping
- Visible roof slope and pitch (steep roofs increase fall risk).
- Missing roof sections or sagging areas (signs of structural failure).
- Loose or hanging shingles and large debris.
- Active roof leaks inside the house (water stains, bulging ceilings).
- Weather conditions (wind, rain, lightning).
- Nearby power lines or other overhead hazards.
- Safe access points (stable ladder placement and anchoring).
Checklist:
- Confirm weather is calm and dry.
- Confirm you have a spotter and fall protection.
- Confirm decking looks intact from ground or binoculars; if not, hire a pro.
- Have the right tools and materials ready (tarp, straps, 2x4s, ladder stabilizer).
Move into exact step-by-placement instructions for tarping.
Step-by-placement instructions: how to tarp a roof correctly (safe methods)
Tools and materials checklist
- Tarp(s) (heavy-duty, UV-stabilized polyethylene)
- 2x4s (pressure-treated or dry lumber, 8–12 ft lengths)
- Roofing nails or deck screws (use only when necessary; see caveat)
- Ratchet straps or cam straps
- Rope (polypropylene or braided)
- Sandbags / roof weights
- Ladder with stabilizer
- Work gloves, safety harness, and non-slip shoes
- Broom or leaf blower (for debris)
- Tape measure, chalk line, utility knife
- Caulk / roof sealant (for temporary patching around penetrations)
Preparing the roof surface
- Clear the area below the roof. Remove furniture, vehicles, and anything that could be damaged by falling debris.
- Remove loose debris from the roof (light debris only): broom or blower from a safe position on ladder; avoid walking on fragile areas.
- Check for live hazards (downed electrical lines nearby) — if present, call professionals immediately.
- Plan tarp size and access before bringing tools onto the roof.
Extending tarp over the peak and how far to extend (recommended)
- Position tarp so it covers the damaged area and extends over the ridge to the opposite slope.
- Recommendation: extend tarp about 2–3 ft past the ridge on the far side when possible. (This is guidance — actual extension depends on roof pitch and eaves.)
- Center tarp over ridge so weight is even and hips/valleys can be handled separately.
- Secure the high point first (see 2x4 sandwich method) then tension the sides.
Tucking under undamaged shingles and ridge-overhang technique
- Work from the low side up toward the ridge when possible.
- Steps:
- Gently lift the edge of undamaged shingles with a flat bar; avoid prying or tearing.
- Slide tarp edge under the lifted shingle tabs about 6–12 inches where possible — this reduces wind uplift.
- At the ridge, allow tarp to drape over and extend per the recommendation above.
- If shingles are brittle or heavily damaged, do not force tuck — use weights or 2x4s instead.
- Rationale: tucking reduces wind catch and improves temporary water shedding without additional decking penetrations.
Anchoring using 2x4 sandwich method
Important: avoid penetrating the roof decking if possible. Use screws only into the 2x4, not through the deck, unless no alternative and you understand the long-term repair implications.
- Lay the tarp across the roof and align per previous steps.
- Place a 2x4 along the tarp edge where you want a secure hold (horizontal across shingles, parallel to ridge).
- Fold tarp over the 2x4 so the tarp is sandwiched between two 2x4s (top and bottom).
- Position the sandwich so the 2x4s sit flat and span multiple rafters if possible.
- Fasten the two 2x4s together with deck screws through the top 2x4 into the bottom 2x4 (screws should not penetrate the roof decking):
- Use long enough screws to bite both 2x4s securely.
- If you must attach to the roof structure, screw into the 2x4s only. If contacting decking cannot be avoided, use the minimum number of screws and seal penetrations with roof sealant; treat this as temporary and plan a professional repair.
- Repeat along all high-stress edges (ridge line, eaves, hips).
- Add straps or ropes to the 2x4s and secure to anchor points or heavy weights on the ground to reduce uplift.
Sub-bullets for placement and fastening:
- Place 2x4 sandwiches at intervals no more than 3–4 ft along long edges.
- For ridge placement, align 2x4s perpendicular to the ridge so they bridge both slopes.
- When possible, orient 2x4s to land across rafters/trusses to distribute load.
- Flag: If instructions tell you to drive nails through the deck as a first option, do not — prioritize screws into 2x4s or non-penetrating weights.
Securing perimeter edges and alternatives to nails
- Use ratchet straps or cam straps wrapped over 2x4s and anchored to ground anchors or heavy objects.
- Screws into 2x4s (not decking) are preferred over roofing nails for holding the 2x4 sandwich.
- Sandbags or roof weights along eaves and hips for short-term hold.
- Rope tied to gutter hangers or ground anchors — only if gutters are undamaged and rated for load.
- Avoid roofing nails driven through the tarp into decking unless you accept additional deck penetrations and plan immediate permanent repairs.
How to tarp a roof valley
- Center tarp so the valley is under a seam of tarp material (or place a separate narrower tarp over the valley).
- Fold tarp neatly into the valley so water flows off both sides.
- Anchor the tarp at the ridge and along valley edges with 2x4 sandwiches placed parallel to the valley.
- Add sandbags or weights in valley low points to keep material seated and prevent ponding.
- Ensure excess water can run off — do not create a low spot where water pools.
Sandbags, weights, and nail-free options
- Sandbags: good for eaves and low-slope roofs; distribute weight evenly.
- Roof weights (commercial): designed to weigh down tarps without penetration.
- Straps/ratchets to ground anchors: effective for steep roofs where anchor points are accessible.
- Combination approach: 2x4 sandwiches + weights + straps gives best temporary hold without decking penetrations.
What size tarp for common roof shapes
| Roof type / area | Typical recommended tarp sizes (approx.) |
|---|---|
| Small shed / single dormer | 6' x 8' or 8' x 10' |
| Single-car garage roof | 12' x 12' or 12' x 16' |
| Small single-family gable (one slope damaged) | 12' x 20' or 18' x 20' |
| Average single-family (partial roof coverage) | 18' x 20' or 20' x 30' |
| Large single-family / full roof (steep pitch) | 30' x 40' or multiple overlapping tarps |
| Multi-level or complex roof | Multiple tarps sized to each section; measure beforehand |
Concise guidance:
- Measure the damaged length and width on the slope, then add at least 2–3 ft extra for ridge extension and overlap.
- Overlap multiple tarps by at least 2 ft and seal seams downhill with roofing tape or sealant.
Common DIY mistakes when tarping (and when to call a pro)
- Attempting repairs with no safety gear or working near downed power lines.
- Using undersized tarps or failing to extend past the ridge.
- Driving numerous nails through decking instead of using 2x4 sandwiches or weights.
- Tucking brittle or missing shingles and causing further damage.
- Failing to secure tarps on both slopes and leaving wind-exposed flaps.
- Creating roof-ponding by improper placement or inadequate slope for runoff.
- Ignoring signs that structural damage or large-scale lift exists — call a professional when:
- There are large areas of decking or structural damage.
- You see visible sagging, wet insulation, or interior leaks that continue.
- The roof is steeper than you can safely work or there are live electrical hazards.
Next: Safety-first steps immediately after roof storm damage
Tools, materials and choosing the right tarp
Polyethylene vs vinyl — quick comparison
- Polyethylene (poly): Lightweight, inexpensive, waterproof, good for short-term emergency tarping. Prone to tearing in high winds.
- Vinyl: Heavier, more durable, UV-resistant, better for longer-term protection and higher wind exposure.
- Choose poly for fast, temporary cover; choose vinyl if you expect the tarp to remain for days or the roof is exposed to wind/UV.
Recommended tarp weights and size guidance
- Tarp weights
- 4–6 oz/sq yd (lightweight poly) — quick emergency cover, short-term only.
- 8–10 oz/sq yd (medium duty) — most homeowner emergency tarping needs; balances durability and cost.
- 12–18 oz/sq yd (heavy duty / vinyl) — best for extended coverage and windy conditions.
- Common tarp sizes
- 6' x 8' — small patching, vent or chimney area.
- 8' x 10' — small single-dormer or localized damage.
- 10' x 12' — most common for single-bay damage.
- 12' x 20' — covers large sections or multiple valleys.
- 20' x 30'+ — for whole-roof temporary covers on larger homes.
- Guidance: For roof areas, always pick a tarp at least 2–3 feet larger than the damaged area in every direction to allow proper anchoring and overlap.
How to sandwich tarp around a 2x4 — numbered micro-steps
- Cut a 2x4 long enough to span the tarp edge plus 6–12" on each side (helps distribute clamping).
- Lay tarp flat over repair area with excess hanging over the eave.
- Fold tarp edge over itself 1–2" to create a clean lip (prevents ripping).
- Place the 2x4 on the folded tarp edge so the folded lip sits between wood and tarp.
- Fold the tarp back over the 2x4 so the wood is sandwiched inside the tarp fold.
- Secure the 2x4 to the roof with roofing nails or screws with large washers every 12–18" (use caution — only when decking is accessible and safe).
- Run a bead of roofing adhesive or sealant along the top edge of the 2x4 for extra waterproofing (optional but recommended).
- Add additional 2x4s spaced along the tarp edge for longer runs; always overlap the tarp edges and seal seams.
Best practices for steep-pitched vs low-slope roofs
- Steep-pitched roofs
- Use a safety harness tied to a secure anchor and a ladder stabilizer — both are essential.
- Handle heavier (vinyl) tarps with at least two people.
- Use 2x4 sandwich method and wider boards to prevent tear-through.
- Low-slope roofs
- You can secure tarps with heavier ballast (sandbags, weighted boards) in addition to fasteners.
- Vinyl tarps can be laid with fewer attachment points if wind exposure is low.
- Watch for standing water — ensure tarp allows proper drainage to avoid added weight.
Tools list — quick checklist
- Personal safety: Full-body harness, roof anchors, ladder stabilizer (essential for steep roofs)
- Ladders: extension ladder with stabilizer and roof ladder if available
- Tarps: selection of poly and vinyl in sizes above (see size list)
- Lumber: several 2x4s (long enough for edge runs)
- Fasteners: roofing nails/screws and large washers
- Sealants: roofing adhesive/caulk and roofing tape for seams
- Hardware: hammer, cordless drill, staple gun (weather-rated staples)
- Weighting: sandbags or heavy straps for low-slope roofs
- PPE: gloves, safety glasses, non-slip boots
- Camera or smartphone (for documentation)
Photograph your tarping work from multiple angles, then move on to interior water protection (bucketing, moving belongings, and calling for a professional inspection).
Preventing interior water damage after tarping
Quick interior protection checklist
- Move valuables — relocate electronics, important documents, heirlooms, and small furniture to a dry room or higher elevation (shelves, countertops).
- Cover furniture and belongings — drape plastic sheeting or waterproof tarps over sofas, mattresses, area rugs, and other large items. Secure edges with tape or clips so covers don't blow away.
- Place containers under active drips — use buckets, tubs, or trash cans and line them with a plastic bag for easy disposal. Label containers if multiple leaks exist.
- Protect floors — lay down towels, mop heads, or absorbent pads where water is spreading; use waterproof runners for high-traffic paths.
- Move electrical items and shut off circuits if needed — unplug lamps and appliances near leaks; if water reaches outlets or fixtures, shut off power to that circuit at the breaker and call an electrician.
- Create a safe walk path — remove tripping hazards and place non-slip mats where floors are wet.
How to inspect attic and ceiling safely
- Precautions before entry
- Only enter the attic if it is safe: ensure no active storms, the roof is stable, and there are no visible electrical hazards.
- Wear personal protective equipment: hard hat or bump cap, safety glasses, dust mask, gloves, and sturdy shoes.
- Use a strong flashlight and have a second person aware of your location. Avoid stepping between joists — walk only on the attic’s framed supports or on secure boards.
- If you smell gas, see significant sagging, or suspect structural damage, do not enter; call professionals.
- Step-by-step attic/ceiling inspection
- Locate the source area by following wet insulation, roof sheathing stains, or daylight shining through holes.
- Probe insulation with a dry stick to find active wet spots without touching contaminated material directly.
- Inspect rafters and roof sheathing for soft spots, heavy water accumulation, or mold growth.
- Check attic vents and HVAC equipment for water intrusion or damage.
- From below, look for bulging or sagging ceilings and bubbling paint — these indicate collected water above.
- Photograph all findings and mark the primary leak areas for repair crews.
Temporary interior protections
- Plastic sheeting and tarps
- Drape thick (6-mil or heavier) plastic sheeting over furniture and flooring; tape edges to baseboards or weigh them down to prevent movement.
- Use contractor-grade tarps for larger coverage and secure with weights rather than nails or staples.
- Bracing a sagging ceiling
- If a ceiling is bulging from collected water, do not stand directly underneath. Catch water with buckets and, if safe, puncture a small drainage hole in the lowest point to release pressure in a controlled way (wear eye protection and stand to the side).
- For large sags, brace temporarily with a 2x4 placed vertically between the floor below and the ceiling joist above using protective pads. This is a stopgap — only attempt if you’re confident in basic carpentry and stability; otherwise call a pro immediately.
- Short-term drying
- Place fans and dehumidifiers to promote airflow once the leak source is controlled. Keep electrical devices away from standing water and follow safety guidance for plugged equipment in damp areas.
Monitoring leaks and documenting interior drying
- Check frequency
- Check regularly during heavy rain and after storms. Increase checks if you notice worsening wet spots or new drips.
- For active leaks, inspect at least once per day and after each weather event until repairs are complete.
- What to record
- Take time-stamped photos and short videos of leaks, wet materials, and temporary protections from multiple angles.
- Note locations, estimated leak start times, bucket/tarp placements, and any changes in condition.
- Keep a written log of checks and actions taken — this helps contractors and supports insurance claims.
- Drying progress
- Track moisture reduction in affected areas (visual changes, smell, and texture). If you have a moisture meter, record readings over time.
- If mold appears or materials stay damp beyond 48–72 hours after the leak stops, escalate to professional drying services.
When to call a water-restoration or structural pro
If leaks are large, ceiling sagging is significant, electrical systems are involved, or you observe structural softening, call a licensed water-restoration or structural contractor right away. Professionals can perform controlled water extraction, safe ceiling stabilization, mold prevention, and coordinate permanent roof repairs.
Starting the insurance claim and inspection process
Stepwise claim filing — numbered steps from reporting claim to receiving adjuster visit
- Report the claim to your insurer immediately. Call your carrier’s claim line or file online and note the claim number, agent name, date, and time.
- Document the damage. Take clear photos and video of all roof damage, interior leaks, and any temporary measures (tarps, buckets). Time-stamp or keep originals.
- Contact a contractor for an emergency roof tarp estimate. Ask for a written tarping estimate or invoice that details materials, date/time performed, and scope. This helps with the claim.
- Submit your documentation to the insurer. Upload photos, the tarping estimate, and any receipts to your claim portal or email them to your adjuster.
- Schedule the insurer’s adjuster visit. Insurers usually arrange an inspection within a few days; confirm the date and be present (or have your contractor present) to point out damage.
- Receive the adjuster’s report and estimate. Review carefully; if something’s missing, request reinspection or provide additional documentation.
- Approve temporary work or move to repairs. Once the claim scope is agreed upon, schedule repairs or a full replacement with your contractor. Keep all invoices and change orders.
Note: For Texas storm claim guidance, see the Texas Department of Insurance: https://www.tdi.texas.gov/
What the adjuster will inspect
- Roof covering (shingles, tiles, metal panels) for missing, cracked, or lifted materials
- Flashing and penetrations (chimneys, vents, skylights) for damage or gaps
- Roof deck and sheathing for signs of structural compromise or rot (may require a probe)
- Attic for evidence of leaks, water stains, wet insulation, and interior ventilation issues
- Gutters and downspouts for impact damage or blockages that contributed to issues
- Interior ceilings and walls for water stains, blistering paint, or drywall damage
- Photographic evidence and measurements — adjusters will photograph, measure roof slope and square footage, and note loss severity
- Temporary repairs documentation — they will verify tarping or other emergency measures and the associated invoices
Coordinating contractor tarping and insurer
If immediate tarping is needed to protect your home, get a written tarping estimate/invoice from your contractor that includes: scope of work, materials used, date/time of service, and a signature or contract authorization. Submit that paperwork to your insurer right away. Most insurers accept documented emergency tarping and it generally does not prevent the insurer from inspecting — but you must document why the tarp was needed and who performed it.
Recommended timelines and paperwork:
- File the claim and notify your insurer within 24–72 hours when possible.
- Keep copies of the tarping invoice, photos before/after, and a signed authorization to perform emergency work.
- Provide receipts for materials and labor to the adjuster at or before inspection.
- If possible, have your contractor coordinate a joint walk-through with the adjuster to point out concealed or complex damage.
How tarping may affect replacement timeline or warranty
- Temporary tarps are considered emergency, cosmetic, or protective measures and do not constitute permanent repair.
- Insurers typically pay for temporary tarping as part of the claim and still proceed with the full inspection and replacement estimate.
- Permanent replacement timelines may be delayed if additional structural damage is discovered after tarping; expect adjustments to the schedule.
- Keep documentation of temporary work — failure to document emergency repairs can complicate warranty or claim reimbursements.
- Reputable contractors will provide a written note distinguishing temporary tarping from permanent repair to avoid warranty or scope confusion.
Local permitting and contractor licensing notes for Texas/Houston
- Permits: Check local city/county requirements — some roof replacements in the Houston area require a permit, while minor repairs often do not. Contact your city’s permitting office (e.g., City of Houston) for specifics.
- Contractor licensing: Texas does not have a single statewide roofing license; verify your contractor’s local registrations, proof of insurance (general liability and workers’ comp), and written contract.
- Ask for references and a written scope of work that includes cleanup, permit handling (if applicable), and warranty information.
When you’re ready, call a professional to schedule a free inspection so you can move from temporary protection to a long-term repair or replacement plan.
When to call a professional: assessing severity and next steps
DIY vs Professional — quick comparison
- Safety: DIY = higher risk (ladders, slippery surfaces, live electrical lines). Professional = trained crews with fall protection and safety equipment.
- Durability: DIY tarps often provide short-term coverage. Professional tarping uses heavier, weather-rated materials and proper attachment for longer, watertight protection.
- Insurance handling: DIY = you’re responsible for documenting damage and communicating with your insurer. Professional = many contractors will document, provide insurance-friendly estimates, and coordinate with adjusters.
- Cost: DIY is cheaper upfront (materials/labor you supply) but can lead to greater damage and repair costs later. Professional tarping costs more initially but reduces secondary damage risk and may speed insurance claims.
When you need emergency tarping by a pro
Call a professional for immediate tarping if any of these red flags apply:
- Steep or high roof where ladder access is unsafe for nonprofessionals.
- Structural damage (sagging roofline, compromised rafters, collapse risk).
- Large openings in the roof (holes larger than a few square feet) or missing large roof sections.
- Exposed attic or interior rooms with visible daylight, falling debris, or active water intrusion.
- Compromised roof access (loose decking, missing shingles in large areas) that prevents a secure DIY fix.
- Nearby downed power lines or other hazards that make the site unsafe.
- Severe ongoing weather (high winds, heavy rain, hail) where the tarp must be installed quickly and securely.
Questions to ask a roofer — use this numbered checklist
- Are you licensed to work in my city/state? (Ask for license number.)
- Can you provide proof of current general liability and workers’ compensation insurance? (Request certificates.)
- Do you offer emergency tarping services now, and when can your crew arrive?
- What materials will you use for the tarp and fastening? (Ask brand/type and warranty.)
- Will you provide a written scope of work and an itemized estimate?
- Do you document damage with photos and a written report for my insurance claim?
- Will you coordinate with my insurance adjuster if needed?
- Who will be my point of contact during the project? (Get direct phone/email.)
- What is the expected timeline from tarping to permanent repair?
- Do you require a deposit, and what forms of payment do you accept?
- Do you provide a lien waiver or proof of materials/work paid once completed?
- Can you provide local references or recent emergency tarping jobs?
How quickly should it be completed
Aim to have emergency tarping done within 24–48 hours of discovering significant storm damage. Faster response reduces interior water damage, mold risk, and further structural deterioration. If your property is actively leaking or the attic is exposed, prioritize the earliest available professional appointment—even if that means a weekend or after-hours dispatch.
What to get from the contractor for insurance and records
Collect these documents from the contractor before, during, or after work:
- Written estimate and detailed scope of work (itemized).
- Proof of licensing (license number and issuing authority).
- Certificates of insurance (general liability and workers’ comp).
- Written tarp/material specifications (type/thickness, fastening method).
- Before-and-after photos and a damage report suitable for your insurer.
- Projected timeline and completion date in writing.
- Contractor contact information (office address, phone, email, crew lead).
- Payment terms and receipts (keep copies of all invoices).
- Signed lien waiver upon final payment, if requested.
- Any workmanship or material warranties in writing.
- Permit confirmation if the job requires local permits.
Final note — seasonal preparedness
After you secure emergency coverage, use this experience to prepare for the next storm: review your roof maintenance schedule, confirm contractor contact info, and update insurance documentation ahead of hurricane and hail season.
DIY techniques, alternatives and common mistakes
Nail-free options and sandbag use
- Tarps with straps or rope: Use a heavy-duty tarp with built-in grommets and secure it using ratchet straps or rope tied to ground anchors or sturdy roof features (never tie to chimneys or vents).
- Sandbags or weighted bags: Place sandbags along tarp edges and seams to hold it down without penetrating the roof. Distribute weight evenly and avoid concentrated loads that could damage shingles.
- Roof-safe adhesive tapes: Use manufacturer-recommended roof tapes sparingly and only on small localized lifts; test a small area first to avoid shingle damage.
- Temporary ridge hooks or non-penetrating clamps: For short-term fixes, consider purpose-made ridge or edge clamps that grip without screws. Ensure they are rated for roofing use.
Step summary for sandwiching tarp with 2x4s without penetrating decking
- Measure and lay the tarp: Unfold the tarp so it fully covers the damaged area with at least 18–24 inches overlap on all sides. Smooth out wrinkles.
- Cut 2x4s to length: Use 2x4s slightly longer than the tarp overlap so each board sits fully on undamaged roofing surface.
- Create the sandwich: Fold tarp edge over each 2x4 so the tarp is sandwiched between two 2x4s (top and bottom), with the tarp wrapped around the boards.
- Position boards on roof: Place the sandwiched 2x4s directly over the roof edge or seam you’re protecting, keeping boards flat and aligned with roof slope.
- Weight the 2x4s: Add sandbags or weighted objects on top of the 2x4s—space them every 12–18 inches—to hold the sandwich in place.
- Tie or strap if possible: Run straps or rope around the weighted 2x4s and secure to a stable, non-roof anchor (ground anchor, heavy object inside attic, etc.) without penetrating roofing materials.
- Check and adjust: From ground level, check for wind gaps and re-tighten weights/straps. Re-inspect after high winds or heavy rain.
Common mistakes and consequences
- Driving nails or screws through the tarp into decking
- Consequence: Creates new penetrations that let water in, increasing leak risk and potentially voiding roofing warranties. Can complicate repairs and increase long-term costs.
- Using too few weights or uneven weight distribution
- Consequence: Tarp slips or flaps in wind, causing further shingle damage and exposing the roof to more water — raises safety hazards for people below and may worsen interior damage.
- Tying tarp to fragile features (chimney, vent, gutters)
- Consequence: Pulling or movement can crack chimneys, pull off gutters, or dislodge vents — higher repair bills and safety risks from falling debris.
- Covering large areas without support or seams overlapped correctly
- Consequence: Water tunnels under poorly overlapped seams, pooling and saturating decking — leads to structural rot and interior water damage.
- Using lightweight or torn tarps
- Consequence: Rips in storms cause sudden failures; exposes home to immediate weather damage and increases claim severity.
- Improper ladder or roof access techniques while installing tarp
- Consequence: Falls and injuries; emergency responders may be needed. Personal safety must be prioritized over hurried fixes.
- Leaving a tarp on for months without inspection
- Consequence: Hidden deterioration beneath the tarp (mold, rot) and missed signs that a permanent repair is needed — can affect resale and insurance outcomes.
How improper tarping can affect insurance claims
Improper tarping can weaken your insurance claim. Insurers expect reasonable, temporary measures to prevent further damage; however, actions that create new roof penetrations, cause additional damage, or look like negligent repairs can be used to deny or reduce payouts. Document everything: take time-stamped photos before and after temporary tarping, keep receipts for materials, and avoid permanent alterations. When in doubt, call your insurer or a professional to confirm acceptable temporary measures.
Prepare now: with hurricane and hail season approaching, review your emergency roof tarp plan and know the safety-first steps immediately after roof storm damage.
Tying emergency tarping to hurricane and hail season preparedness
Pre-storm checklist for roof readiness
- Trim trees and large branches near the house to reduce falling limbs.
- Inspect and clean gutters and downspouts so water can drain freely.
- Secure loose items in the yard (lawn furniture, grills, trampolines) that can become projectiles.
- Check attic and roof access — know where your attic hatch and roof entry points are for inspections.
- Verify roof flashings and vents are tight and not visibly separated from shingles.
- Remove loose or damaged shingles if safe to do so, or schedule a pro inspection.
- Locate and note your main water shutoff and electrical panel in case of post-storm damage.
- Store emergency tarping supplies in an accessible place: heavy-duty tarps, roofing nails or screws, a hammer or screwdriver, rope/strapping, and a ladder rated for the job.
- Have contractor and insurance contact info handy (store digital and paper copies).
Creating pre-storm photo baselines
- Photograph the whole roof from multiple angles on a clear day: front, back, both sides, and a close-up of the ridge and eaves.
- Capture wide shots of the whole property that show roof context (trees, neighboring structures).
- Take close-up photos of problem areas: cracked shingles, lifting flashings, vents, chimneys, and gutters.
- Use consistent filenames and metadata (datelocationview — e.g., 2026-06-01Katyfront.jpg) so files are easy to sort and reference.
- Include a short written note with each set: date, weather conditions, and who took the photos.
- Store copies in three places: local device, cloud backup (e.g., Google Drive, iCloud), and an email to yourself or an emergency contact.
- Make a quick video walkthrough (30–60 seconds) narrating any known issues — video can be extremely persuasive for claims.
- Update baselines annually or after any roof work or renovation.
How to plan for quick tarping and claims after storms
- Prioritize safety first — do not climb on a wet or severely damaged roof. Wait for professionals.
- Call your contractor for emergency tarping as soon as possible to limit further water intrusion.
- Document all storm damage immediately with photos and video before any repairs.
- Keep all receipts and records for emergency purchases and temporary repairs.
- Notify your insurance company promptly and provide your pre-storm baseline photos to speed claim processing.
- Avoid permanent repairs before claim approval unless approved by your insurer; temporary tarping is usually acceptable and expected.
- Ask your contractor for a written tarping scope and estimate to include with your claim.
Seasonal timing and response expectations for Houston/Katy
Hurricane and hail threats in the Houston–Katy area are seasonal but variable. Hurricane season runs broadly from early summer through fall, and severe thunderstorms with hail can occur in spring through late summer. That means it's wise to prepare ahead of the active season rather than waiting for a forecasted storm. When storms arrive, response windows for emergency tarping are often narrow — the sooner you document and call for help, the better you protect interior finishes and speed insurance resolution.
This preparedness work ties directly into how Blue Rhino Roofing responds after a storm — from rapid emergency tarping to documentation support for claims.
Next: Safety-first steps immediately after roof storm damage
How emergency tarping ties into residential roofing and home protection
Emergency tarping as part of roof lifecycle decisions
Emergency tarping is a temporary mitigation step—it stabilizes a damaged roof to prevent further water intrusion and interior damage while you evaluate long-term options. Tarping does not repair the underlying roofing system; it buys time to assess structural condition, document damage, and plan either repair or replacement.
How prompt tarping and documentation influence repair vs replacement decisions
- Reduces secondary damage: Quick tarping limits water entry, which can prevent rot, mold, and drywall or insulation replacement that might otherwise push a repair toward full replacement.
- Preserves evidence for assessment and claims: A properly installed tarp and dated photos help contractors and insurers judge the original damage rather than damage that occurred after the event.
- Buys time for a thorough inspection: Temporary protection lets you arrange a full roof inspection to determine whether localized repairs will suffice or whether age and widespread damage favor replacement.
- Improves cost-versus-value analysis: When tarping contains damage, repair estimates are often smaller and more targeted; uncontrolled leaks can reveal hidden deterioration that increases replacement likelihood.
- Safety and immediate habitability: Prompt tarping lowers short-term risk to occupants and possessions, which factors into prioritizing emergency stabilizing work over major renovation.
Long-term roof health and seasonal maintenance tie-ins
Emergency tarps should be followed by a full roof evaluation and a planned maintenance program—regular inspections, timely shingle replacement, and gutter upkeep reduce the chance that a future storm will require emergency mitigation. Consider seasonal checks (spring and fall) so small issues are fixed before they worsen during severe weather.
Ready to move from temporary protection to a clear plan? Arrange a free emergency roof inspection to document damage and define next steps.
Free emergency roof inspection — schedule a free inspection now
What the free emergency inspection includes
- Safety assessment of immediate hazards (loose debris, structural concerns, fall risks)
- Roof photos and documentation you can use for insurance claims
- Tarping estimate if temporary protection is needed to prevent further damage
- Same-day emergency tarping when it's safe and crews are available
How to schedule
- Call us at (281) 800-7663 during business hours: Mon–Fri 8:00 AM–5:00 PM, Sat 9:00 AM–1:00 PM.
- Schedule online using our free inspection form: Request a free inspection.
- Have this information ready when you call or submit the form:
- Your address and best contact number
- Brief description of the damage and whether there are active leaks or safety concerns
- Preferred availability for an inspector visit
Links and resources
- Residential roof repair
- Insurance claims guidance
- Roof hail damage & insurance claim
Emergency Roof Tarp FAQs
How long can a tarp stay on my roof safely?
Treat a tarp as short-term emergency protection rather than a long-term roof covering, since a professionally installed tarp typically protects a roof for several weeks to a few months. UV, wind, and ponding water degrade tarps and fastenings over time, so inspect yours every few days for loosening, tearing, or water infiltration and repair or replace it as needed. Arrange permanent repairs as soon as practical.
Will my homeowners insurance usually pay for emergency tarping if I call a contractor?
Most standard homeowner policies reimburse reasonable costs for emergency mitigation that prevents further damage, including professional tarping, when the work is documented and related to a covered event. Insurers typically expect photos or video of the damage before temporary repairs when it is safe to take them, copies of contractor estimates and invoices, and a clear description of the emergency action taken. Policy terms vary, so call your insurer to confirm coverage and keep all receipts and contractor credentials to support a claim.
Can I safely tarp a steep or wet roof myself, or should I wait for a professional?
Wait for a professional if the roof is steep, wet, or visibly damaged, because wet surfaces and steep pitches sharply increase the risk of a fall and of causing additional damage. A professional tarping crew works with harnesses, stabilizers, and trained helpers. Limited DIY tarping on a low-slope, dry roof may be reasonable if you are experienced with ladders and roof work, but call a pro when in doubt.
How soon should I have emergency tarping completed after storm damage?
Emergency tarping should be completed as soon as it is safe to access the roof and within a timeframe that prevents additional interior damage. In practice that means arranging tarping the same day or within 24 to 48 hours after an event that exposes the roof deck or creates large openings, provided weather and site conditions allow safe work. If hazards or access issues delay tarping, document the damage with photos and notify your insurer so mitigation needs are clear.
How should I document tarping work to support my insurance claim?
Photograph and video the original damage from multiple angles with timestamps before any work, if it is safe to do so. Then photograph the tarp installation showing the layout, anchor method, 2x4 sandwiching or straps, the contractor name on a vehicle or badge, and any displayed permit or license, and keep a dated invoice listing materials, labor, and scope plus a short written statement of work performed. Organize the files in a dated folder and back them up, because this is what lets your adjuster verify necessity and cost.
Schedule a Free Emergency Inspection
Call (281) 800-7663 or use the online form to request a no-obligation emergency inspection. Inspections include a safety assessment, timestamped photos and documentation for insurance, and a written estimate; when conditions allow we can perform same-day emergency tarping to stop water intrusion. Business hours: Monday through Saturday, 8:00 AM to 6:00 PM. For full repair options and next steps visit Residential roof repair.

Shawn Swearingen
Shawn Swearingen leads Blue Rhino Roofing, a BBB A+ accredited, Texas-licensed roofing company based in Katy. He's on the roof and on the phone, and known for telling homeowners the straight truth about whether they need a repair or a replacement.