
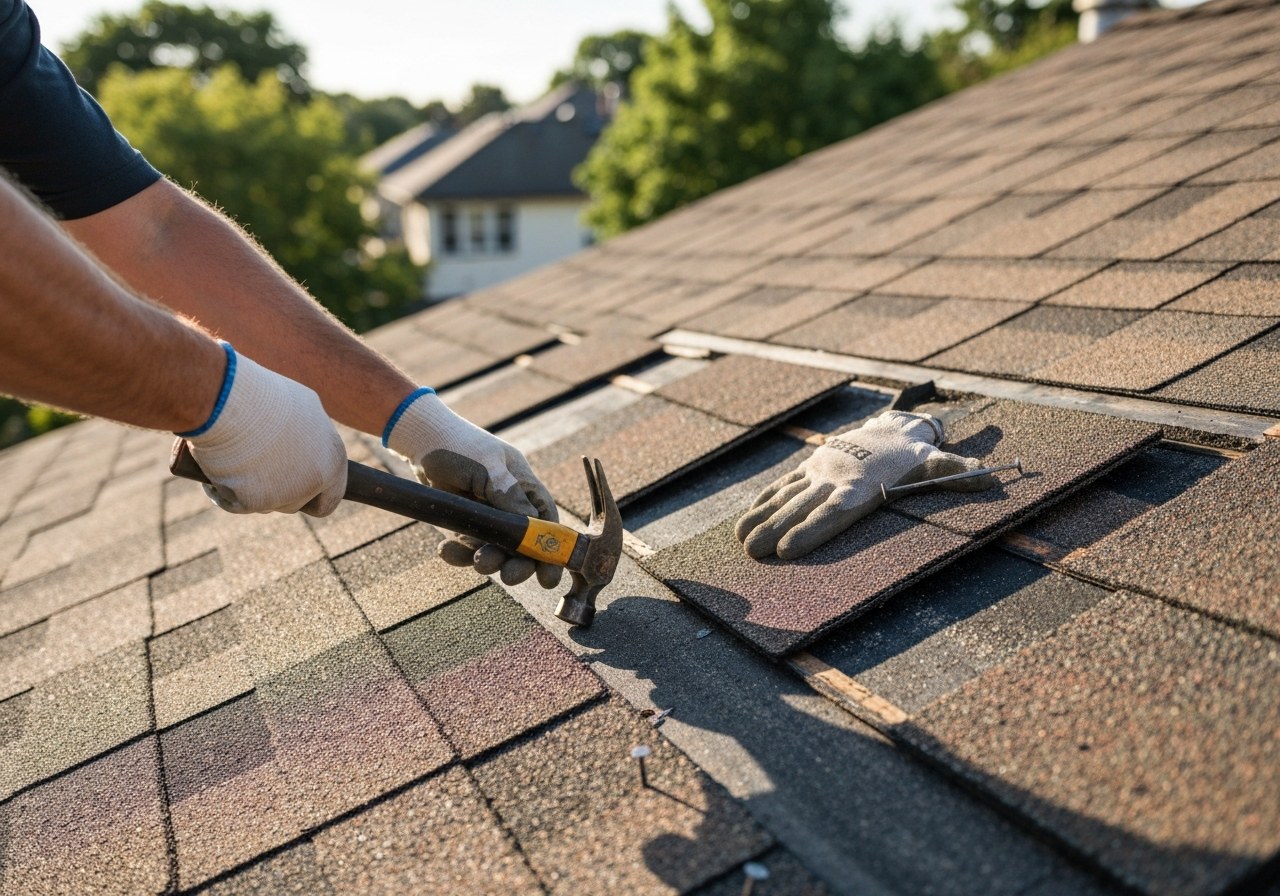
Many homeowners discover decking problems only after shingle failure, hidden leaks, or a tear-off that reveals rot or delamination. Damaged roof decking undermines shingle performance, creates interior water risk, and can transform a routine reroof into a structural repair project.
That risk matters because decking condition directly affects project scope, insurance outcomes, and the long-term durability of the roof. Unrecognized decking failure increases the chance of rework, warranty denials, and interior damage during storms.
This guide explains what roof decking is and why it matters; how to spot rot, delamination, and sag from both attic and roof; when to repair versus replace; material, thickness, and code considerations; cost, insurance, and quoting mechanics; how decking replacement changes timeline and site protection; fastening and installation best practices; Houston and Katy climate implications; how decking ties into underlayment and ventilation; additional homeowner questions; a printable inspection checklist and exact questions to ask contractors; and practical next steps for documenting damage and obtaining professional inspections.
Understanding what decking is and how it fails will shape your inspection priorities and the decisions you make with contractors and adjusters.
What roof decking (sheathing) is and why it matters
Roof decking (also called roof sheathing) is the flat structural layer—typically plywood, OSB, or board sheathing—nailed to rafters or trusses that supports underlayment and roof covering and transfers loads to the framing.
Definition and role
Roof decking is the structural surface beneath shingles or other roof coverings; it provides a continuous base for underlayment, resists wind and live loads, and helps transfer those loads into the roof framing. Proper decking prevents sagging, keeps the roof covering stable, and is a primary barrier against moisture intrusion when intact.
Common materials
OSB (oriented strand board). OSB is made from compressed wood strands and adhesives; it is commonly used today because it is cost-effective and available in large panel sizes. OSB performs well when dry but can swell, delaminate, or lose strength if exposed to prolonged moisture.
Plywood. Plywood is manufactured from stacked veneer layers glued together with alternating grain; it resists moisture slightly better than standard OSB and is often preferred for higher-end jobs or areas with more humidity. Plywood panels are durable and hold fasteners well but are typically more expensive than OSB.
Older spaced-board decks (less common today):
- Boards are typically 1x or 2x planks with gaps between them.
- They allow ventilation but can be uneven and may leak without modern underlayment.
- Many have been replaced; remaining boards often need full replacement when damaged.
Pros and cons
OSB — Pros:
- Cost-effective compared with plywood.
- Available in large, consistent panels.
- Strong under normal, dry conditions.
OSB — Cons:
- Can swell or delaminate after prolonged moisture exposure.
- Edges are vulnerable if water penetrates.
- Repairs may require panel replacement rather than spot fixes.
Plywood — Pros:
- Generally better moisture resistance than OSB.
- Takes nails and fasteners reliably.
- Long history of predictable performance.
Plywood — Cons:
- More expensive than OSB.
- Variability in quality between grades and manufacturers.
- Thinner plywood grades may sag under heavy loads.
Spaced wood boards — Pros:
- Natural ventilation under the roof deck (in some historic assemblies).
- Simple to replace individual boards.
Spaced wood boards — Cons:
- Gaps can allow water and air infiltration without modern underlayment.
- Often uneven and prone to rot or insect damage.
- Typically require full replacement to meet modern code and performance expectations.
Next: how to inspect for damage
How to spot rot, delamination, sag and water damage (inspection checklist)
From the attic
From the attic, look for these specific signs:
- Soft or spongy decking — Step carefully; depressed or springy spots underfoot indicate weakened wood.
- Mold or mildew growth — Black, green, or fuzzy patches on decking or rafters point to ongoing moisture.
- Dark stains or water streaks — Discolored boards or drips show past or active leaks.
- Visible daylight through decking — Any light coming through means holes or severe deterioration.
- Musty or damp odors — Persistent musty smells suggest trapped moisture and possible rot.
From the roof surface
From the roof surface, scan for these outward signals of decking problems:
- Sagging roof plane — A visible dip or uneven slope often means compromised decking or framing.
- Nail pops or missing fasteners — Raised nails or exposed fastener holes can allow moisture entry and indicate movement beneath.
- Buckling or splitting shingles — Shingle distortion can be caused by unstable or warped decking.
- Shingle anomalies (soft spots felt while walking) — Softness when you walk on shingles often corresponds to rotten decking below.
- Granule loss concentrated in one area — Localized wear may indicate trapped moisture or decking failure under that spot.
Tools and methods
- Moisture meters — Useful for spotting elevated moisture levels in decking. They indicate where water is present but do not prove structural rot or how deep deterioration goes. Treat readings as a screening tool, not a diagnosis.
- Infrared (IR) thermography — IR cameras can reveal cooler, wetter areas behind shingles or in the attic. They are effective for locating suspect zones but can produce false positives from temperature differences unrelated to moisture (venting, shading, time of day).
- Limitations and next steps — Neither moisture meters nor IR scans can confirm full structural rot or delamination. To verify the extent of damage, a professional may need to remove shingles and inspect (a tear-off) or take core samples. If elevated moisture, sagging, or visible decking failure appears, schedule a professional inspection that includes opening the roof surface.
- Safety note — Homeowner roof access carries fall risk. Use binoculars from the ground or hire a pro for roof-surface checks if you’re uncomfortable or the roof is steep.
Homeowner inspection checklist
Print or save this one-page checklist for quick use. Short, action-oriented items you can tick off during an inspection.
- Check attic for soft or spongy decking.
- Look for mold, mildew, or fungal growth.
- Note dark stains, water streaks, or active drips.
- Look for daylight through decking or roof sheathing.
- Smell for musty or damp odors in attic spaces.
- From roof surface, check for visible sagging.
- Inspect for nail pops or missing fasteners.
- Walk carefully to feel for soft spots under shingles.
- Look for buckling, splitting, or displaced shingles.
- Note concentrated granule loss on shingles.
- Photograph stains, daylight spots, nail pops (attic + roof).
- Record dates, locations, and any recent storms or leaks.
- If any items checked, contact a licensed roofing pro for a tear-off inspection.
Callout: Checklist (downloadable PDF) — see data_ideas for file.
Place CMS download link here:
Lead-in to next section: Use these inspection results to decide whether targeted repairs can fix the problem or whether full roof decking replacement is necessary.
When is decking repair sufficient versus full decking replacement
Decision factors
- Extent of damage — How much of the decking area is affected (single sheathing panel vs. multiple bays).
- Structural risk — Whether rot or deflection compromises rafter/joist support and overall roof structural integrity.
- Continuous water intrusion — Ongoing leaks or moisture that may have spread damage beyond visible areas.
- Ventilation and attic conditions — Poor ventilation or persistent attic moisture that can accelerate decking failure.
- Insurance, permits, and code triggers — Adjuster findings, local code requirements, or permit conditions that may require larger repairs or full replacement.
Typical scopes seen during reroof
Depending on inspection findings, scope varies by roof age, local climate, and construction practices. Typical observed ranges; actual scope varies. Often ranges seen: ~10–30% for spot repairs (isolated panels or minor rot), ~30–70% for partial/sectional replacement (multiple adjoining bays or concentrated storm damage), and ~70–100% for full decking replacement (widespread delamination, continuous moisture, or structural compromise). These percentages are approximate and can shift by region, roof age, or inspector judgment.
Examples
- Isolated leak: A small leak around a flashing area led to one or two damaged plywood panels; a spot repair of those panels and flashing replacement resolved the issue after confirming no hidden spread.
- Storm damage with multiple areas: Hail and wind tore shingles across several roof sections; inspections found several non-adjacent panels softened—partial decking replacement for affected areas was recommended to ensure a uniform substrate for new shingles.
- Old delaminated OSB across roof: A roof with decades-old OSB showed broad delamination and sag; the decking had lost structural integrity and a full replacement was advised to restore performance and warranty eligibility.
Transition
The decision between repair and full replacement directly affects cost, timeline, and warranty outcomes, and it may influence your insurance claim and permitting process.
Materials, thickness, and local code considerations
Common thicknesses and code drivers
- 7/16" (11/32" / 0.4375") — Common for modern OSB roof sheathing on rafters spaced 24" OC. Used where code or manufacturer allows lighter sheathing for lower-span conditions. Check manufacturer span tables and local code for acceptability; when code-driven thickness is required, consult the International Residential Code (IRC) — roof sheathing requirements: https://codes.iccsafe.org/.
- 5/8" — Often specified for 16" OC framing or when a stiffer deck is needed for certain roofing materials (heavy shingles, tile) or under high wind uplift requirements. Many manufacturers and industry guides recommend 5/8" where added stiffness or improved fastener holding is desired.
- 3/4" — Used for long spans, roof decks that will carry concentrated loads, or where local code/inspector requires thicker sheathing (or where older homes have thicker boards). Also common when installing solid wood boards or when re-sheathing over existing layers is planned. If you reference specific manufacturer mandates, link to their technical bulletins or NRCA/IRC guidance for verification.
Re-nailing, sheathing layering, and code triggers
Brief note: local code and manufacturer requirements vary — the paragraphs below summarize common patterns and triggers. For definitive code language, see the International Residential Code (IRC) cited above: https://codes.iccsafe.org/.
Common requirements and best-practice bullets:
- Layering limits
- Many codes and inspectors limit roof sheathing to no more than two layers of solid decking before a full tear-off is required. (Verify with local building department.)
- Re-nailing triggers
- Re-nailing is typically required when reusing an existing deck that has loose or under-driven nails, or when adding a new layer rather than full removal. Exact nailing patterns vary by code and manufacturer; expect to re-nail perimeter and field panels to current nailing schedules if permitted.
- Typical re-nailing/fastening expectations (hedged)
- Re-nailing patterns commonly call for: 6" OC at panel edges and 12" OC in the field for many installations — but these figures can vary by code, panel type, and wind zone. Always confirm the required pattern for your product and jurisdiction.
- Nailing schedules and fastener type
- Code or manufacturer may specify ring-shank nails or specific screw types for re-nailing or new sheathing; using the wrong fastener can void warranties or reduce uplift resistance.
- When a full tear-off is required
- Excessive rot, more than two layers of sheathing, structural damage, or failed roof decks typically require full removal rather than re-sheathing.
- Documentation and inspector coordination
- If you plan to re-nail or add a layer, document the proposed fastening schedule and get pre-inspection sign-off when possible to avoid failed inspections.
Short local note: Houston/Katy enforcement tendencies — inspectors around Katy and greater Houston often prefer full tear-offs when there’s visible deck rot, more than one existing layer, or unclear fastening; verify with your local building department or inspector before proceeding.
Best choices for wind resistance and humid climates
- Use thicker panels (5/8" or 3/4") in high-wind zones or long-span rafters — thicker decks reduce deflection and improve wind uplift resistance.
- Prefer exterior-grade plywood over standard OSB in consistently humid climates for better long-term moisture resilience.
- Tongue-and-groove boards or CDX plywood can be good for older homes where solid decking is appropriate; ensure edges are properly sealed and ventilated.
- Consider treated or HDO (high-density overlay) panels where frequent wetting is expected.
- When re-sheathing over existing deck, avoid more than two layers — remove old decking if moisture damage or multiple layers exist.
Materials comparison — OSB vs plywood vs boards
| Material | Pros | Cons | Typical thicknesses | Suitability for humid climates |
|---|---|---|---|---|
| OSB | Cost-effective, consistent panel size, good shear strength | Susceptible to swelling/delamination if repeatedly wet | 7/16", 1/2", 5/8" | Moderate — performs well if kept dry; less ideal if frequent exposure |
| Plywood (exterior-grade/CDX) | Better moisture resistance, strong fastener holding, durable | Higher cost, thicker options heavier | 5/8", 3/4" commonly; 1/2" and 7/16" used per span | Good — preferred in humid climates |
| Solid wood boards (tongue-and-groove or planks) | Traditional look, thick solid decking, good for local repairs | Labor-intensive, can warp/split, variable quality | 3/4" and thicker | Variable — better if properly treated and ventilated; can be problematic if not detailed correctly |
Lead into roof system tie-in with underlayment and ventilation
Proper roof decking choice and installation must be coordinated with underlayment, flashing, and attic ventilation to prevent moisture issues and ensure warranty compliance. After sheathing decisions, the next step is to confirm underlayment type, ventilation pathways, and flashing details before installing shingles.
Cost, pricing, and insurance: common homeowner questions
Pricing mechanics — bulleted Q&A
- Per-sheet vs per-square-foot — which pricing method will I see?
Contractors commonly quote per-sheet (common for plywood/oriented strand board) or per-square-foot (more common for broader roofing work); ask which unit your estimate uses so you can compare bids directly.
- How are change orders priced?
Change orders are typically billed as separate line items at the contractor’s published unit rates or a mutually agreed hourly/flat rate — get the pricing method in writing before work begins.
- What should I expect on an estimate?
A clear estimate includes line-item scope (materials, labor, disposal, permits), approximate quantities, and any exclusions or contingencies — if any of these are missing, request them.
- Include cost breakdown visual:
Please include the project's illustrative line-item template for clarity (no dollar amounts).
Insurance and adjusters — numbered action steps
- Document visible damage; do not speculate about cause.
Take clear photos and video of affected decking, eaves, interior stains, and adjoining roofing materials — caption images (location/date) and avoid guessing what caused the damage.
- Collect supporting evidence.
Save inspection reports, contractor notes, and any pre-loss photos or maintenance records that show prior condition.
- Share contractor findings with the adjuster early.
Ask your contractor to prepare a one-page damage summary and line-item replacement scope to give to the adjuster before or during their visit.
- Request a joint walk-through.
Ask the adjuster to review the damage on site with your contractor present so both parties can agree on scope; document the walkthrough with photos and a short memo.
- Use recommended phrasing when speaking with the adjuster:
- To state facts: "This is the visible damage at [location]; here are dated photos."
- To avoid speculation: "I don't want to guess the cause; please make note of what you observe."
- To request clarification: "Can you explain how you determined this scope or exclusion?"
- If you disagree, get it in writing.
Ask the adjuster to note disagreements in the claim file and request a written explanation for any denial or partial payment.
Hidden and indirect costs — short bullet list
- Disposal and dumpster fees (old decking and roofing materials)
- Permits and inspection fees required by local jurisdictions
- Interior repairs or mold remediation if water damaged the ceiling or insulation
- Temporary protection (tarps, plywood) and weather-related delays
- Additional trades (electrician, HVAC, chimney work) if attachments or systems are disturbed
Contractor quoting practices — short bullets
- Ask for a written line-item quote that separates materials, labor, permits, disposal, and contingencies.
- Request labor vs. materials breakout — local labor rates and permit complexity can materially affect final price.
- Ask how they handle unforeseen decking damage (hourly rate vs. fixed per-sheet replacement) and require change-order approval in writing.
- Verify license, insurance, and warranty terms and ask for references or recent project photos.
Include the cost breakdown sample visual here as a reference (no dollar amounts) to use when comparing bids or submitting documentation to your insurer.
How decking replacement affects the roof replacement timeline and site protection
Typical timeline impact
Roof decking replacement typically adds extra work time to a reroof project — how much depends on the amount of decking replaced and access/site conditions. Minor localized decking repairs usually have a small impact; widespread rot or full-deck replacement can meaningfully extend the project. Factors that increase time include extent of damaged decking, multiple layers of existing roofing, structural repairs, permit requirements, and weather interruptions.
Insert the timeline graphic below to give homeowners a clear visual of sequencing and impacts:
Step-by-step sequencing during reroof
Followed below is the standard sequencing most contractors use when decking work is involved. Each job can vary, but these numbered steps cover the essential flow from initial inspection through final cleanup:
- Initial inspection and documentation — Inspect decking condition, document damage with photos for the homeowner and insurer, and confirm scope (see homeowner expectation note).
- Permits and staging — Obtain permits if required, stage materials and safety equipment.
- Tear-off — Remove old shingles, underlayment, and any loose decking down to the structural sheathing.
- Decking evaluation & targeted repairs — Identify and mark areas of rot, delamination, or weak sheathing for replacement or sistering.
- Decking replacement/installation — Install new deck boards or plywood/OSB sheathing where needed; ensure fastening and nailing patterns meet code.
- Underlayment and ice-and-water shield (if applicable) — Install new underlayment and flashing, paying close attention to valleys, eaves, and penetrations.
- Shingling or roofing material installation — Install shingles or other roof coverings per manufacturer/specs.
- Flashing, vents and detail work — Reinstall or replace flashing, vent boots, chimney counterflashing, and other penetrations.
- Final cleanup and inspection — Remove debris, magnet sweep the property, perform a final quality inspection, and document completed work.
Interior and site protection methods
Contractors should use multiple protection layers to prevent damage during decking replacement:
- Exterior tarping protocols — Roof edge and slope tarps to catch runoff and protect landscaping.
- Temporary sheathing or plywood — Protect exposed areas if decking replacement is staged over multiple days.
- Vents, chimney, and penetration protection — Cover or shield chimneys, skylights, and vents during tear-off.
- Interior floor and attic protection — Drop cloths, rosin paper, or plywood pathways over floors; attic walkways and coverings to protect insulation and ductwork.
- Gutter and downspout protection — Block or divert debris to minimize clogging and interior water risk.
- On-site debris control — Use dumpsters, shingle bags, and magnet sweeps to keep the property safe.
- Homeowner expectation (practical): If decking is replaced, expect additional inspections and photographs for insurance and quality records.
Weather delays and temporary protections
Weather can pause decking replacement work; contractors commonly install temporary tarps or breathable covers to protect the home between shifts. For large decking jobs that span multiple days, expect contractors to secure the roof each night and communicate any weather-related schedule changes. Homeowners should plan for flexible timelines when decking replacement is possible and confirm how the crew will protect interior spaces and valuables during work.
Fastening, nailing patterns, and installation best practices
Nails vs screws
Fastening choice affects holding power, movement with temperature/moisture, and speed of installation. For roof decking replacement, contractors most often use ring-shank or spiral-shank nails designed for decking; screws are used in specialty situations. Always follow the roof deck material and fastener manufacturer recommendations.
- Nails — Pros: faster to install; good shear strength for roof decking; ring/spiral shanks resist pull-out better than smooth nails.
- Nails — Cons: can loosen over time with repeated moisture cycles or if the wrong type/length is used; corrosion risk if not specified for the environment.
- Screws — Pros: superior pull-out resistance and can be useful for fixing delaminated or warped boards; easier to remove for repairs.
- Screws — Cons: slower and more expensive to install for large areas; some screw heads can shear under heavy loading if not rated for structural decking.
(If you use the term sister rafters or blocking later in the article, define them at first mention. Example: sister rafters — installing a new rafter alongside an existing one to restore strength; blocking — short wood pieces installed between framing members to reduce movement and transfer loads.)
Fastening patterns — checklist
Manufacturer and local building code requirements take precedence. The items below are typical patterns commonly used for plywood/OSB roof decking—verify the exact nailing schedule with the deck manufacturer, shingle manufacturer, and your local code official before work begins. Homeowners should ask the contractor to include the nailing schedule on the written proposal.
- Edge panels (panels that meet a rafter/truss at a roof edge): typical pattern — 6" o.c. (on center) along edges (verify with manufacturer/code).
- Field panels (interior of the roof, away from edges): typical pattern — 12" o.c. (verify with manufacturer/code).
- Panel ends (where panel ends land on framing): typical pattern — 6" o.c. (verify).
- End lap/offsets: stagger panel joints so end joints do not line up over the same framing member on adjacent rows; follow manufacturer recommendations for gap spacing for expansion.
- Fastener type & length: use ring-shank or spiral-shank nails of the length recommended for the deck thickness (manufacturer/code may require specific fastener types).
- High-wind or coastal areas: manufacturers or codes may require closer spacing (for example 4"–6" o.c. at edges) and corrosion-resistant fasteners—always check for environment-specific requirements.
- Specialty decks (board decking, tongue-and-groove, or engineered panels): follow the panel manufacturer's nailing pattern exactly—do not assume plywood/OSB patterns apply.
Structural fixes
Address structural issues before fastening new decking to ensure a solid, lasting surface.
- Blocking: short pieces installed between rafters/trusses to stiffen spans or provide solid nailing—use where decking edges land on unsupported spans. (Define at first use if this is the article’s first occurrence.)
- Sistering rafters: when a rafter is damaged, a new rafter can be fastened alongside the existing one to restore strength—this is called sistering (installing a new member adjacent to the old one). Keep sistering concise and limited to adequately supported repairs; severely rotted rafters typically require full replacement.
- Replacing fascia and eaves: if fascia, eave framing, or rafter tails are rotten or compromised, replace them before installing new decking and shingles to prevent ongoing moisture problems.
- When to replace vs repair: when more than localized areas show rot, widespread delamination, or excessive sag, plan for full member replacement rather than spot repairs. For marginal conditions, consult a structural contractor or engineer.
Contractor & homeowner checklist (quick)
- Contractors: follow the deck and fastener manufacturer's installation guide and local code; document the nailing schedule on the proposal.
- Homeowners: ask to see the manufacturer’s recommended nailing schedule and the fastener specifications before work begins.
Transition to next topic
Next: how to spot rot, delamination, sag, and water damage — a practical inspection checklist to decide when decking needs replacement.
Houston/Katy humidity and climate: how it affects decking and inspections
Regional climate impacts
Houston and Katy sit in a hot, humid, subtropical climate with frequent summer storms and high year-round moisture. That combination raises the risk of fungal decay, mold, and long-term moisture-induced deterioration in roof decking compared with drier regions — particularly where ventilation or water-management details are inadequate. For research-backed context on how moisture and fungi affect wood in humid climates, see University research on wood decay and moisture in humid climates (https://extension.psu.edu/wood-decay-and-fungi). Use that research to inform inspection frequency and repair priorities; local conditions (shade, nearby trees, roof pitch) will change actual risk.
Inspection adjustments for humid climates
Front-load: inspect more often, focus on moisture readings, and document conditions.
- Schedule inspections at least twice per year (spring and late summer) and after any major storm; increase frequency for low-slope roofs or shaded properties.
- Use a moisture meter on suspect areas; record readings and locations. Moisture meters are best used relative to baseline values — a single high reading warrants follow-up rather than immediate replacement in all cases.
- Perform infrared (IR) scans only after a dry period (24–72 hours after rain) to reduce false positives from surface cooling/wetting.
- Photograph all suspect areas with time-and-date stamps: attic/decking from the interior, eaves, penetration flashings, and roof valleys. Include close-ups of fasteners, seams, and flashing interfaces.
- Pay special attention to attic ventilation paths, soffits, and ridge vents for signs of blocked airflow or condensation.
- When in doubt, repeat the meter/IR checks after a dry spell or get a lab analysis for fungal presence — humidity makes visual assessment less reliable.
Material and construction recommendations for Houston/Katy
Front-load: prioritize moisture-resistant materials and robust ventilation/drainage details.
- Prefer exterior-grade plywood (CDX or better) or OSB rated for exterior use; for replacement, consider thicker panels (5/8" or 3/4") where code and roof framing allow to reduce deflection and improve fastener holding.
- Use pressure-treated or preservative-treated framing/flashings in areas prone to chronic moisture (e.g., near roof penetrations).
- Ensure continuous, balanced attic ventilation: adequate soffit intake + ridge/exhaust vents sized per code and net free area recommendations. Consider adding baffles to keep soffits clear.
- Detail effective rain protection: full drip-edge, correct step and counter-flashing at chimneys and walls, sealed underlayment at eaves and valleys, and sealed fastener details where applicable.
- Specify high-quality synthetic underlayments and ice/water protection membranes in vulnerable areas; these dry faster and resist delamination better than some older felts.
- For accelerated decay risk areas, consider composite or engineered roof decking products where permitted by code and manufacturer instructions.
- Keep installation records and manufacturer product datasheets for warranty/insurance claims.
Storm exposure and insurance expectations
Hurricanes and severe storms bring wind-driven rain that can saturate decking and accelerate rot. After storms, document damage thoroughly and be aware that insurers often expect timely mitigation (temporary tarps, drying, repairs) to limit further loss. Keep inspection photos, moisture readings, and repair estimates ready — these improve claim outcomes and help distinguish pre-existing decay from storm damage.
Lead into broader roof system connection
The decking is one part of the whole roof system — ventilation, underlayment, flashing, and shingles all interact. For a practical inspection checklist on identifying rot, delamination, sag, and water damage, continue to: How to spot rot, delamination, sag and water damage (inspection checklist).
How roof decking replacement fits into the roof-as-a-system
Underlayment and decking interaction
Damaged decking undermines underlayment adhesion and fastener holding strength. When decking is soft, delaminated, or decayed, underlayment can't bond properly and nails or staples lose their grip—this increases water infiltration risk and reduces the underlayment's effectiveness as a secondary water barrier. Inspect decking when replacing underlayment; replace compromised boards or sheathing before installing new underlayment to restore adhesion, fastener performance, and the roof’s intended water-shedding capability.
Ventilation and decking health
Poor ventilation accelerates deck failure. Inadequate attic ventilation traps heat and moisture, which promotes rot, delamination, and fastener corrosion; the National Roofing Contractors Association (NRCA) documents how ventilation affects roof system longevity and performance (see NRCA guidance). Improving ventilation reduces the chance that decking will need premature replacement.
Shingle performance and structural integrity
Decking condition directly affects shingle performance and warranty risk. Uneven, loose, or water-damaged decking can cause rippling, nail pull-through, and increased susceptibility to wind uplift and blow-off. Manufacturers may deny warranty claims if underlying decking problems contributed to shingle failure, so confirm decking integrity during any inspection or roof replacement decision. When decking is compromised, consider full reroof or targeted replacement to protect shingle performance and warranty coverage; for larger projects see our internal resource on Roof replacement (/roof-replacement/).
Suggested internal reading links
- /roof-underlayment
- /roof-ventilation
- /roof-replacement/
Further reading: National Roofing Contractors Association (NRCA)
Note: For warranty-related questions and manufacturer requirements, consult NRCA guidance and manufacturer instructions before approving decking repairs or replacement.
Next: How to spot rot, delamination, sag and water damage (inspection checklist)
Inspection checklist and exact questions to ask your roofer
Printable inspection checklist
This checklist is formatted for printing—bring it to the inspection and ask the contractor to initial checked items. Attach this checklist to your project file and include it in the " " data_idea.
- Attic
- Signs of active leaks (wet spots, dark stains)
- Mold or mildew growth
- Wet or sagging insulation
- Rot or soft sheathing at rafter/tie-in points
- Visible daylight through roof deck
- Roof surface
- Missing, cracked, or curled shingles
- Granule loss in gutters and downspouts
- Sagging or uneven roof planes
- Rusted, loose, or missing flashing
- Condition of drip edge and eaves
- Clear, well-sealed vents and chimneys
- Evidence of previous patching or repairs
- Paperwork & safety
- Written estimate with line-item costs
- Scope showing decking replacement amount (sq ft or %)
- Warranty terms in writing (duration and coverage)
- Proof of contractor insurance and license
- Permit responsibility (who pulls permits)
- Photos to be provided before, during, after
- Debris removal and site-cleanup plan
Print-friendly note: leave a two-inch margin on the left for contractor initials and date.
Questions to ask your contractor
Ask each question aloud — use this exact wording. One-line questions make the answers clear and easy to record.
- Do you carry a roofing license and local permit?
- Are you fully insured and can you provide certificates?
- Who will pull required permits and handle inspections?
- What percentage of decking do you expect to replace?
- How will you check for hidden rot under shingles?
- What flashing and drip-edge approach will you use?
- What brand and class of shingles will you install?
- What is the exact warranty duration and what does it cover?
- Is there a workmanship or labor warranty and how long is it?
- How will you document before/during/after work with photos?
- Will my insurance-ready report include cost breakdowns and photos?
- What is your project start date and estimated completion time?
- Who is the on-site supervisor and how do I contact them?
- Do you provide references from recent customers in my area?
- How will you protect landscaping, gutters, and siding during work?
Practical instruction: Ask the contractor to show you before/after photos and mark replaced areas on the written estimate.
What to expect during the walk-through
- Photo documentation of problem areas and surrounding roof.
- Narrated findings from the inspector pointing to visible issues.
- Written notes on expected decking replacement (sq ft or percentage).
- Insurance-ready packet with photos and line-item estimate for claims.
- Clear next steps and timeline for repairs or replacement.
Transition to next steps
Use this checklist and question list to confirm scope and costs before signing. Next: learn how to spot rot, delamination, sag, and water damage so you can verify the contractor’s findings.
Next steps: getting a professional inspection and documenting damage
Pre-inspection checklist
- Photos to take: attic stains, daylight through decking, nail pops, exterior problem areas (flashing, eaves, soffits), close-ups of shingle damage
- Paperwork to gather: prior roof inspection reports, contractor invoices, builder/repair records, current insurance policy and claim number (if applicable)
- Access notes: make attic access available and clear a path; note pets, locked gates, or restricted areas for the inspector
- Quick tip: photograph interior stains (ceiling/wall) with a ruler or object for scale and capture timestamps if possible
How to compare estimates
- Compare line-by-line: materials (decking, underlayment, shingles), labor hours/rates, permits, disposal/hauling, warranty details, and cleanup
- Watch for red flags: vague lump-sum items like “materials” without brand/grade, missing disposal or permit fees, no allowance for decking replacement, or nonexistent warranty terms
- Ask for manufacturer specs for proposed materials and confirm fastening patterns, underlayment type, and ventilation plan are listed
- Get multiple written estimates and highlight differences in quantities, scope, and exclusions before choosing
Insurance coordination
- Contact your insurer promptly to report damage and open a claim (have claim number and policy handy).
- Document everything: dates, photos, repair estimates, prior roof history, and any temporary emergency repairs.
- Schedule the insurer’s adjuster to inspect with your contractor present if possible — coordinate timing and share the contractor’s estimate.
- Compare adjuster notes vs. contractor’s line-item estimate and ask for clarification on discrepancies.
- Approve repairs only after a written scope and payment plan are agreed; keep copies of all communications.
- Caution: Avoid admitting cause; document only observed damage. (Practical/legal hedging — for cause questions, refer to insurer and contractor evaluations.)
Schedule a free inspection (link to free inspection page)
Deliverables included with the inspection:
- Attic access and moisture readings
- High-resolution photos (attic, decking, exterior)
- Written decking condition report with recommended next steps and estimated scope of work
Frequently Asked Questions About Roof Decking Replacement
Will my homeowner’s insurance cover roof decking replacement from storm or water damage?
Insurance often covers decking replacement when the damage comes from a sudden, covered peril such as wind, hail, or a clearly documented storm-related leak, though gradual wear, neglect, and pre-existing conditions are commonly excluded. Document visible damage with photos, keep contractor estimates and a written inspection report, and ask the adjuster to note decking damage explicitly rather than only shingle damage. If an adjuster denies decking, request a written explanation and get a contractor's second opinion to support an appeal.
How can I tell from the attic if my decking is rotted or delaminated?
From the attic, look for soft or springy areas underfoot, dark water stains that follow the roof framing, mold or fungal growth, daylight through seams or holes, and a damp musty odor. Gently probe suspicious spots with a screwdriver, since a tip that sinks or crumbles indicates rot, and watch for plywood or OSB that peels in layers or shows raised, blistered faces. Attic checks locate many problem areas but can miss hidden rot beneath underlayment or where there is no attic access.
How much decking is typically replaced during a reroof?
Scope ranges from spot repairs of a few sheets around an isolated leak to replacing more than 50 percent of the deck when damage is extensive. Storm damage that lifted fasteners or caused widespread saturation can require partial replacement of roof bays or the entire deck where panels are delaminated or structurally compromised. Exact scope should come from an on-site assessment and a written line-item estimate.
Can moisture meters or infrared scans reliably detect hidden decking rot?
Moisture meters and infrared scans improve inspection accuracy but have real limits, since meters give accurate point readings only where you can access the wood and infrared highlights surface temperature differences that merely suggest wet areas. Both can produce false positives from thermal bridging, attic air movement, or recent rainfall, and neither reliably reveals rot beneath roofing membranes. Use them alongside a physical inspection, and confirm with a controlled tear-off when uncertainty remains.
Should I be present during the decking inspection and tear-off to ask questions?
Being present during an initial inspection is helpful so you can point out concerns, grant attic access, and hear the inspector’s observations directly. During tear-off the work area can be dusty, noisy, and hazardous so it is usually safer to let the crew focus on the removal while you arrange a walk-through with the foreman or estimator afterward. Ask for photos, moisture readings, and a written decking condition report so you have documentation to review and to share with your insurer or decision makers; this evidence makes scheduling a no-cost, on-site inspection an easy next step if you want full certainty about the deck.
Schedule your free inspection and written decking condition report
Request a no-cost, on-site roof inspection that includes attic access, moisture readings, photos, and a clear written decking condition report so you can decide with confidence. Schedule a free roof inspection and decking report

Shawn Swearingen
Shawn Swearingen leads Blue Rhino Roofing, a BBB A+ accredited, Texas-licensed roofing company based in Katy. He's on the roof and on the phone, and known for telling homeowners the straight truth about whether they need a repair or a replacement.