
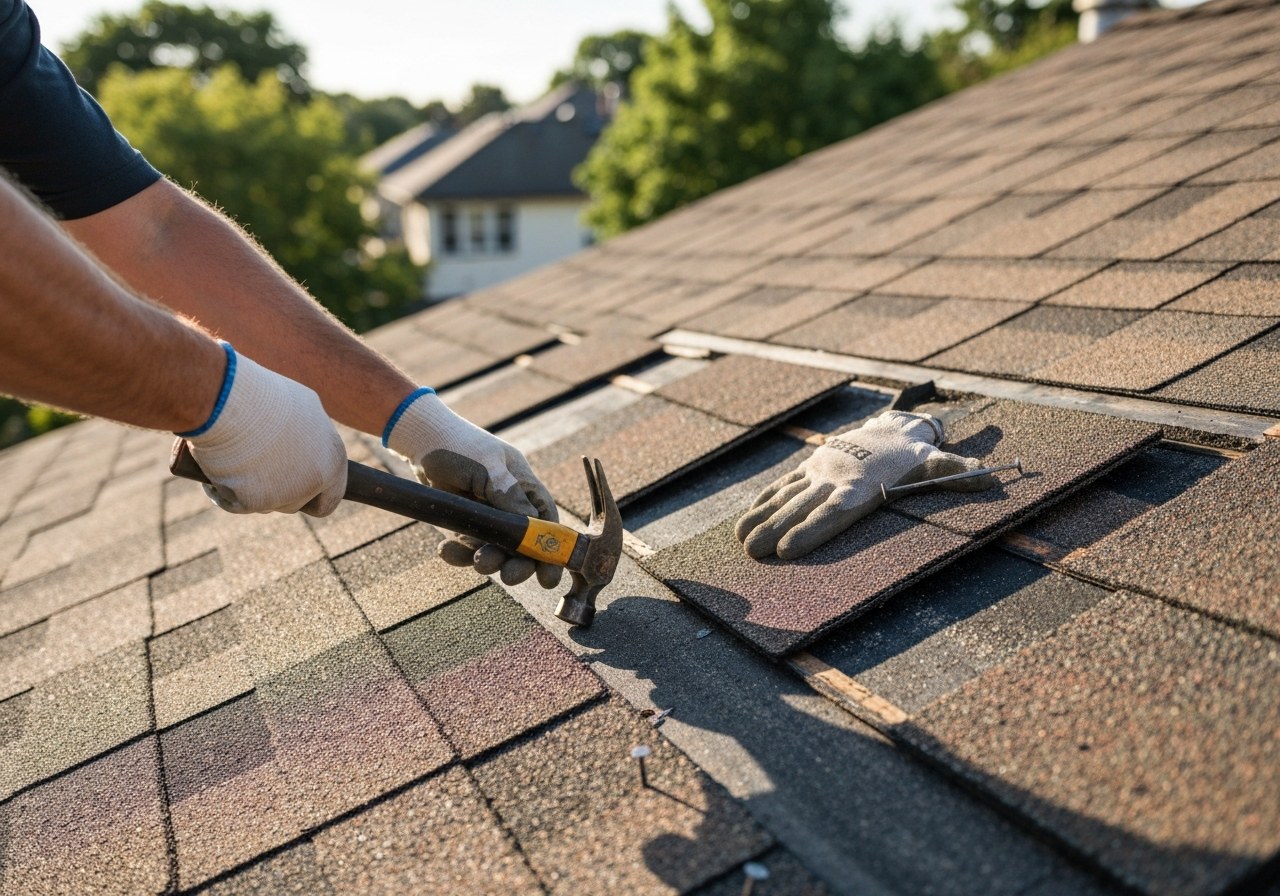
Chimney flashing failures are a leading cause of roof leaks because chimneys penetrate multiple roof layers and create numerous interfaces where water can enter. Left unaddressed, a flashing leak can cause interior staining, rot, mold, and expensive structural repairs.
For a homeowner, the practical stakes are clear: timely diagnosis and the right repair approach protect interior finishes, preserve roof sheathing, and limit insurance exposure. Poor temporary fixes or deferred work commonly increase total replacement costs.
This guide explains why chimneys concentrate leaks, compares step flashing and counter-flashing, describes chimney crickets and when they are needed, lists signs and expected costs, shows when to repair versus replace flashing, provides a homeowner troubleshooting checklist and temporary fixes, offers hiring and bidding guidance, reviews materials and maintenance, summarizes code and insurance considerations, and connects chimney flashing to broader roof repair planning. Use the troubleshooting checklist later in the guide to prioritize immediate actions and decide whether you need a professional inspection.
Introduction — why this matters for homeowners
Quick summary
Chimney flashing is one of the most common and highest-impact causes of roof leaks. Failed flashing lets water bypass shingles and enter attic and wall cavities, creating rot, mold, and costly interior damage if left unchecked. This guide explains what goes wrong with chimney flashing, the repair options, and how to decide between hiring a pro or doing a DIY fix.
What this guide covers
- Common causes of chimney flashing failure
- Step-flashing vs. counter-flashing and how they should be installed
- Crickets and diverters that redirect water around chimneys
- Signs of a leak & typical repair costs
- A concise troubleshooting checklist you can use immediately
- Hiring vs. DIY: when to call a roofer and what to expect
Link references
Schedule an inspection or emergency repair via /roof-leak-repair.
Learn about broader roof repair options at /roof-repair.
A short, actionable troubleshooting checklist follows in the next section so you can quickly spot the most common flashing problems.
Why chimneys are the #1 spot for roof leaks
Chimneys create roof penetrations and multiple material interfaces, so water can find many paths inside.
Chimneys interrupt the roof plane and join different materials (brick, mortar, flashing, shingles). Those penetrations and interfaces create seams, gaps, and movement points where water can enter if any component fails.
Common failure causes
- Movement/settling of the chimney relative to the roof, which breaks seals and flashing.
- Mortar deterioration (crumbling or missing mortar joints) that allows water into the chimney structure.
- Poor installation or repairs—incorrectly installed or patched flashing is a leading cause of leaks.
- Corrosion of metal flashing or fasteners, especially in coastal or humid climates.
- Wind-driven rain that forces water under shingles and into gaps where flashing or counter-flash is compromised.
What happens when a chimney leaks
Water entering around a chimney first shows as interior damage: ceiling and wall stains, peeling paint, wet insulation, and eventually wood rot. Leaks also encourage mold and mildew, which are health hazards for occupants and can be costly to remediate.
Over time, repeated leaks cause structural problems: rotted roof decking, weakened rafters, compromised chimney masonry, and larger repair or replacement bills if not addressed quickly. Left unchecked, small flashing failures can escalate into major roof replacements.
Add before-and-after photos showing corroded flashing, missing counter-flash, deteriorated mortar, and attic damage.
Transition to flashing methods
Because chimneys have so many failure points, choosing the right flashing method and professional installation is critical — next we compare common flashing systems, what they protect, and which situations each one suits best.
Step flashing vs counter-flashing: how they work and why both matter
Step flashing
Step flashing is a series of overlapping metal pieces installed at the intersection where a roof plane meets a vertical wall or chimney to divert water away from the joint. Each piece is bent into an L-shape and interleaved with the shingles so water sheds down and out without tracking behind the siding or masonry.
- Typical placement: tucked under each course of shingles and turned up against the vertical surface.
- Purpose: channels roof runoff past the vertical surface and into the roof plane so it drains over the shingles.
- Common materials: galvanized steel, aluminum, copper (premium).
- Quick note: proper installation requires correct overlap and integration with the shingle courses to avoid leaks.
Counter-flashing
Counter-flashing is a continuous sheet of metal or metal insert embedded into or attached to the vertical surface and lapped over the top of the step flashing to create a sealed joint. It covers and protects the upper edge of the step flashing from direct weather and prevents water from entering behind the flashing.
- Typical placement: secured into a reglet, mortar joint, or mechanically fastened to the wall above the step flashing.
- Purpose: protects the upper edge of step flashing and seals the roof-to-wall transition.
- Common materials: galvanized steel, stainless steel, copper, lead-coated copper.
- Quick note: counter-flashing is especially important on masonry chimneys and walls where a watertight junction is needed.
Side-by-side comparison
- Effectiveness
- Step flashing: Very effective at channeling water away when each piece is correctly lapped with shingles.
- Counter-flashing: Essential for preventing water entry from above; improves overall system reliability.
- Durability
- Step flashing: lifespan depends on material (galvanized < stainless/copper); performance declines if shingles or step pieces fail.
- Counter-flashing: generally long-lived if properly seated in a reglet or securely fastened; mortar-set counterflashing may need tuckpointing over time.
- Typical materials
- Step flashing: galvanized steel, aluminum, copper.
- Counter-flashing: galvanized steel, stainless steel, copper, lead-coated copper.
- Common failure modes
- Step flashing: improper overlap, separation from shingles, corrosion of metal, or damage during re-roofing.
- Counter-flashing: inadequate embedment (shallow reglet), mortar deterioration, improper lap, or movement of masonry that opens gaps.
Lead tray / DPC and reusing old flashing — what to watch for
Lead trays or DPCs (damp proof courses) are sometimes used at chimney bases to collect and redirect water. Reusing old flashing or lead trays can be risky because hidden corrosion, deformation, or poor previous detailing can compromise the seal. Before reusing any existing flashing, have it inspected by a qualified roofer; if there’s visible corrosion, gaps, or uncertain attachment, replacement or professional repair is recommended to meet current safety and code expectations.
- Safety/code considerations: older installations may not meet current best practices or local codes; confirm with your contractor.
- Practical advice: when in doubt, replace worn flashing during a chimney flashing repair to reduce future leak risk and liability.
Step vs counter-flashing — NRCA/GAF technical sheet
Chimney cricket (saddle): function and when it's needed
A chimney cricket is a small peaked metal or framed ridge built on the high side of a chimney to divert water around the chimney and prevent ponding and leaks.
When a cricket is recommended
- Wide chimneys — chimneys that project significantly from the roof plane. (Guideline: many roofers recommend a cricket when chimney width is greater than 3 feet; this is a conservative rule of thumb and should be confirmed with a local code or manufacturer citation.)
- Low‑slope roofs — roofs with shallow pitch where water drains slowly and is more likely to pool behind a chimney. (If using a numeric threshold, note that definitions of “low slope” vary; confirm with roofing material manufacturer or local standards.)
- Chronic ponding on the chimney’s high side — any chimney that repeatedly traps water or debris during rain events.
- When replacing or upgrading chimney flashing — if you’re already removing and installing flashing, add a cricket when the chimney is wide or the roof slope is low to reduce future leak risk.
Installation overview: materials and how a cricket ties into flashing
A cricket is usually built from one of two approaches: a framed and sheathed triangular ridge covered with the same roofing underlayment and shingles/metal as the surrounding roof, or a formed metal saddle (typically painted or coated galvanized steel, copper, or lead‑coated copper on higher‑end jobs). Whichever material is used, the cricket must be integrated with the chimney flashing so water is channeled around the chimney rather than behind the flashing.
Key integration points:
- The cricket sits against the chimney where the roof meets the chimney. The cricket flashing is installed to tie into the base flashing (the metal directly against the chimney) so water flows over the cricket flashing and down the roof surface.
- The cricket’s top edge is covered by the roof’s step or counter‑flashing system (see the “step vs counter‑flashing” section above). In short, the cricket flashing should be lapped under the counter‑flashing and over the step flashing so there are no exposed seams where water can enter.
- Use compatible materials and sealants: metal cricket flashing should match or be compatible with existing flashing metals to avoid corrosion where dissimilar metals meet.
Recommended note: when you’re planning flashing replacement on a wide chimney or a low‑slope roof, include a cricket in the scope of work — it’s a relatively small additional cost that significantly reduces future leak risk.
Next: Why chimneys are the #1 spot for roof leaks
Signs of failing chimney flashing and expected costs
Quick visual checklist (exterior and interior)
- Missing or loose flashing pieces (visible gaps where flashing meets chimney)
- Rust or flaking metal on flashings or counter-flash — metal failure risk
- Separated or cracked mortar at the chimney base (open joints)
- Missing counter-flash (only base flashing visible)
- Visible flashing gaps where shingles do not overlap the flashing correctly
- Attic or ceiling stains (water marks, damp insulation) — interior sign of leak
Quick facts: common causes of attic/ceiling moisture and how to confirm chimney origin
- Water on a ceiling/attic can come from roof flashing, chimney cracks, or roof material failures.
- To confirm the chimney flashing is the source:
- Inspect the attic directly under the chimney for concentrated wet spots and follow the water path downward.
- Conduct a small hose test (one person on roof, one in attic) to run water around the chimney flashing seams while watching for leaks.
- Check for gaps where flashing meets chimney brick or where counter-flash is missing.
- Compare timing of leaks with rain direction—wind-driven rain often exposes flashing failures.
- For a step-by-step procedure, see the troubleshooting checklist: Roofing Resources — Blue Rhino Roofing
- Photo tip for insurance: photograph exterior flashing, interior stains, and any rust or gaps before repairs — label photos with date/time and location in the house.
Cost ranges for chimney flashing work (typical ranges)
Notes: The dollar ranges below are presented as typical ranges — vary by region; cite source if available. If you need exact pricing for your home, request a written estimate from a local contractor. Any specific number here should be sourced for your market; treat these as estimates.
| Repair item | Typical range |
|---|---|
| Minor reseal or patch (sealant, small gaps) | $150–$500 — typical range — vary by region; cite source if available |
| Flashing replacement (aluminum or galvanized) | $500–$1,200 — typical range — vary by region; cite source if available |
| Flashing replacement (copper or lead) | $1,200–$3,500 — typical range — vary by region; cite source if available |
| Scaffolding / access (if required) | $200–$1,000 — typical range — vary by region; cite source if available |
| Masonry crown repair or rebuild | Priced separately — typical range varies widely; get masonry estimate |
(Above values are typical estimates. If you rely on these numbers for budgeting or claims, request a written estimate and ask the contractor to cite local material/labor rates.)
Rust, warranties, and insurance — short notes
- Rust on flashing often indicates advanced metal corrosion; rusted flashing usually needs replacement rather than resealing. If metal is thin or perforated, a patch is only a temporary fix.
- Warranties and insurance: many workmanship or material warranties are void if flashing failure is due to age or neglect. Insurance may cover flashing repair only if damage resulted from a covered event (storm, impact). Unsourced cost numbers above are estimates — Must fix: provide a market-specific source or flag them as estimates when publishing.
Next: Why chimneys are the #1 spot for roof leaks
Repair vs replacement: when to reseal, patch, or fully replace flashing
Temporary fixes and their limits
Caulk or roof cement is a temporary, short-term fix — not a permanent substitute for missing or damaged flashing. Use caulk or roofing cement only to stop active leaks until you can schedule a proper repair or replacement. These materials can buy time after a storm or while waiting for a roofer, but they degrade with sun, temperature swings, and ponding water and often fail within months to a few years.
- When temporary fixes are appropriate: emergency leak stopgap, small localized gaps, or while awaiting a professional inspection.
- When temporary fixes are NOT appropriate: missing flashing, extensive rust/corrosion, large separations, or flashing that’s repeatedly leaking despite patching.
Decision checklist — repair vs. replace
Use this quick checklist to decide whether to reseal/patch flashing or plan a full replacement.
- Repair (reseal or patch) when:
- Flashing is present and mostly intact but has small gaps, cracks, or failed sealant.
- Leaks are limited and recent (no widespread water damage).
- Flashing shows minor surface rust but is structurally sound.
- You need a short-term, low-cost stopgap before professional work.
- Replace (full flashing replacement) when:
- Flashing is missing, torn, badly corroded, or warped.
- Repeated leaks occur after multiple patches.
- Flashing sections are loose or detached from roofing or chimney structure.
- There is extensive water damage to roof deck, chimney, or interior finishes.
- Flashing materials are at or past their expected service life (see lifespans below).
Typical lifespans by flashing material (approximate)
Below are common flashing materials and approximate lifespan ranges. These are general estimates — actual life depends on installation quality, local climate, and maintenance. Numbers without a direct source should be treated as estimates and verified for your region or with a professional inspection.
- Galvanized steel: 10–20 years (prone to rust in coastal or humid climates) — approximate
- Aluminum: 15–25 years (lighter and corrosion-resistant but can fatigue) — approximate
- Copper: 40+ years (durable and long-lived but costlier) — approximate
- Lead (sheet lead): 40+ years (very durable where allowed) — approximate
- PVC or rubberized flashings: 10–20 years (used in some systems; material-dependent) — approximate
If your flashing is within these ranges and showing signs of wear (cracking, gaps, rust), plan for replacement. For chimney work and complex flashing systems, we strongly recommend hiring a licensed roofing contractor — full replacements require skill to integrate flashing with shingles, counter-flashing, and chimney masonry.
Proper flashing replacement — step-by-step checklist
Follow these steps (high-level) for a complete, proper flashing replacement. This list is intended as a contractor-level checklist; DIY full replacements are not recommended unless you have roofing experience.
- Inspect and remove surrounding shingles as needed to access flashing.
- Remove old flashing and any degraded sealant or nails.
- Prepare the chimney or penetration surface (clean, dry, and repair masonry or decking as needed).
- Install new step flashing along the roof-to-chimney intersection where shingles meet the chimney.
- Install counter-flashing or tuck-in counter-flashing to overlap and secure step flashing.
- Integrate a cricket or saddle behind the chimney if required to divert water.
- Test the repair (water test or visual inspection for proper shedding).
- Clean up debris, reinstall shingles, and finish sealant where specified.
For full replacements, hire a professional roofer—proper flashing integration, flashing-to-masonry connections, and water-testing are critical to prevent recurring leaks and interior damage.
Troubleshooting checklist and temporary fixes (what to check now)
Ground-level exterior checklist — ordered
- Look for pooled water on the driveway, patio, or under eaves (maps likely leak path).
- Check gutters and downspouts for overflow, debris, or missing sections near the chimney.
- Inspect chimney exterior for missing bricks, cracked mortar, loose or missing flashing, or gaps at the base.
- Examine roof penetrations near the chimney (vents, pipes) for dislodged flashing or sealant.
- Scan for discoloration or streaks on siding below the roofline where water may run.
- Photograph damage and mark exact locations for later reference or to show a contractor.
Attic/ceiling checklist — ordered
- Locate the wettest spot (stains, drips) and note if it moves during rain.
- Identify water entry point above the stain — follow rafters/ceiling joists toward the roof.
- Look for active drips or recent water stains on insulation or rafters.
- Smell for mildew or musty odors indicating long-term moisture.
- Check chimney chase top and ceiling below chimney for gaps or deteriorated materials.
- Contain wet insulation in a plastic bag if saturated to prevent mold spread.
Simple hose-test instructions — numbered
- Have a partner inside watching the attic/ceiling while you stay on the ground (do not climb a wet/sloped roof).
- Direct a garden hose at the chimney base and flashing (not the roof slope) for 2–3 minutes in one spot, then move to the next area.
- Wait and watch inside for leaks for at least 5 minutes after each 2–3 minute test in that spot.
- Repeat up the chimney (flashing, step flashing, chimney cap) until you locate active infiltration or eliminate likely areas.
Temporary fixes — prioritized (brief instructions + limitations)
- Tarp the chimney area — secure a waterproof tarp over the chimney and roof intersection; limitation: short-term only, wind can tear tarps; not a permanent seal.
- Apply roof cement to small gaps around flashing or cracks; limitation: works for small, accessible cracks only and can fail under sun/heat or ponding water.
- Temporary counterflashing patch — tuck a flexible metal or self-sealing strip under existing cap flashing; limitation: requires careful placement and won’t replace failed embedded counterflashing.
- Cap/crown patching with masonry sealer on small cracks at the chimney crown; limitation: only for hairline cracks; major crown repair/replacement is often needed.
Safety warnings and when to call a pro
- Do not climb on wet, icy, or steep/sloped roofs. Falls are the most common cause of serious injury.
- Avoid roof work in high wind or during storms.
- If the leak is active, widespread, or you cannot access the area safely, call a professional.
- Consider hiring a licensed roofer—professionals have fall protection and the right tools for durable flashing repair.
- For professional help, inspection, or emergency repair: Schedule an inspection or emergency repair via /roof-leak-repair.
(If you want, we can convert the checklist above into a printable/downloadable PDF or a one-page graphic for quick reference.)
Hiring guidance: who to hire and what to ask
Who to hire (and who to avoid)
Hire licensed roofing contractors, experienced masons, or metal fabricators for chimney flashing repair — these trades have the tools and skills to correctly integrate flashing with shingles, step flashing, counterflashing, and any needed metalwork. Avoid one‑person handymen for complex flashing jobs unless they can demonstrate relevant roofing licenses, commercial experience, and insurance.
Must‑ask contractor checklist
- Proof of insurance (general liability and workers’ comp) — get certificate of insurance.
- License / permits — ask what permits are required and who pulls them; verify license number where applicable. (Permit requirements vary by city/county.)
- References and photos of past work — request recent examples of chimney flashing repairs.
- Materials & membrane types — which flashing metal (copper, stainless, aluminum), underlayment, and sealants will you use?
- Scaffold / fall protection plan — will the crew use scaffolding, roof jacks, guardrails, or personal fall arrest systems?
- Written warranty terms — get the warranty in writing (labor vs. materials, length, exclusions). Note: don’t accept blanket promises — ask for specifics and written proof.
- Timeline and cleanup — expected start and finish dates, daily work hours, and debris removal plan.
- Itemized bid — request an itemized estimate (labor, materials, permits, cleanup) to compare apples‑to‑apples between contractors.
Safety and site‑protection practices
A professional crew should describe onsite safety steps before work starts. Typical protections include scaffolding or guardrails, roof protection (roof runners or plywood), tarping/“blue roof” for temporary weather protection, and debris netting or drop cloths to protect landscaping and gutters. For official fall‑protection guidance, review: Roofing safety standards — OSHA fall protection guidance.
Typical project timeline (approximate)
- Minor reseal (caulking or small patch): half‑day to 1 day (approximate).
- Flashing replacement around a single chimney: 1–2 days (approximate).
- Jobs requiring full scaffolding, significant masonry repair, or extensive roof work: 2 days to multiple days (approximate).
- Final step: verify itemized bids and written warranties before signing — compare scope, exclusions, and whether permits are included. Remember that warranty language and permit responsibility can vary by contractor and locality, so avoid assuming a universal guarantee.
Materials, lifespan, inspections and prevention
Material comparison
- Galvanized steel — Relative cost: low; Expected lifespan (approximate): 10–20 years (unsourced — actual life varies by environment); Pros: inexpensive, easy to form on-site; Cons: corrodes in salty or acidic environments, shorter life where water pools.
- Aluminum — Relative cost: low–medium; Expected lifespan (approximate): 15–25 years (unsourced — varies with thickness and exposure); Pros: lightweight, resist corrosion, easy to work with; Cons: softer than steel (can dent), can galvanically corrode against dissimilar metals.
- Lead — Relative cost: medium–high; Expected lifespan (approximate): 40+ years (unsourced — very long-lived in many climates); Pros: extremely malleable, durable, long life, excellent waterproofing when formed correctly; Cons: heavy, expensive, environmental/handling concerns, not allowed by some codes.
- Copper — Relative cost: high; Expected lifespan (approximate): 50+ years (unsourced — excellent longevity typical); Pros: very durable, develops protective patina, low maintenance; Cons: high upfront cost, can stain nearby masonry or roofing, requires skilled installation.
Note: the lifespan numbers above are approximate and depend heavily on local climate, exposure (salt spray, industrial pollution), installation quality, and maintenance. Call out any specific manufacturer warranties or local code limits when planning replacement.
Thermal expansion and how installers allow movement
Metal flashing expands and contracts with temperature changes. Good installers plan for that movement so seams and roof connections don’t split open. Common on-site methods include:
- Using slip joints (one flashing piece slides inside another) so pieces can move independently.
- Leaving short, intentional gaps at seams bridged by a flexible sealant rather than rigid soldering where movement is expected.
- Using overlapping bends sized to allow sliding instead of tightly crimped seams.
- Choosing mechanical fasteners plus sealant in places where soldering would make a joint too rigid; conversely, solder or welded seams are used where a permanent, water-tight joint is required but movement is minimal.
- Fastening to allow the flashing to rest on the roof surface rather than being nailed rigidly in a way that prevents flexing.
In simple terms: installers alternate sliding connections, overlaps, and flexible seals so temperature shifts don’t tear the flashing away from the chimney or crack the waterproof seal.
Maintenance checklist
- Annual visual inspection of chimney flashing (roof access or during a professional roof inspection).
- After major storms check flashing for lifted edges, missing fasteners, or punctures.
- Check mortar and chimney crown for cracks or gaps that let water reach flashing.
- Clear debris (leaves, branches) from around the chimney base and cricket to prevent ponding.
- Check and re-seal joints and exposed fasteners with appropriate roofing-grade sealant as needed.
- Look for corrosion or rust; replace or repair corroded flashing sections promptly.
- Document and photograph issues each visit for warranty, insurance, and repair planning.
Inspection frequency and code / insurance considerations
Inspect chimney flashing at least once a year and after every major storm. More frequent checks are wise if your home is near the coast, in an industrial area, or if you notice ponding water or chimney movement — these factors shorten flashing life and raise failure risk.
Note: local building codes and many homeowner insurance policies may require documented maintenance or professional inspections for certain claims. Keep inspection records and any repair invoices; they help with warranty coverage, insurance claims, and proving code-compliant repairs. For specific code rules and insurance requirements in your area, consult your local building department or your insurer.
Next: Why chimneys are the #1 spot for roof leaks
Regional code, permitting and insurance considerations
Typical code / permit triggers (short, action-oriented)
- New flashing or full chimney rebuild — permits often required.
- Changes to roof slope, eaves, or gutters near the chimney — check local permit triggers.
- Replacing structural supports or masonry at the chimney — usually needs a permit/inspection.
- Replacing roof covering over >50% of roof area (local “replacement” thresholds vary) — may trigger permit and updated flashing requirements.
- Visible rot, fire damage, or major structural cracks — inspector will likely require repairs and verification of proper flashing.
- Work affecting fire separation or venting (chimney liners, caps) — expect code review.
What inspectors commonly look for
- Proper step and counterflashing installation (secure, lapped, directing water away).
- Flashing height and embedment into masonry consistent with code.
- Kick-out flashing at sidewalls and clear diversion into gutters—if missing, they’ll flag it.
- Sealing vs mechanical fastening — flashings should be mechanically attached where codes or manufacturer require.
- Condition of adjacent shingles, underlayment, and masonry that could cause recurring leaks.
Quick reference to guidance
- Follow industry best practices where codes are silent: Flashing code and best practices — IRC/NRCA guidance
Insurance claims — short facts and actions
- Document everything immediately: take dated photos from multiple angles and note the date of discovery.
- Distinguish cause vs. wear-and-tear: insurers often deny wear-and-tear; record recent maintenance and age of materials.
- Collect repair estimates from reputable contractors to support the claim.
- Avoid admitting fault when speaking to adjusters; stick to documented facts and photos.
- Keep records of inspection reports, estimates, and any emergency repairs.
Confirm local requirements and prepare inspection photos for claims.
How chimney flashing ties into broader residential roofing care
Quick connection
Proper chimney flashing maintenance directly protects your roof’s lifespan and reduces long‑term repair and replacement costs.
Where chimney flashing intersects with overall roof care
- Inspection scheduling: Include flashing checks during your regular roof inspections to catch gaps or rust early.
- Budgeting: Factor flashing repair or replacement into short‑term repair budgets and long‑term replacement funds.
- Coordinating with shingle work: Plan flashing replacement when shingles are being replaced to ensure watertight seals and avoid rework.
- Lifecycle planning: Treat flashing as a component of the roof system—align its replacement with major roof milestones rather than as a standalone fix.
Next steps
When you’re planning a roof replacement or major chimney work, coordinate flashing work with your contractor to save time and money; learn more in our Residential roof repair overview and contact Blue Rhino Roofing for a free inspection and a coordinated plan.
Conclusion and recommended next steps
Key takeaways
- Chimneys are a common leak source — flashing and masonry joints are frequent failure points.
- Step flashing + counter flashing is the correct long-term solution, not just surface patches.
- Install crickets for wide or low-slope chimneys to divert water around the chimney.
- Caulk and sealants are temporary — they delay leaks but won't replace proper flashing.
Next steps (clear actions)
- Inspect now: check chimney flashing, mortar joints, and nearby shingles for stains or soft spots.
- Use a simple checklist: look for rusted flashing, lifted shingles, cracked mortar, and missing counter flashing.
- Apply short-term fixes only if needed: temporary sealant or tarp to limit damage until a permanent repair is scheduled.
- Schedule a professional inspection: Schedule an inspection via /roof-leak-repair.
- Learn broader repair and replacement options: Learn about broader options at /roof-repair.
Documentation reminder
Be sure to document damage with dated photos and keep all receipts and repair records for warranties and insurance.
Frequently Asked Questions
Q: How much does chimney flashing repair cost?
A: Typical chimney flashing repairs range based on damage and materials; see our guide on signs of failing flashing and expected costs for a deeper breakdown and local estimates. (Signs & costs)
Q: Can I just recaulk the flashing to stop a leak?
A: Caulk can be a short-term stopgap but is rarely a permanent fix; for guidance on when to repair vs. replace flashing and when caulk is appropriate, read our repair vs replacement section. (Repair vs replacement)
Q: My flashing is rusty — is that dangerous?
A: Rust usually means the metal has lost protection and will fail sooner rather than later; check the signs of failing flashing and expected costs to decide if repair or replacement is needed. (Signs & costs)
Q: How long should chimney flashing last?
A: Lifespans vary by material and installation quality — give typical ranges and maintenance needs a look in our materials and lifespan section for specifics. (Materials & lifespan)
Q: Is flashing repair something I can DIY?
A: Simple sealant touch-ups are doable for experienced DIYers, but diagnosing hidden damage and doing a long-lasting re-flash is best left to pros; see our repair vs replacement guidance before attempting a DIY fix. (Repair vs replacement)
Q: How do I tell if the leak is coming from the chimney flashing or somewhere else?
A: Leaks that return after temporary fixes or appear around the chimney base usually point to flashing failure — consult our signs checklist and cost page to identify common flashing problems. (Signs & costs)
Q: Will replacing flashing damage my roof or shingles?
A: When done correctly, a professional re-flash minimizes shingle disturbance; if your roof already shows widespread wear you may need a full replacement — compare options in our repair vs replacement article. (Repair vs replacement)
Q: Do chimney crowns or caps cause the same problems as flashing?
A: Crown or cap failures can mimic flashing leaks but require different fixes; see the signs & expected costs page to learn how to tell them apart and what repairs each needs. (Signs & costs)
Q: What flashing material is best for my chimney?
A: Best choice depends on your budget, roof type, and local climate — review typical materials and lifespan comparisons in our materials and lifespan section to pick the right one. (Materials & lifespan)
Q: How quickly should I act if I find failing flashing?
A: Prompt action is recommended because trapped moisture can worsen damage; check our signs & costs page for urgency cues and next steps. (Signs & costs)
Call to Action
If you suspect chimney flashing problems, schedule a no-cost inspection via /roof-leak-repair or learn about broader roof repair options at /roof-repair . For emergency leaks, contact local emergency services or your local roofing provider right away.
Frequently Asked Questions About Chimney Flashing
How much does chimney flashing repair typically cost compared with full replacement?
Minor repairs such as resealing joints, replacing a few pieces of step flashing, or patching corroded areas commonly run about $150 to $500 depending on accessibility, while full replacement including new step and counter-flashing and any chimney preparation typically runs $500 to $3,500. Aluminum or galvanized steel sits toward the lower end, and lead or copper, or jobs requiring scaffolding or masonry work, push it higher. An inspection that accounts for roof slope, chimney size, and local labor rates will narrow the range.
Can I use caulk or roof cement to permanently fix leaking chimney flashing?
Caulk or roof cement can buy time and stop small leaks temporarily, but they are not a permanent solution for flashing that is corroded, loose, or improperly integrated with shingles and masonry. These products can harden and crack with thermal cycling and weather, trapping moisture behind them and hiding a larger failure. Use caulk only as an emergency measure while you arrange for a proper repair or replacement; a permanent fix requires correct flashing details, replacement of compromised metal, and proper integration with the roofing materials.
Will rust on the flashing cause structural damage or just leaks?
Rust itself indicates the metal has lost corrosion resistance and is at higher risk of developing holes that allow water to enter. Initially, rust causes leaks where water follows seams and fastener holes, but prolonged moisture intrusion can lead to rot in roof decking, damaged insulation, mold growth, and deterioration of adjacent chimney masonry. Address rusted flashing promptly to stop water entry and avoid escalating structural and interior damage.
How long should different flashing materials (aluminum, galvanized steel, lead, copper) last?
Lifespans depend on installation quality and environment. Typical useful life ranges are:
- Aluminum: about 10 to 20 years in most climates; lighter and less expensive but more prone to denting and corrosion in coastal or acidic conditions.
- Galvanized steel: roughly 15 to 25 years if the zinc coating remains intact; susceptible to rust once the coating wears.
- Lead: 30 to 50 years when properly installed; durable and malleable but expensive and heavier.
- Copper: 40 to 70 years and often outlasts the roof when installed correctly; premium cost but excellent longevity and corrosion resistance.
Expect shorter service life where flashing is exposed to heavy salt, pollution, or frequent freeze–thaw cycles. Regular inspections and maintenance extend performance and reveal when a replacement is wiser than repeated patching.
Can a chimney cap or damaged crown cause leaks that look like flashing problems?
Yes. A cracked or deteriorated crown, or a missing or damaged cap, lets water enter the flue or run down the chimney exterior, producing staining and interior leaks that mimic flashing failure, and mortar deterioration between crown and chimney channels water toward the flashing too. A thorough inspection checks the cap, crown, masonry joints, and flashing details together so the repair targets the true source.
Schedule a no-cost roof inspection or learn more
If you notice staining, active dripping, or any sign of compromised flashing, arrange a free roof inspection so a professional can confirm the source and recommend the right repair or replacement; you can also explore broader roof repair options to plan longer term maintenance.

Shawn Swearingen
Shawn Swearingen leads Blue Rhino Roofing, a BBB A+ accredited, Texas-licensed roofing company based in Katy. He's on the roof and on the phone, and known for telling homeowners the straight truth about whether they need a repair or a replacement.