Claims are won and lost on documentation. Two homeowners can have the same hail damage, and the one with clear dated photos, a record of the storm, and an itemized list of what was hit tends to get a fair settlement faster. The good news: you do not need special gear, just a phone and a little method. Here is exactly how to document Katy roof storm damage so your claim holds up.
A quick safety note first. You do not have to climb on the roof, and we would rather you did not. Most of what an adjuster needs can be captured from the ground, a ladder at the eaves, or inside the attic. We are glad to do the rooftop documentation for you on a free inspection.
Start with the storm itself
Before you photograph a single shingle, capture the event. Insurers want to tie the damage to a specific covered storm on a specific date.
- Note the date and time of the storm.
- Save any weather alerts, news reports, or local hail maps for that day.
- Photograph hail on the ground next to a coin or ruler for scale if you can do it safely during the storm.
- Write down what you heard and saw, loud impacts, wind direction, downed limbs.
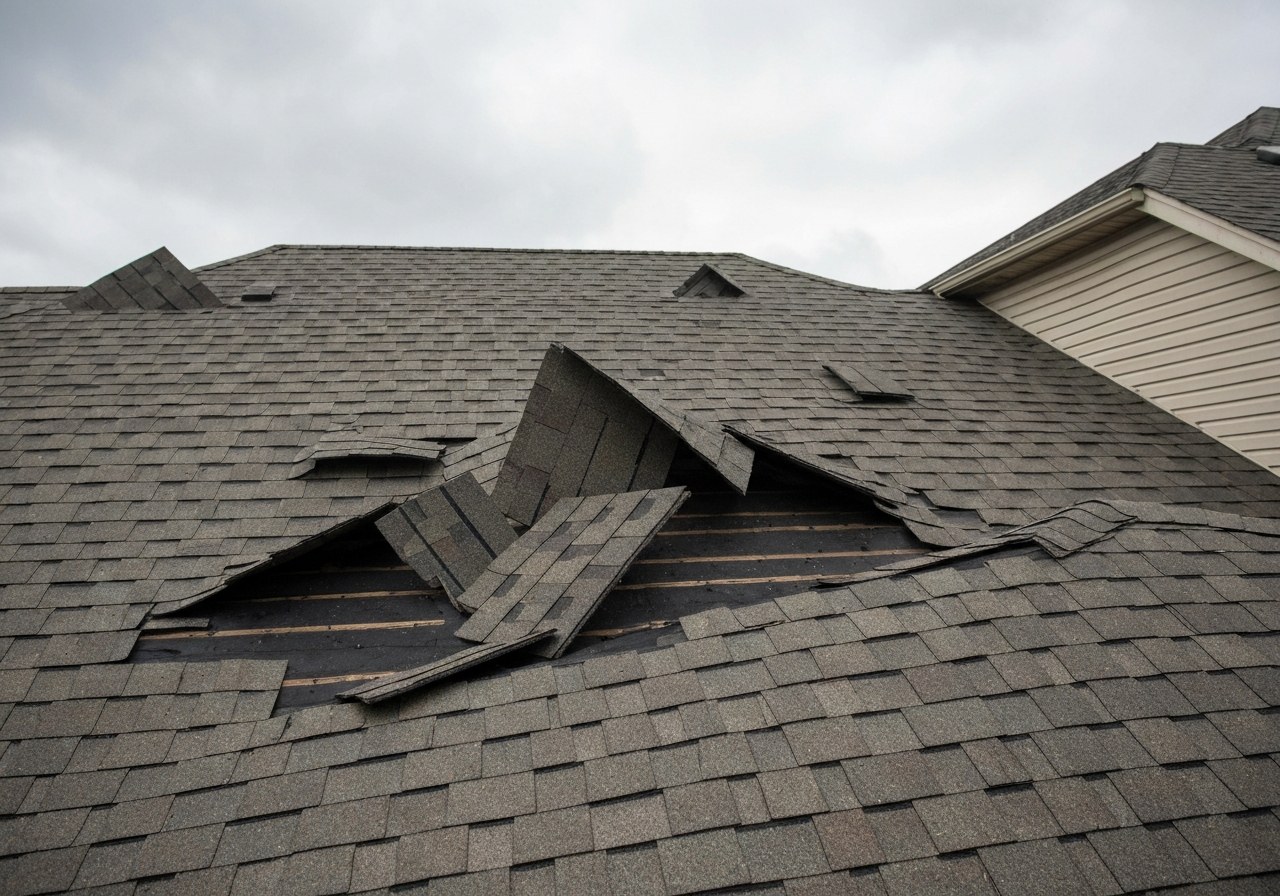
Photograph the damage the right way
Good claim photos follow a simple pattern: wide, then medium, then close. The wide shot proves it is your house, the medium shows the area, and the close-up shows the actual damage.
What to capture
- Roof surfaces: bruised or cracked shingles, granule loss, missing or lifted shingles.
- Soft metals: dented gutters, downspouts, vents, flashing, and your AC unit fins, hail leaves obvious dings here.
- Interior: ceiling stains, water spots, and any attic daylight or wet decking.
- Surrounding clues: dented mailbox, fence caps, or car, supporting evidence a storm hit your address.
"The homeowners who document well make my job and the adjuster's job easy. Dated photos and a simple list of what got hit cut through a lot of back-and-forth. When in doubt, take more pictures than you think you need."
Shawn, Owner, Blue Rhino RoofingKeep a paper trail
| Document | Why it helps your claim |
|---|---|
| Dated photos | Ties damage to the storm date and your address |
| Weather records | Proves a covered hail or wind event occurred |
| Damage list | Gives the adjuster an itemized scope to verify |
| Receipts | Documents temporary repairs like tarping |
| Communication log | Records dates, names, and what was said |
Document temporary repairs too
If you tarp a leak or make an emergency fix to prevent more damage, photograph it and keep the receipts. Insurers generally expect you to mitigate further damage, and those costs are often reimbursable. See our guide to emergency roof tarping for how to do it safely.
Documentation checklist
- Date and details of the storm saved
- Wide, medium, and close photos of each damaged area
- Soft metals and interior stains photographed
- Itemized list of everything damaged
- Receipts for any temporary repairs
- A folder or notes app with everything in one place
Let your roofer document the roof
For the parts you cannot safely reach, a roofer's photo report carries weight with adjusters. On a free inspection we photograph every slope, mark damage, and hand you a record you can submit with your claim. From there it flows right into the rest of the claim process, and if you would like us to meet your adjuster, that is covered in working with your adjuster.
The bottom line
Strong documentation is the cheapest insurance you can give your insurance claim. Capture the storm, photograph wide-to-close, list what was hit, keep your receipts, and let a roofer handle the rooftop record. If a storm just rolled through, book a free inspection and we will document everything for you, or call Shawn at 346-733-8558. You can also start with our full roof insurance claim help.

Shawn
Shawn leads Blue Rhino Roofing, a BBB A+ accredited, Texas-licensed roofing company based in Katy. He's on the roof and on the phone, and known for telling homeowners the straight truth about whether they need a repair or a replacement.