
346-733-8558 Katy, TX
Licensed & Insured
Blog · Guide

Signs you need a new roof: how to know it's time

Shawn, owner of Blue Rhino RoofingBy Shawn, Owner Updated August 2026 28 min read
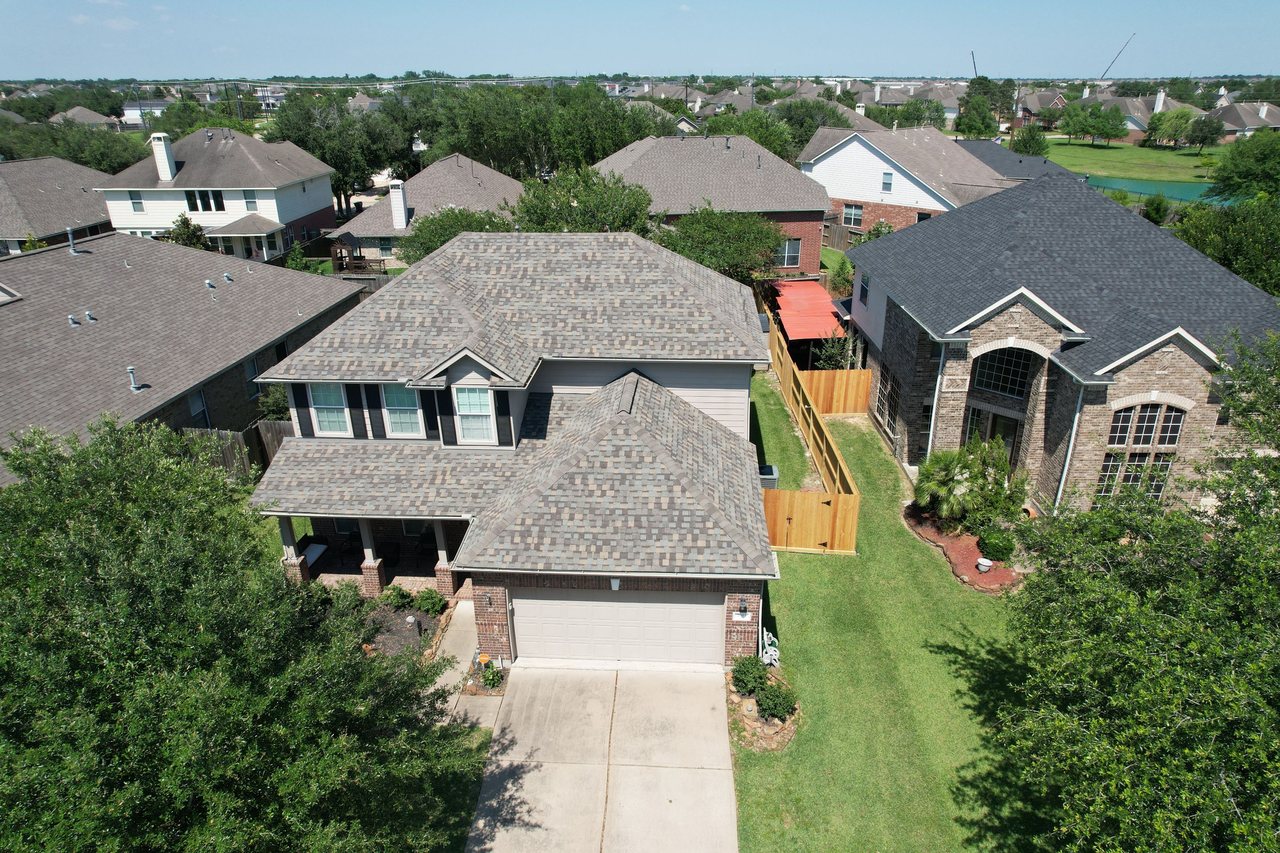
Roofer inspecting an aging asphalt shingle roof

Visible roof damage and subtle interior signs both indicate when a roof is nearing the end of its useful life. Many common problems are easy for a homeowner to spot from the ground, but other failures begin in the attic or within the roof deck and worsen quickly without repair.

Failing to act can increase water damage, shorten the life of attic insulation and mechanical systems, and create safety and mold risks that raise repair costs. In the Katy and Houston climate, expect standard asphalt shingles to last about 20 to 25 years; intense sun, thermal cycling and summer storms commonly shorten that span.

This guide helps you identify exterior and interior warning signs, assess age and lifespan, apply a repair versus replacement framework (including the 25 percent guideline), run a safety‑first ground and attic inspection, understand how heat, storms and hail accelerate wear, evaluate contractors and estimates, weigh insurance and financing considerations, plan timing and next steps, and consider neighborhood factors before scheduling an inspection.

Start by learning the exterior warning signs you can check from the street so you know what to document and photograph.

Introduction: why this guide matters in Katy & Houston

Short summary

Typical asphalt shingle life in Texas is about 20–25 years. This guide explains the local climate and roof-age signs that shorten shingle life, when to repair versus replace, and how to get a reliable local contractor. If you want a quick, professional opinion, Blue Rhino Roofing offers a free roof inspection — see the CTA at the end of this guide.

Local climate impact

Houston-area climate speeds shingle aging in ways homeowners should watch for. High daytime temperatures and strong sun cause the asphalt binder to soften and the granules to break down faster, cutting real-world service life below manufacturer warranty expectations. The NRCA notes that elevated temperatures can prematurely age asphalt shingles.

Source: NRCA Roofing Guidelines — Resources

The main local factors and how they accelerate wear:

  • Heat / UV: Intense sun fades granules and degrades the asphalt coating, making shingles brittle.
  • Thermal cycling: Daily heating and cooling (roof surface vs. night air) causes small split-and-settle damage over time.
  • Humidity: Persistent moisture and high dew points can speed adhesive failure and encourage algae/stain growth.
  • Storms / hail: Hail dents and tears granules; even non-penetrating impacts shorten service life.
  • Wind: Repeated gusts lift edges and loosen sealants, increasing the risk of shingle loss in later storms.

What this guide covers

  • Exterior warning signs every homeowner should check
  • Interior signs (attic leaks, stains, insulation issues)
  • Age & typical lifespan explained for Katy/Houston conditions
  • Repair vs. Replace — when patching is fine and when full replacement makes sense
  • Free inspection checklist you can use or bring to an inspector
  • Storm & hail effects and insurance considerations
  • Choosing a contractor — questions to ask, red flags, guarantees
  • Costs & financing overview and local price ranges
  • Timing & next steps — best seasons to replace in Houston area
  • Community context — Blue Rhino Roofing service area and guarantees
  • Call to action & FAQs — how to book your free inspection and common answers

Next, check the exterior warning signs every homeowner should look for.

Image gallery suggestion:

Exterior warning signs every homeowner should check

Missing, curling, cupping, cracked shingles

Missing, curling, cupping, or cracked shingles are visible deformities or gaps in your shingle field that usually indicate advanced wear or storm damage. Repair vs replace: small isolated cracks or a few curled shingles can often be repaired; widespread curling, cupping, or many cracked shingles often indicates replacement may be needed. Urgency: moderate to high — schedule an inspection soon to avoid leaks. In Houston, heat and UV exposure accelerate shingle curling and cracking.

Granule loss and granules in gutters

Granule loss is when shingle mineral granules thin or appear in your gutters; it signals asphalt wear and aging. Repair vs replace: scattered granule loss can be monitored, but heavy, continuous loss often indicates the shingles are nearing end of life and replacement may be needed. Urgency: medium — check after heavy rain. Heat and hail can speed granule fallout; blocked gutters worsen water issues.

Shiny or smooth patches on shingles

Shiny or smooth patches are areas where the protective asphalt or granule surface has worn away and the shingle looks glossy. Repair vs replace: small isolated patches can sometimes be patched, but larger smooth areas often mean the shingle’s protective layer has failed and replacement should be considered. Urgency: medium — these spots are prone to faster deterioration and should be checked soon.

Missing shingles / blow‑offs after storms or hail

Missing shingles or blow-offs are sections where shingles have been torn away, exposing the underlayment and decking. Immediate actions & urgency: high — temporary tarping and a prompt professional inspection are recommended to prevent water intrusion. After Houston-area storms or hail, prioritize fast repairs to avoid interior damage.

Damaged or rusted flashing

Damaged, loose, or rusted flashing is compromised metal (around chimneys, vents, valleys) that fails to seal roof intersections. Repair vs replace: minor gaps or pulled flashing can often be resealed or replaced locally; extensively corroded or bent flashing often merits replacement. Urgency: medium to high — flashing failures commonly lead to leaks and should be addressed quickly.

Visible daylight or roof board gaps

Visible daylight through the roof or gaps between roof boards means the roof deck or underlayment is exposed. Urgency: very high — this is a clear sign of severe failure and requires immediate professional inspection and likely extensive repair or replacement. Move indoors items away from leak-prone areas and arrange an urgent assessment.

Caption: Close-up images of curling shingles, granules in gutters, shiny worn shingles, hail bruises, damaged flashing, and missing shingles.

Interior warning signs to watch for in the attic and living areas

Water stains and active leaks

Water stains and active leaks: Water spots on ceilings or walls, bubbling paint, or visible drips are direct signs of a roof leak and require immediate attention. Stop further damage by placing buckets under active drips, moving valuables away, and contacting a roofing professional for a prompt inspection. If the stain is recent and spreading, treat it as urgent—roof structure and interior finishes can deteriorate quickly.

Attic inspections

Attic inspections: Check the attic regularly — here’s a checklist to follow. Photograph each finding from multiple angles and include a ruler or tape for scale when possible.

  • Daylight showing through:
  • What to look for: Any shafts or dots of daylight visible when standing in the attic.
  • Why it matters: Daylight indicates missing or damaged roofing underlayment or shingles. Water and pests can follow these openings.
  • Photo tip: Photograph from inside pointing toward the light and from the roof exterior if safe.
  • Urgency: High — schedule a roof inspection soon.
  • Wet or compressed insulation:
  • What to look for: Insulation that looks darker, feels damp, or is matted down instead of fluffy.
  • Why it matters: Wet insulation loses R-value and raises cooling loads; persistent moisture also promotes mold.
  • Photo tip: Take a close-up showing texture and a wider shot showing surrounding area. Include a hand or tool for scale.
  • Urgency: High — inspect source of moisture and replace affected insulation.
  • Damp rafters, sheathing, or musty smell:
  • What to look for: Dark streaks on wood, soft or spongy rafters, or a persistent musty odor when you enter the attic.
  • Why it matters: Damp wood can rot and weaken roof structure; odor often signals ongoing moisture problems.
  • Photo tip: Capture the wood close-up and a wider framing of its location; record the smell and timing in notes.
  • Urgency: Medium–High — prompt evaluation recommended, especially if structural softness is present.
  • Active drips or standing water:
  • What to look for: Visible water drops, puddles, or wet spots on attic floor or roof sheathing.
  • Why it matters: Active leaks indicate an open pathway for water; ongoing leaks damage structure and insulation rapidly.
  • Photo tip: Photograph the drip source and the puddle; use a time-stamped photo if possible.
  • Urgency: Immediate — contain water, document, and call a roofer now.

Sagging or soft roof deck

Sagging or soft roof deck: A roof deck that sags or feels spongy underfoot (noticed from the attic or when visible from the eaves) signals serious structural compromise. This condition can be caused by long-term water damage or failed decking and creates a collapse risk. If you find sagging or soft spots, avoid walking on the affected area and contact a licensed roofer immediately for an emergency assessment.

Mold, moss, rot and wood decay

Mold, moss, rot and wood decay: Houston’s humidity accelerates mold growth and wood rot compared with drier climates. Visible mold, persistent moss on roof surfaces, or soft/crumbly wood at roof edges or in the attic means decay is underway. Call a roofing professional when you see spreading mold, extensive moss coverage, or weakened wood so they can identify the moisture source and recommend repairs or replacement.

Rising energy bills and ventilation/insulation signs

Rising energy bills and ventilation/insulation signs: Degraded shingles or poor roof ventilation allow more heat into the attic and reduce insulation effectiveness. The causal pathway is: damaged roof or blocked vents → higher attic temperatures and/or wet insulation → reduced R-value and greater cooling load → higher utility bills. Before assuming you need a full roof replacement, have a contractor check attic ventilation, insulation condition, and minor roof damage; fixing ventilation or replacing compressed insulation can often restore efficiency at lower cost.

Next: Exterior warning signs every homeowner should check

Age and lifespan: how old is too old for an asphalt shingle roof

Typical asphalt shingle roofs in Texas last about 20–25 years.

Typical lifespans

Typical asphalt shingle roofs in Texas last about 20–25 years. This is a local estimate and actual life will vary by product quality, installation, attic ventilation, and Texas weather; see NRCA roof inspection guidance (https://www.nrca.net/) for national inspection and maintenance recommendations.

  • 3‑tab (basic) shingles: Generally last about 15–25 years depending on quality and exposure.
  • Architectural (dimensional) shingles: Commonly last about 20–30 years with proper installation and ventilation.
  • High‑grade / designer / SBS-modified shingles: Can last 25–40 years in ideal conditions.

All ranges are approximate; manufacturers and the NRCA note that actual lifespan depends on installation quality, roof slope, attic ventilation, storm exposure, and maintenance.

How to find your roof's age

  1. Check permit and installation records with your city or county building department.
  2. Ask the previous owner or review the seller’s disclosure and any paperwork left at closing.
  3. Examine shingles for manufacturer codes, date stamps, or leftover packaging/labels (look under eaves or in the attic for labels).
  4. Get a professional inspection — an experienced roofing contractor can often estimate age from wear patterns and installation details.

When age alone means replacement

Should a 20‑year‑old roof be replaced? Not always — but often. Age is one important factor; a 20‑year‑old asphalt shingle roof may still have useful life if the shingles show minimal granule loss, no widespread curling or cracking, the decking is sound, and there are no active leaks. However, age combined with any of these conditions usually means replacement is the prudent choice:

  • Soft or sagging deck under the shingles
  • Widespread granule loss (bare spots on shingles or lots of granules in gutters)
  • Curling, cupping, or large areas of missing shingles
  • Multiple leaks or interior water damage
  • Repeated repairs that add up in cost

If your roof is around 20 years old and any of the above signs are present, replacement is commonly recommended rather than repair. For an accurate assessment, follow NRCA roof inspection guidance (https://www.nrca.net/) or schedule a professional inspection to check decking, flashing, attic conditions, and overall remaining life.

Repair vs. replace: a clear decision framework for homeowners

Step 1: Document damage

  1. Take clear photos of all visible damage from multiple angles (roof surface, eaves, flashing, valleys).
  2. Map the locations — sketch or label where each photo was taken (e.g., "north slope near chimney").
  3. Note dates and conditions — record when you first noticed the damage and any recent storms or events.
  4. Check the attic and ceilings for stains, mold, wet insulation, or daylight through the roof deck.
  5. Save storm timelines and reports (local severe-weather alerts, insurance claim numbers) and keep receipts for any temporary repairs.

Step 2: Quantify scope — the 25% guideline (use as a guideline, not an absolute rule)

A practical rule many contractors use is the 25% damaged-area guideline: if visible roof damage covers more than about 25% of the roof area, a full (or nearly full) roof replacement is likely recommended. Treat this as a guideline to help decisions—other factors (age, decking condition) can change the outcome.

Examples to help visualize (guideline only):

  • Minor (< ~5%) — Repair likely: a few missing shingles, one small localized area, or limited edge/corner damage.
  • Moderate (~10–25%) — Repair possible; consider replacement if other concerns: multiple isolated spots, recurring leaks in the same area, or damage on an older roof. Replacement may be the better long-term option if problems are recurring or the roof is near the end of its expected life.
  • Extensive (> ~25%) — Replacement likely recommended: large contiguous sections damaged, widespread shingle granule loss, or many failing shingles across multiple slopes.

(Again: these percentages are a practical guideline — not an absolute rule. Use them to prioritize inspection and contractor recommendations.)

Step 3: Consider age, prior repairs, and recurring issues

  • Roof age: older asphalt shingles near or past their expected lifespan weigh toward replacement.
  • History of repairs: many previous patch repairs can indicate underlying, widespread wear.
  • Recurring leaks or chronic issues: repeated failures in the same area suggest systemic problems (decking, flashing, ventilation).
  • Hidden decking or structural damage: visible surface damage may understate rot or decking failure underneath.
  • Ventilation or attic problems: poor ventilation accelerates shingle deterioration and can justify replacement sooner.

Step 4: Insurance and storm claims

Insurance adjusters often use visible-damage thresholds when evaluating storm claims. The 25% guideline can influence whether an adjuster recommends replacement or approves repairs, but adjusters also inspect for underlying damage (decking, interior water damage) and document age and wear. Always document damage thoroughly, provide your photos and dates, and ask for the adjuster’s notes. If you disagree with a claim decision, a contractor’s documented inspection can support an appeal.

Step 5: When to call a professional immediately

  • Active leak(s) with water dripping into living spaces
  • Sagging or soft spots in the roof deck or ceiling
  • Large contiguous area of missing shingles or exposed decking (> ~25% guideline)
  • Signs of structural compromise after a storm (fallen branches, visible sheathing failure)

Designer note: include the decision flowchart from our data_ideas — produce a simple flowchart that maps the steps above (Document → Quantify using 25% guideline → Check age/prior repairs → Insurance considerations → Repair vs likely replacement). The flowchart should show outcomes (Repair / Likely replacement / Call pro immediately) based on the documented inputs.

Inspection checklist (ground-level first) and safety notes

Ground-level checklist — numbered inspection items

  1. Shingle condition (curling, cracking, missing)Why it matters: exposed areas let water in and shorten roof life. Urgency: High
  2. Granule loss in gutters or at downspoutsWhy it matters: losing granules means reduced UV/protection and imminent shingle failure. Urgency: High
  3. Shingle stains or dark streaks (algae/moss)Why it matters: biological growth retains moisture and can degrade shingles over time. Urgency: Medium
  4. Sagging rooflines or uneven areasWhy it matters: structural issues can indicate decking or framing failure. Urgency: High
  5. Flashing condition around chimneys, vents, valleysWhy it matters: damaged flashing causes concentrated leaks. Urgency: High
  6. Missing, loose, or rusted nails and fastenersWhy it matters: loose fastening leads to shingle blow-off and leaks. Urgency: Medium
  7. Clogged or damaged gutters and downspoutsWhy it matters: poor drainage increases roof and fascia damage risk. Urgency: Medium
  8. Granule bald spots on shingles (visible from ground)Why it matters: indicates advanced wear and reduced weather protection. Urgency: High
  9. Evidence of water stains on exterior walls or soffitsWhy it matters: sign of active leaks or moisture intrusion. Urgency: High
  10. Roof penetrations (satellite dishes, HVAC units) and seal integrityWhy it matters: penetrations are common leak sources. Urgency: Medium
  11. Chimney crown and mortar conditionWhy it matters: cracks allow water into masonry and roof interface. Urgency: Medium
  12. Attic venting and visible ridge/soffit vents from groundlineWhy it matters: poor ventilation accelerates shingle failure and creates moisture issues. Urgency: Medium

(Quick tip: use binoculars and a clear photo from the ground to document each item.)

Safe attic checks from inside the home

  • PPE before entry: sturdy shoes or boots, gloves, eye protection (safety glasses), and an N95 mask for dusty or moldy attics. Carry a reliable flashlight or headlamp.
  • Do not step on insulationstep only on the ceiling joists/rafters to avoid falling through drywall.
  • Look for light coming through the roof — pinpoint holes or missing shingles. Photograph each gap.
  • Check for stains, damp insulation, or mold — photograph markers and note locations.
  • Inspect attic ventilation and insulation levels — inadequate ventilation or low insulation worsens roof life. Take wide-angle photos.
  • Smell test for musty odors — persistent odors often mean hidden moisture. Document with photos and notes.
  • Check around roof penetrations from below (vents, chimneys) — look for water stains or deteriorated seals. Photograph these areas.
  • Avoid working alone if attic is cramped or has limited access — have someone nearby and keep a charged phone on you.
  • Keep a camera or phone with flash for clear photo documentation and to build a photo log for later review.

What not to do

  • Don't climb a wet or steep roof.
  • Don't walk on a fragile or brittle roof surface.
  • Don't remove shingles yourself — that can make leaks worse.
  • Don't delay on active leaks — immediate action reduces interior damage.

When to call the pro

If you find high-urgency items (active leaks, sagging rooflines, large missing shingle areas, or evidence of structural issues), stop further DIY checks and schedule a professional inspection. Blue Rhino Roofing offers a free, no-pressure inspection — we provide photo documentation, an attic check, a written recommendation, and a no‑obligation estimate.

  • Arrange your free inspection here: Schedule a free inspection

data_idea: Design a downloadable checklist PDF (printable ground-level + attic checklist) that includes checkboxes and space for a photo log; produce both a full-page printable and a phone-friendly PDF for on-site use.

How Houston/Katy heat, storms and hail specifically affect shingle life

Heat and UV effects

In the Houston/Katy area, intense heat and strong UV exposure accelerate shingle aging. UV rays break down asphalt binders and the shingle surface, while daytime heating and nighttime cooling cause repeated thermal cycling. The result is brittleness, cracking, and accelerated granule loss, which reduces waterproofing and shortens shingle life.

Humidity and mildew/rot in the coastal plain

High year-round humidity common to the Gulf Coast creates conditions for mold, mildew, and faster roof-deck rot when moisture gets trapped under roofing materials. Even small, persistent leaks or poor attic ventilation can lead to wood deck deterioration and rot that weakens roof structure and speeds the need for replacement.

Wind, storms and hail indicators

After a wind, storm, or hail event, check for these visible signs on your roof. If you see any of them, document with photos and consider scheduling an inspection.

  1. Missing or lifted shingles — shingles that are gone, curled, or have loose edges.
  2. Shingle bruising or granule loss — soft spots, bald patches where granules are gone, or excessive granules in gutters.
  3. Dents or dings on metal components — visible dents on gutters, vents, or metal flashing that indicate hail impact.
  4. Cracked or split shingles — straight or irregular cracks across the shingle surface from impact or stress.
  5. Exposed or damaged underlayment — visible felt or synthetic underlayment where shingles are broken or missing.
  6. Interior leaks or new stains — water stains on ceilings or attic wet spots after a storm.

Guideline for timing: inspect within 48–72 hours after a major storm for visible damage (this is a guideline — adjust based on safety and access). Always prioritize personal safety and follow official guidance — see the NWS severe weather and hail information at https://www.weather.gov/ for current warnings, sheltering advice, and when it’s safe to go on your roof.

Upgrading to impact-resistant shingles

Upgrading to impact-resistant or Class 4-rated shingles can reduce visible damage from hail and improve durability, but it’s not a guarantee of no damage. Consider these tradeoffs:

  • Pros
  • Better resistance to hail and impacts, often fewer cosmetic failures.
  • Possible insurance discounts in some areas for impact-rated roofing.
  • Longer perceived lifespan in storm-prone neighborhoods when paired with proper installation.
  • Cons
  • Higher upfront cost compared with standard architectural asphalt shingles.
  • Aesthetic and weight differences — some options may look or sit differently on the roof.
  • Not indestructible — very large hail or extreme winds can still cause damage; upgrades lower risk but don’t eliminate it.

Next: Exterior warning signs every homeowner should check

Choosing a contractor: questions, warranties, and protection during work

Vetting questions to ask

  • Are you licensed to work in my city/state? Ask for the license number and issuing agency.
  • Do you carry general liability and workers’ compensation insurance? Request a certificate of insurance with policy numbers and coverage limits.
  • Can you provide local references from jobs completed in the last 12–24 months? Ask for names, phone numbers, and addresses so you can verify.
  • Do you have experience with roofs affected by local storms (hail, wind, heavy rain)? Ask for examples and any storm-related certifications.
  • Who on your team will be on-site and who is the point of contact? Clarify the project manager or foreman.
  • What specific product and workmanship warranties do you offer? Ask for written details, including length and what is and isn’t covered.
  • Will you obtain required permits and handle inspections, or is that my responsibility? Get commitments in writing.
  • How do you document pre-existing damage and final completion? Ask about photos, written checklists, and completion reports.
  • What is your expected timeline and your payment schedule? Confirm milestones and accepted payment methods.
  • How will you handle unexpected problems or change orders? Ask for examples of typical change-order costs and approvals.

Warranties and guarantees

There are two different warranty types to watch for: manufacturer (product) warranties and contractor workmanship warranties. Manufacturer warranties cover defects in the roofing materials themselves (shingles, underlayment, flashing) and are issued by the product maker—they often require proper installation and registration to remain valid. Workmanship warranties are issued by the contractor and cover installation-related issues (improper flashing, poor sealing, leaks from installation errors). These are separate and can vary widely in length and terms.

Note that certain installation choices—like installing a new shingle layer over an old roof (an overlay)—can affect manufacturer warranties. Many manufacturers either void or limit their coverage when materials are not installed over a clean deck per their specifications. Always get warranty details in writing and ask the contractor to explain any conditions or limitations. Avoid accepting absolute guarantees; instead, get the exact warranty language and the process for filing a claim.

Jobsite protections and cleanup

  • Tarps and roof protection to cover landscaping, vents, and openings.
  • Dumpster or debris container on-site for shingles and construction waste.
  • Magnetic sweep and regular debris checks to remove nails and metal fragments daily.
  • Daily cleanup routine so the site is left safe at the end of each workday.
  • Tree and landscaping protection (boarded walkways, guards on shrubs).
  • Final inspection and walk-through to confirm cleanup and repairs to any incidental damage.

What a complete estimate includes

  1. Scope of work — clear description of tasks (remove old roof, replace decking, install ventilation, etc.).
  2. Materials — brand, product names, sizes, and quantities for shingles, underlayment, flashing, nails, vents.
  3. Line-item costs — labor and material costs broken out so you can see what you’re paying for.
  4. Warranty details — both manufacturer and contractor workmanship warranties with durations and coverage.
  5. Permit responsibility — who will obtain and pay for required permits and inspections.
  6. Cleanup and disposal — how debris will be handled and where materials will be taken.
  7. Timeline — start date, major milestones, and estimated completion date.
  8. Payment schedule — deposit amount, progress payments tied to milestones, and final payment terms.

Verifying credentials

  1. Request the contractor’s insurance certificate that lists the insurer, policy numbers, effective dates, and coverage limits.
  2. Call the insurer (use the phone number on the certificate or the insurer’s public line) to confirm the policy is active and covers the job type and location.
  3. Ask for the contractor’s license number and verify it on your state’s licensing board website or by calling the licensing agency. Some cities also maintain contractor permit lists—check the city permit office if applicable.
  4. Call the provided local references and ask about timeline adherence, cleanup, communication, repairs after completion, and whether any warranty issues arose.
  5. Check recent permit history for the contractor (many local permit portals show contractor names on recent permits) and confirm they close permits and pass inspections.

After verifying credentials, move on to comparing costs, financing options, and scheduling so you can decide with confidence.

Next: Exterior warning signs every homeowner should check

Insurance, cost considerations, financing options, and common hidden costs

How insurance claims typically work after storm or hail

After storm or hail damage, the usual claim process is: file a claim → insurer schedules an adjuster visit → adjuster and insurer determine the scope of covered damage → you get contractor estimates. Adjusters evaluate damage and prepare a report that insurers use to approve repairs or replacement. Contractors often provide detailed estimates that can differ from the adjuster’s scope — keep copies of all inspection reports, photos, and estimates. Filing a claim may or may not affect your premiums; always confirm with your insurance agent before filing.

Cost drivers and hidden costs

Common factors that increase the final price beyond basic shingle replacement include:

  • Decking replacement (rot or structural repairs beneath shingles)
  • Flashing replacement or repair around chimneys, vents, valleys
  • Permit fees required by local building departments
  • Disposal and landfill fees for old roofing materials
  • Tarping or emergency repairs to prevent further damage while waiting for work/settlement
  • Fascia, soffit, or gutter repairs discovered during replacement
  • Unexpected mold or water remediation if leaks have progressed
  • Additional labor for steep or complex roofs (safety and time)

The 25% rule and insurance interplay

As noted earlier in this guide (see section on "When to replace vs. repair"), many insurers use a guideline — commonly referred to as the 25% rule — that compares the cost to repair visible storm damage against the cost of a full roof replacement. If an insurer’s adjuster determines that roof damage exceeds that guideline, they may approve a full replacement; if not, they may only approve repairs. This is a guideline, not a law, and adjuster estimates can vary from contractor estimates. To protect your position: document all damage with photos, get at least two contractor estimates, and share those estimates with your adjuster and insurer.

Financing and payment options

Common ways homeowners pay for roof work include:

  • Contractor financing (financing offered through the roofing company or a partner)
  • Personal loans
  • Home equity loans or HELOCs
  • Credit cards for smaller repairs or deposits

Confirm APRs, repayment terms, fees, and whether prepayment penalties apply before committing. Also verify any payment schedules or down-payment requirements with your contractor. This is not an endorsement of any option — just a list of typical choices; always review terms carefully and choose what fits your budget.

When to act: timing, emergency steps and recommended next steps

Emergency actions

  1. Contain active water — place buckets or pans under active leaks immediately to limit interior damage.
  2. Protect belongings — move furniture, electronics and important documents away from the leak; cover large items with waterproof tarps or plastic sheeting.
  3. Temporary patching if safe — if you can access the area without risk, apply a tarp or temporary seal from the ground or a stable ladder. Do not climb on a wet, unstable or heavily sloped roof.
  4. Turn off electricity in affected areas if water is close to outlets, lights or electrical panels. If you’re unsure, shut power to that circuit and call an electrician or emergency services.
  5. Call a professional — contact Blue Rhino Roofing for emergency response and tarping to stop further damage.

Safety warnings: prioritize personal safety over property. Avoid walking on slick or damaged roofs, and do not attempt major repairs alone. If ceilings bulge from pooled water, evacuate the room and call for help.

What to photograph/save: take clear photos of the interior damage (ceilings, walls, belongings), exterior roof damage, attic water intrusion, and any temporary patches. Timestamp photos and back them up to the cloud for insurance and estimate purposes.

Best scheduling windows in Houston

Schedule major roof work in spring or fall — those seasons have milder temperatures and lower humidity, which improves shingle adhesion and worker safety. Avoid major tear-offs during July–August peak heat: extreme heat softens shingles, increases risk of installer heat illness, and can cause adhesive and material problems that reduce roof longevity.

Next steps checklist

  1. Photograph damage (interior, exterior, attic; timestamp and back up).
  2. Call for a free inspection — https://bluerhinoroofing.net/free-inspection/ for a professional assessment and written report.
  3. Get 2–3 estimates from reputable contractors to compare scope and pricing.
  4. Verify permits and insurance — confirm the contractor pulls required city permits and carries liability and worker’s comp.
  5. Confirm timeline and warranties — get start/completion dates in writing and a clear warranty on materials and labor.
  6. Consider solar sequencing — if you plan to add solar, sequence roofing before solar installation so panels aren’t reinstalled twice and warranty conflicts are avoided.

Next: check the exterior of your home for warning signs every homeowner should watch for — simple visual checks that often indicate a roof replacement is due.

How neighborhood roof projects, inspections and local trends affect homeowner decisions

What neighbors' roof replacements indicate

When several homes on your street get new roofs around the same time, that usually signals one of three concrete things: the roofs reached the same age (many builders used the same materials and install date), a builder- or product-related failure (the same shingle or installation detail is failing across multiple houses), or a recent storm caused clustered damage. Multiple nearby replacements within weeks or a single season often point to storm-related activity; replacements spread over a year or two can point to common installation age or warranty cycles.

Local storm cycles and inspection waves

After hail, wind, or severe storms, you’ll often see an inspection wave: insurers, independent adjusters, and contractors are busier, and scheduling slots fill quickly. In these periods:

  • Expect longer wait times for inspections and repairs.
  • Insurers may open claims windows that make documentation important.
  • Contractors may prioritize storm-related jobs.

Document visible damage immediately (photos and dates), contact your insurer early, and book a professional inspection as soon as practical to avoid long delays and to preserve any claim options. Early scheduling also improves your chances of getting preferred contractors before they reach capacity.

HOA and neighborhood considerations

Before deciding on a replacement or material change, check these common HOA or neighborhood rules:

  • Color/material rules — approved shingle colors or material types.
  • Permit and inspection requirements — local permit proofs or inspection sign-offs the HOA monitors.
  • Coordinated repair schedules — neighborhood-wide projects or timed streetscape repairs that could affect access or staging.
  • Visible covenants — restrictions on visible elements (solar panels, ridge vents, satellite mounts, etc.).

If your home is in an HOA, verify rules before ordering materials or scheduling major work to avoid rework or violations.

Next: Exterior warning signs every homeowner should check

Schedule a free roof inspection

What the free inspection includes

  • Photo documentation of visible roof areas and any concerns
  • Attic check to inspect ventilation, insulation, and interior signs of leaks
  • Written recommendation summarizing findings and suggested next steps
  • No‑obligation estimate for repairs or replacement, when applicable
  • Discussion of financing options available to help with project planning
  • Explanation of our quality guarantee and what it covers

How to prepare for the inspection

  • Ensure clear access to the exterior of your home and roof areas (trim branches, clear pathways)
  • Restrain or secure pets so the inspector can access entry points safely
  • Gather any prior roof documents (warranty paperwork, previous inspection reports, insurance notices)

Link and scheduling instruction

To schedule, use the online form or call to set a convenient time. Start here: /free-inspection/. For more information about replacement options after your inspection, see our roof replacement resource: /roof-replacement/.

(Neutral scheduling language; no obligation — the inspection is informational and intended to help you decide on next steps.)

Frequently Asked Questions

Q: How can I safely check my roof without climbing on it?

A: Use a pair of binoculars from the ground to scan for missing, curled, or damaged shingles, sagging areas, and visible debris; also check attic access for daylight, water stains, or damp insulation. If you spot issues, schedule a professional free roof inspection rather than climbing up yourself.

Q: If my roof is 20 years old but not leaking, should I still replace it?

A: Possibly — have a professional inspect for age-related wear like brittle or curling shingles, worn granules, damaged flashing, and reduced weather resistance; if several signs are present or multiple roof components are failing, replacement is often recommended. Regular inspections and minor repairs can extend life short-term; consult the roof replacement section for guidance.

Q: Will my homeowner insurance cover a new roof after hail or storm damage?

A: Often yes for sudden storm or hail damage, but coverage depends on your policy deductible and cause of damage; file a claim promptly, document damage with photos, and get a professional estimate to support your claim. Expect the insurer to send an adjuster and consider contacting a trusted contractor for help during the claims process.

Q: What is the 25% damage rule and how strictly should I use it?

A: The 25% damage rule says that if storm damage affects 25% or more of the roof surface, many insurers will approve a full replacement — this is a guideline, not a universal requirement. Always document damage with photos, get a professional inspection and estimate, and use the rule only as one factor when discussing coverage with your insurer.

Frequently Asked Questions About Your Roof

How can I safely check my roof without climbing on it?

Use binoculars from the yard and a steady ladder at the eaves only when someone else is home to help. Walk the perimeter looking for missing or curled shingles, granules in gutters, sagging areas, damaged flashing, and damaged vents. Take photos and note locations so a pro can review them. Avoid walking on a hot, wet, or steep roof and never climb if shingles are brittle or there are power lines nearby. If you want a closer look without risk, schedule a professional inspection with photo documentation and an attic check.

If my roof is 20 years old but not leaking, should I still replace it?

Age is a major factor in expected performance even without active leaks. In Texas a standard asphalt shingle roof commonly reaches the 20 to 25 year range for end of useful life because of heat, UV and storm exposure. If shingles are brittle, granule loss is significant, flashing is compromised, or the roof has had multiple repairs, replacement is usually the wiser long term choice. If the roof looks intact and decking and ventilation are sound, you may defer replacement short term but should schedule regular professional inspections and get a written assessment to avoid surprise failures.

Will my homeowner insurance cover a new roof after hail or storm damage?

Many policies cover sudden storm or hail damage but coverage details vary by insurer and policy. Carriers look for visible storm-related impact and may use the 25 percent guideline when deciding between repair and replacement. Document damage with photos, keep emergency remediation receipts, and file a prompt claim if advised. An adjuster will inspect and compare their estimate to a contractor’s. Filing a legitimate claim for storm damage does not always raise rates, but check your policy and speak with your agent to understand deductibles and potential premium effects.

What is the 25% damage rule and how strictly should I use it?

The 25 percent rule is a practical guideline some insurers and contractors use: if about 25 percent or more of your roof surface is damaged, replacement is usually recommended. Use it as one data point rather than a rigid law. Exceptions include older roofs near the end of life, repeated leaks, hidden deck or ventilation damage, or large localized failures around valleys and penetrations; in those cases replacement may be appropriate well below 25 percent. For certainty, document the scope with photos, note the roof age and prior repairs, and get a professional inspection with a written recommendation that weighs both percentage and underlying causes. If any of this is unclear on your roof, a free inspection will give photo evidence, an attic check, and a written recommendation to guide your decision.

Get a free roof inspection

Request a no-cost inspection and receive photo documentation, an attic check, a written recommendation, and a no-obligation estimate. The inspection helps you understand urgency, insurance options, and whether repair or replacement is the best path forward. Schedule a free inspection today to get clear, documented next steps and an honest assessment.

Shawn, owner of Blue Rhino Roofing

Shawn

Owner, Blue Rhino Roofing, Katy, TX

Shawn leads Blue Rhino Roofing, a BBB A+ accredited, Texas-licensed roofing company based in Katy. He's on the roof and on the phone, and known for telling homeowners the straight truth about whether they need a repair or a replacement.

Wondering if your roof needs replacing?

Get a free, no-pressure inspection with photos and a straight answer on repair vs. replacement.

No-pressure consult BBB A+ & Texas licensed You'll talk to the owner
Call Shawn Free Inspection