
346-733-8558 Katy, TX
Licensed & Insured
Blog · Checklist

Roof maintenance checklist for Texas homeowners

Shawn, owner of Blue Rhino RoofingBy Shawn, Owner Updated August 2026 35 min read
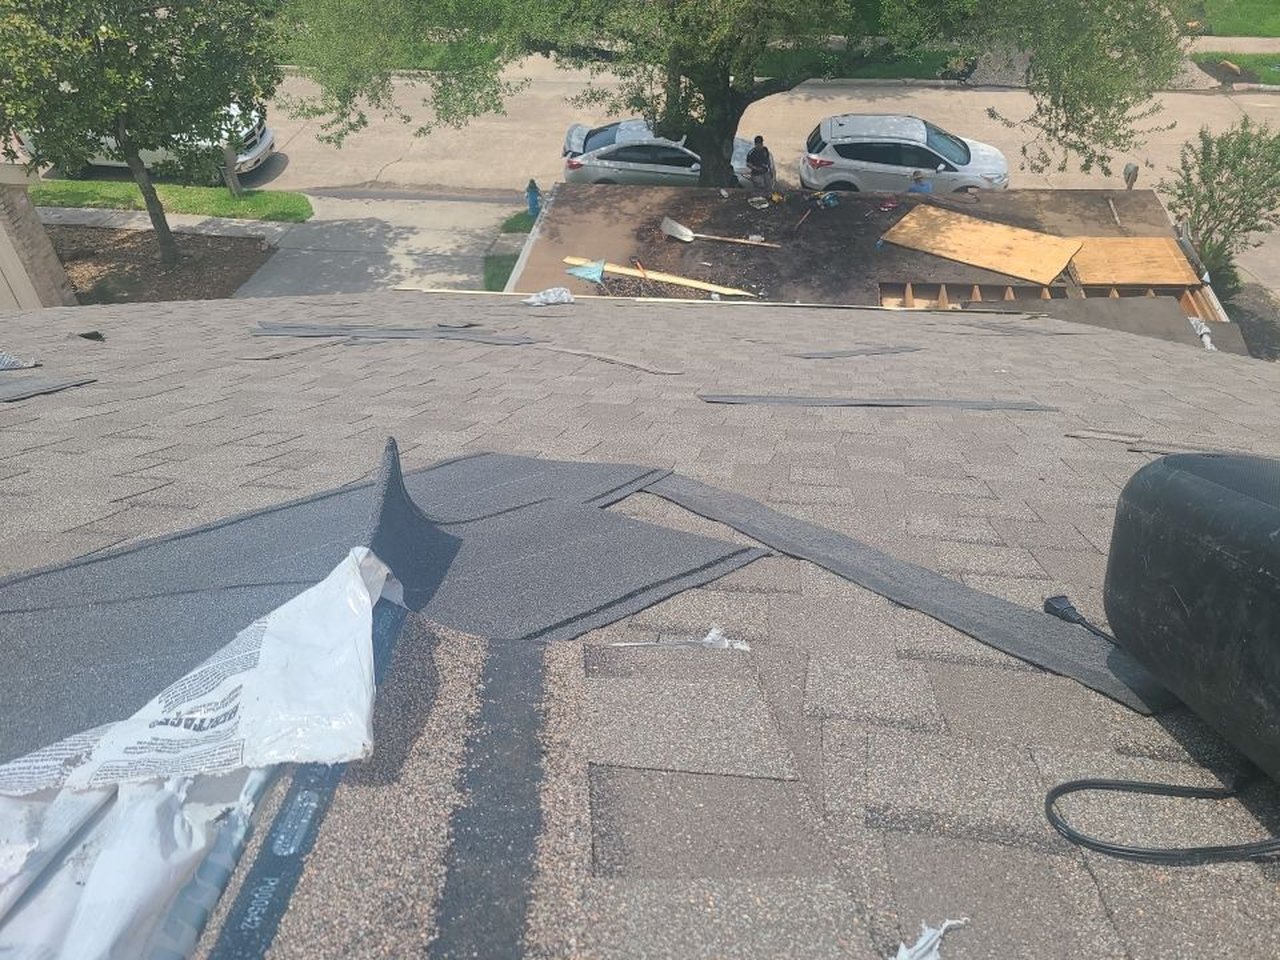
Homeowner checking a roof and gutters for maintenance

Many Texas homeowners struggle to keep roofs resilient against intense heat, persistent humidity and seasonal storms. This checklist addresses that gap by giving clear, repeatable inspection and maintenance actions you can apply across the year.

Neglecting routine checks increases the risk of leaks, accelerates shingle wear and can raise repair or replacement costs; for Gulf Coast properties, missed pre-hurricane preparation and post-storm documentation can affect insurance outcomes. Routine inspections also preserve warranty coverage and help prioritize repairs before they escalate.

This guide explains who should use the checklist and how to read it, provides season-by-season tasks, sets inspection timing (including the twice-a-year baseline and checks for roofs older than ten years), outlines safe inspection methods and what to look for, covers maintenance and cleaning, flashing and component care, DIY versus professional work, insurance and replacement considerations, attic and interior checks, Gulf Coast hurricane preparation, documentation and tools, and a neutral free-inspection option you can schedule.

Start with the season-by-season checklist to match tasks to the time of year and the local weather risks homeowners in Houston and Katy face.

How to use this roof maintenance checklist

Quick summary paragraph

This roof maintenance checklist gives a simple, seasonal roadmap to keep your roof watertight, spot small problems early, and extend its service life with minimal fuss.

Who this checklist is for

This guide is for Texas homeowners, especially those living along the Gulf Coast/Houston/Katy climate, who need practical, local-first roof care advice tailored to heat, humidity, and storm exposure.

How to read and use this page

  • Seasonal checklist — Use the step-by-step tasks in each season to plan routine maintenance and repairs.
  • Inspection frequency — Follow the recommended timing for visual checks and more thorough inspections.
  • DIY vs pro — Learn which tasks you can safely do yourself and when to call a licensed roofer.
  • Documentation — Keep photos, dates, and notes for warranties and insurance claims.

This page now leads into the detailed seasonal checklist — see the seasonal checklist section for spring, summer, fall, and winter tasks.

Seasonal roof maintenance checklist (spring, summer, fall, winter)

Downloadable PDF checklist: Downloadable PDF checklist — full seasonal roof maintenance checklist (printable)

Spring checklist

Spring is the top time to prepare your roof for hurricane season — prioritize securing loose elements and clearing debris. Follow these quick tasks before severe weather.

  1. Clear debris from roof and gutters — remove leaves, branches, and built-up debris so water can flow; flush gutters and downspouts with a hose.
  2. Inspect and tighten roof attachments — check and secure vents, flashing, chimney caps, satellite mounts and loose shingles; replace damaged fasteners.
  3. Check for and repair minor shingle damage — look for lifted, cracked, or missing shingles; re-seal or replace affected pieces to prevent leaks.
  4. Trim overhanging branches — cut limbs that contact or overhang the roof to reduce wind damage and debris during storms.
  5. Pre-hurricane checklist (priority) — remove loose outdoor items near the roof, secure or strap rooftop equipment (solar inverters, HVAC), and schedule professional inspections if you expect a major storm.

These spring tasks set you up for regular inspections and storm-season frequency recommendations below.

Summer checklist

Summer in the Gulf Coast brings intense heat, humidity, and algae growth — focus on ventilation, cooling effects, and cleaning.

  1. Inspect attic ventilation and insulation — ensure vents are clear and insulation is dry to reduce heat buildup that shortens shingle life.
  2. Look for algae, mold, and stains — safely clean roof algae with a mild detergent or zinc/bleach solution following manufacturer guidance; consider zinc strips for prevention.
  3. Check flashing and seals around roof penetrations — heat expands materials; re-seal gaps at vents, skylights, and plumbing stacks to prevent leaks.
  4. Monitor and repair minor leaks quickly — patch small leaks before summer storms magnify damage; document repairs for warranty records.
  5. Late-summer hurricane prep — re-confirm loose items are secured, clear gutters again, and re-check attic ventilation and roof attachments ahead of peak storm months.

After summer maintenance, proceed with the inspection frequency guidance below to time checks during and after heat waves.

Fall checklist

Fall is a good time to remove seasonal debris and prepare the roof for cooler, wetter months.

  1. Clear gutters and downspouts of fall leaves — remove blockages to prevent ponding and ice buildup in colder areas.
  2. Inspect roof after summer storms — look for new damage from wind or hail and repair as needed.
  3. Check and clean roof valleys and low spots — remove debris where water pools to prevent rot and leaks.
  4. Service attic vents and seals — repair torn vent screens and re-seal gaps to keep pests and moisture out.
  5. Schedule professional inspection if you missed spring prep — a pro can catch issues before winter.

Complete these fall steps and then follow the inspection frequency guidance to plan end-of-year checks.

Winter checklist

Winter on the Gulf Coast is mild but still requires attention to leaks and storm damage; focus on leak prevention and post-storm checks.

  1. Inspect for interior signs of leaks — check ceilings, attic, and insulation for damp spots after winter storms.
  2. Clear gutters of debris after storms — ensure water can drain away from eaves and foundations.
  3. Check roof penetrations and seals — re-check seals around chimneys, vents, and skylights for shrinkage or gaps.
  4. Repair shingle and flashing issues — fix cracked shingles and re-seat flashing to prevent winter rain infiltration.
  5. Document winter storm damage immediately — take photos and log weather dates to support insurance or warranty claims.

Finish winter tasks and use the inspection frequency guidance below to schedule follow-up checks in spring.

Seasonal checklist notes

  • Take dated photos of the roof and any damage before and after maintenance.
  • Keep a simple log with date, who performed the task (DIY or pro), and what you did.
  • Note weather events (storms, hail, high winds) with dates to correlate with any damage.
  • Store receipts and warranty info for materials and professional work in one place (physical or digital).

These documentation steps help with insurance, warranties, and deciding inspection frequency and timing.

Inspection frequency and timing — how often and when to inspect

Recommended routine schedule

Inspect at least twice a year (spring and fall), ideal months: March–April and September–October. These twice-yearly checks help catch wear after winter storms and before/after the heavy heat season; use them as your baseline routine.

  • Quick tip: keep inspections simple — look for missing shingles, visible damage, clogged gutters, and signs of leaks.

After-storm inspections

After significant wind, hail, or heavy rain, inspect within 24–72 hours once it’s safe to do so. Focus on:

  • Documenting visible damage (shingles torn, dents, granule loss, missing flashing).
  • Photographing any problem areas for insurance and contractor review.
  • Checking gutters, downspouts, and attic for signs of water intrusion.

Label findings clearly (date, location on roof, photos) so you can share them quickly with your contractor or insurer.

Age-based frequency

Treat these as guidance for how often to step up inspection intensity as a roof ages:

  • 0–7 years: Annual to twice-yearly visual inspections; low likelihood of major issues but still check after storms.
  • 8–15 years: Inspect twice a year and after storms; materials begin to show more wear and may need minor repairs.
  • 15+ years: Inspect every 3–6 months (or hire a pro for routine checks); plan for replacement budgeting and watch for accelerated deterioration.

How often to hire a pro

  • For newer roofs (0–7 yrs): consider a professional inspection every 2–3 years or after significant storms.
  • For mid-life roofs (8–15 yrs): hire a pro every 1–2 years, or sooner if you notice granule loss, curling shingles, or recurrent leaks.
  • For older roofs (15+ yrs): schedule a professional inspection annually or before extreme weather seasons and prepare for replacement planning.

Triggers to hire a pro immediately (not waiting for routine schedule):

  • Visible leaks or water in the attic
  • Large areas of missing or damaged shingles
  • Major storm damage (hail, fallen trees)
  • Significant sagging or structural concerns

These recommendations are guidance — local climate, roof material, and installation quality affect actual needs.

Next: Seasonal roof maintenance checklist (spring, summer, fall, winter)

Inspection methods and safety: ground checks, attic checks, and when not to climb

Ground and photo inspections

Start every inspection from the ground first. A careful ground check is safer and often reveals the most common problems: missing shingles, loose flashings, sagging gutters, and wet spots under eaves. If you need a closer look, use the methods below before considering climbing.

  • Use binoculars from a safe distance: scan ridge lines, valleys, chimneys, vents, and flashing for missing or damaged material.
  • Take high-resolution photos with a zoom camera: shoot from multiple angles and date-stamp images so you can compare over time.
  • Use a drone only if you’re experienced or hire a pro: drones give a rooftop view without putting you at risk—follow local drone regulations.

Attic inspection checklist

Before you climb onto the roof, check the attic. Many roof problems show up first inside. Here’s a short interior-attic checklist to run through while you’re on the attic floor or stairs:

  • Look for daylight — Hold a flashlight and look along the roof deck from inside; any visible daylight between rafters means openings that can leak.
  • Check for stains — Water stains on rafters, sheathing, or insulation indicate past or current leaks; trace stains back toward the roof slope to find the source.
  • Smell and look for mold — Musty odor or visible mold on wood or insulation suggests ongoing moisture; take photos and note location.
  • Feel for damp insulation — Gently press insulation (wear gloves); damp or packed-down insulation loses R-value and signals leaks or poor ventilation.
  • Inspect roof sheathing from below — Look for sagging, soft spots, or dark discoloration on the underside of the sheathing that show structural or moisture damage.
  • Watch for pests — Rodent droppings, nests, or chewed wiring indicate animal entry points that often occur where the roof or venting is compromised.

If any of these attic checks show active leaks, widespread mold, structural soft spots, or large pest infestations, do not climb on the roof—call a professional.

Ladder and roof safety

If attic and ground checks show only minor issues and you still need a roof-level look, follow these safety steps exactly.

  1. Use the right ladder — Extension ladder tall enough to extend 3 feet above the roof edge; set on firm, level ground and secure the base.
  2. Have a helper — Always have someone hold the ladder and watch while you climb.
  3. Wear proper footwear — Clean, soft-soled shoes with good traction; avoid flip-flops or smooth soles.
  4. Keep three points of contact — Two hands and one foot, or two feet and one hand on the ladder at all times.
  5. Limit roof time and movement — Stay near the roof edge only as long as necessary; avoid walking on steep or wet surfaces.
  6. Use fall protection — For steep slopes or significant heights, use a harness and anchor rated for roofing work—don’t improvise.

Do NOT climb if any of the following conditions exist:

  • Roof is wet, icy, or covered in loose debris (leaves, moss, loose gravel).
  • Slope is steep (greater than about 6:12 pitch) and you lack proper fall protection.
  • You see soft, sagging, or visibly damaged decking from the attic or ground.
  • There are high winds or storm conditions in the forecast.
  • You have health, mobility, or balance issues that could impair safe climbing.
  • You lack proper personal protective equipment or a second person to assist.

Tools and PPE homeowners should use

  • Sturdy extension ladder with stabilizer
  • Work gloves (cut-resistant preferred)
  • Non-slip work boots or shoes
  • Hard hat if someone is working below or tools are being used on the roof
  • Safety harness and anchored rope (for steep roofs) — hire a pro if you don’t have this gear
  • Flashlight for attic checks
  • Camera or smartphone to document issues
  • Binoculars for detailed ground scans

If you find holes, active leaks, extensive mold, rotten sheathing, or large missing sections of shingles during these checks, stop and call a licensed contractor. Below are the specific signs of damage to look for on the roof surface next.

What to look for: common damage signs and how to identify them

Shingle damage

Start by visually identifying broken, curled, or missing shingles—these are the most obvious signs a roof needs attention.

  • Cracked or split shingles: look along the edges and near the nail line for tears or splits.
  • Curling or cupping: shingles that lift at the edges indicate age or heat-related deterioration.
  • Missing shingles: obvious gaps or exposed roof underlayment increase leak risk.
  • Loose or slipping shingles: shingles shifted out of place expose fasteners and seams.

When checking, work from the ground with binoculars first; only climb if you’re experienced and safe. Take photos to compare over time.

Granule loss and UV damage

Check for granule wear and surface fading—these show prolonged UV exposure and loss of protective layers.

  • Inspect gutters and downspouts for black or colored granule buildup.
  • Examine shingle surfaces for smooth, bald patches or significant color fading.
  • Press gently on suspect shingles: heavy granule loss often feels smoother and thinner.

Granule loss reduces fire resistance and shortens shingle life; note locations and extent for your maintenance notes.

Hail and impact damage

Identify impact damage from hail or falling debris by looking for characteristic marks.

  • Bruising: soft indentations on shingles that may not break the surface but compress the mat.
  • Dents in metal: check gutters, flashings, vents, and metal trim for small, rounded dents.
  • Granule loss circles: round patches where granules were knocked off from an impact.
  • Shingle fractures: visible cracks or split tabs after severe impacts.

If you suspect hail damage, document it (photos, dates) and consider a professional inspection—some damage is hidden and gets worse over time.

Flashing, vents and chimneys

Flashing failures are a common leak source. Use this checklist when inspecting roof penetrations:

  • Check flashing seams for rust, separation, or missing sealant.
  • Look for gaps where flashing meets chimneys, vents, or roof transitions.
  • Inspect vent caps and collars for cracks, loose fasteners, or degraded rubber boots.
  • Examine chimney mortar and crown for cracks or spalling.
  • Confirm secure fasteners—loose nails or screws allow water entry.

Any visible gaps, rust, or missing sealant should be addressed quickly to prevent leaks.

Interior / attic signs

Often the first clues of roof issues appear inside. Inspect the attic and ceilings for these warning signs:

  • Water stains or discoloration on ceilings or rafters.
  • Active drips or damp spots—trace stains to roof areas above.
  • Mold, mildew, or musty smells indicating chronic moisture.
  • Light penetration—any daylight visible through the roof deck means an open seam or hole.
  • Sagging sheathing or insulation wetness—structural or prolonged leak concerns.

Check the attic during daylight and after rain to spot active leaks; mark locations on a sketch of your roof for fixes.

Finish your inspection notes by prioritizing issues that allow water in (flashing, open seams, missing shingles). Next, use these findings to guide the seasonal roof maintenance checklist and cleaning steps.

Maintenance and cleaning: gutters, moss/algae removal, debris management

Gutter and downspout cleaning

  1. Inspect gutters from the ground for sagging, visible blockages, or water spilling over the edge.
  2. Protect yourself: wear gloves, eye protection, and use a stable ladder with a spotter if possible.
  3. Remove debris by hand or with a small scoop into a bucket — work downhill sections first so you don't push clogs into lower runs.
  4. Flush with a garden hose from the top down to verify flow and find hidden clogs in downspouts.
  5. Clear downspouts by directing a hose up from the bottom or use a plumber’s snake if needed.
  6. Check attachments: make sure hangers and fasteners are secure and pitch is toward the downspout.
  • Recommended frequency: at least 2–4 times per year in the Gulf Coast climate (fall and spring plus after major storms).
  • Signs gutters are causing roof damage: water overflowing at the eaves, staining or rot at fascia, shingles lifting near the gutter line, or ice/damp spots inside the attic.

(For professional gutter installation or upgrades see our gutters.)

Moss, algae, and stain removal

  • Use a soft-wash approach — do not scrub aggressively or use a pressure washer (this can strip asphalt shingle granules and void many warranties).
  • Step-by-step soft-wash method:
  1. Wet the surrounding plants and cover them if possible.
  2. Apply a cleaning solution across the affected area, working in small sections from the top down.
  3. Let the solution sit (typically 10–20 minutes) but do not let it dry on the roof.
  4. Rinse gently with low-pressure water from the top down until clean.
  • Typical homeowner cleaning mix (example guidance from university extension resources): about 1 part household bleach to 3–4 parts water plus a small amount of non-ionic detergent or mild roof cleaner to help the solution cling. Some extension bulletins recommend adding a trisodium phosphate (TSP) substitute per label directions for stubborn growth — follow product safety instructions.
  • When to avoid DIY: steep roofs, aged or damaged shingles, heavy moss mats, or if you’re unsure about containment/protection of landscaping — hire a certified soft-wash contractor.
  • Warning: Do not use pressure washers on asphalt shingles or brittle roofing materials — high pressure can cause permanent damage.

For official safety and environmental advice, see the EPA/university guidance on safe roof cleaning.

Debris and tree management

  • Trim tree branches 6–10 feet away from the roof where practical to reduce leaf/debris fall and limit shade that encourages algae and moss.
  • Remove dead limbs that could fall on the roof during storms.
  • Keep nearby trees pruned to allow sunlight and airflow over the roof surface.
  • Clear accumulated debris from valleys and around chimneys promptly — even a small pile can trap moisture and speed deterioration.
  • Schedule regular tree inspections if you have large canopy trees near the house.

Preventative products and upgrades

Consider gutter guards, leaf screens, and downspout extensions to reduce clogging and direct water away from the foundation. These products lower how often you need to clear gutters but do not eliminate inspections — check guards after storms and seasonal leaf drop.

Next up: flashing, vents, and metal roofing components — then we'll move into the seasonal roof maintenance checklist (spring, summer, fall, winter).

Inspecting and maintaining flashing, vents, gutters and other roof components

Flashing and seals

  • Check step flashing at roof-to-wall intersections for:
  • Gaps, lifted edges, or torn metal
  • Caulk or sealant failure (cracking, hardening, or missing)
  • Rust or corrosion on metal flashing
  • Inspect counter-flashing around chimneys and masonry for:
  • Separation from masonry or mortar joints
  • Signs of water stains or staining on interior walls/attic
  • Inspect skylight and chimney seals for:
  • Cracked, shrunken, or missing sealant around the perimeter
  • Loose or damaged flashing pieces

Short how-to: resealing small gaps

  1. Clean the area of loose material, rust, dirt, and old sealant—use a wire brush and a cloth.
  2. If metal flashing is rusty, remove loose rust and apply a rust-inhibiting primer to bare metal.
  3. For gaps up to about 1/4"—apply a high-quality roofing sealant/caulk compatible with your flashing material, smoothing it so it fully contacts both surfaces.
  4. For wider gaps or damaged flashing, use a thin metal patch (cut to overlap both sides) and seal both edges with roofing sealant.
  5. Allow cure time per the sealant instructions before exposing to heavy weather.

Note: these are temporary or minor fixes. Avoid language that implies a permanent or guaranteed cure—larger failures, recurrent leaks, or damaged flashing sections should be evaluated and repaired by a licensed roofer.

Vents, pipe boots and flashing boots

  1. Visually inspect all roof vents, plumbing pipe boots, and flashing boots for cracks, brittleness, or holes.
  2. Check the seal/boot base where it meets roofing material for shrinkage, splits, or gaps.
  3. Look for signs of water entry around vent penetrations: stains, mold, damp insulation, or daylight visible from the attic.
  4. Confirm vents are fastened securely—watch for missing or corroded fasteners.
  5. On powered vents, ensure the fan rotates freely and wiring/vent caps are intact.

Signs a vent/boot is failing:

  • Cracked or split rubber boots
  • Loose flashing or flashing that has pulled away from the roof surface
  • Persistent staining or odors in the attic

Gutters, fascia and soffits

  • Check gutters for:
  • Sagging sections or low spots where water pools
  • Rust, holes, or significant corrosion (metal gutters)
  • Debris build-up causing slow drainage or overflow
  • Inspect downspouts for blockages, disconnected joints, or poor routing away from the foundation.
  • Examine fascia boards and soffits for:
  • Rot, soft spots, or paint failure indicating trapped moisture
  • Separation from rafters or cornice where water can enter the roof assembly
  • Ventilation openings in soffits that are blocked or damaged

If you notice water backing up under shingles or behind fascia, stop DIY work and contact a professional—this often indicates a roof edge or gutter failure that can cause structural damage.

Metal roofing specifics

  • Look for corrosion or rust spots, particularly around drip edges, seams, and fasteners.
  • Check all fasteners/screws for looseness, missing washers, or backed-out screws. Tighten or replace with the correct washered fasteners if minor.
  • Inspect seam integrity: seam separation, oil-canning (buckling), or failed seam sealant.
  • Watch for scratches or punctures that expose bare metal—these should be primed and coated to prevent rust.
  • Verify flashing and edge metal are properly seated and fastened without gaps.

Note: metal roof repairs often require specific fasteners and coatings—if you see widespread corrosion, many loose fasteners, or seam issues, schedule a professional metal-roof inspection.

Temporary repairs homeowners can do and when to call a pro

DIY temporary fixes (short-term, weather-dependent):

  • Apply roofing sealant to small gaps or cracks around flashing and pipe boots (clean surface first).
  • Use a piece of metal flashing or a metal repair patch and roofing sealant to cover a small puncture or tear (secure temporarily).
  • Tighten slightly backed-out screws on metal roofs with matching washered screws—do not overtighten.
  • Clear gutters and downspouts of debris to restore flow and reduce roof edge backup.
  • Place a tarp over a localized leak area, secured with battens or screws placed into wood (not just nails through shingles), until a permanent repair can be made.
  • Use temporary roof cement under a lifted shingle to hold it down in a short storm.

When to hire a professional (don’t delay):

  • Recurrent leaks or multiple leak locations.
  • Large or worsening separation of flashing, counter-flashing, or skylight surrounds.
  • Extensive rust or corrosion on a metal roof, or many loose/missing fasteners.
  • Structural rot around fascia, soffits, rafters, or decking.
  • Damage after severe weather (storm, hail, fallen limbs) or when working from a ladder/roof is unsafe.
  • If the repair requires replacing flashing, re-flashing a chimney/skylight, or matching metal roofing panels and specialized fasteners.

For a seasonal schedule of what to inspect and when, see the next section: Seasonal roof maintenance checklist (spring, summer, fall, winter).

DIY vs professional repairs: what homeowners can do and when to hire a pro

DIY-friendly tasks

  • Clear gutters and downspouts — remove leaves and debris to prevent water backup. Safety note: use a sturdy ladder on level ground and have a spotter; avoid leaning far to the side.
  • Trim overhanging branches that rub or drop debris on the roof. Safety note: use proper pruning tools from the ground when possible; hire a tree pro for large limbs.
  • Replace missing or damaged shingles (single-shingle repairs) on low-slope, easily accessible roofs. Safety note: work with good footwear, a harness on steep slopes, and avoid roofing work in wet/windy conditions.
  • Re-seal small flashing gaps and roof penetrations (vents, skylights) with manufacturer-recommended roofing sealant. Safety note: follow product instructions and keep chemicals away from skin and eyes.
  • Spot-check for moss, algae, and minor debris and remove gently with a soft brush or a manufacturer-safe cleaner. Safety note: do not use a pressure washer — it can damage shingles.
  • Inspect the attic for signs of leaks, rot, or insulation problems (stains, damp insulation, or daylight through the roof). Safety note: watch for loose wiring and wear a mask if insulation is disturbed.

Tasks that require a professional

  • Large-area shingle failure or multiple missing shingles — a pro can diagnose underlying decking or structural issues.
  • Significant flashing failure around chimneys, valleys, or skylights — improper flashing replacement leads to chronic leaks.
  • Sagging roof or visible structural damage — may indicate rot or compromised framing; needs structural assessment and repair.
  • Roof coverings near end of life or widespread wear (curling, granule loss, exposed mat) — professionals can advise repair vs. replacement.
  • Complex roof systems (multiple pitches, steep slopes, metal, tile, or solar-integrated roofs) — require specialty tools and expertise.
  • Extensive storm damage (hail, wind, fallen trees) — a contractor can document damage for insurance and safely perform repairs or removal.
  • Roof penetrations that require new flashing or re-roofing of large areas — improper DIY work increases long-term costs and leak risk.

The 25% rule explained

The 25% rule: if storm or localized damage affects 25% or more of the roof surface, replacement is usually more cost-effective and durable than repeated spot repairs. Consequence: below 25% — a repair may suffice; at or above 25% — expect a professional to recommend replacement or a major repair to avoid ongoing leaks and higher lifetime costs.

What to ask a roofing contractor during an inspection

  1. Are you licensed and registered in Texas? Ask for the license number and verify it with state records.
  2. Do you carry general liability and workers’ compensation insurance? Request current certificates naming you as additional insured for the job.
  3. Can you provide local references or recent jobs in my neighborhood? Photos and contactable references help verify quality and timeliness.
  4. What materials and brands do you recommend, and why? Ask about shingle class, wind/hail ratings, and product lifespan.
  5. Do you offer a workmanship warranty in addition to the manufacturer’s warranty? Get terms, length, and what is covered in writing.
  6. Will you provide a written, itemized estimate and project timeline? Ensure it includes removal, disposal, permits, and cleanup.
  7. How will you handle permits, inspections, and debris removal? Confirm who is responsible and any extra costs.
  8. What safety measures will you use on my property (fall protection, tarps, protection for landscaping)? This helps avoid property damage and liability.
  9. How do you document damage for insurance claims? Ask whether they provide inspection reports and photos for claims.
  10. Do you offer financing or payment plans, and what are the terms? If financing is needed, compare offers before deciding.

When to call now

  • Active leaking inside the home (water dripping or pooling).
  • Visible sagging or sudden drop in roofline.
  • Large sections of missing shingles or exposed underlayment after a storm.
  • Fallen tree or large branch through the roof.
  • Electrical sparking or water reaching light fixtures or outlets.
  • Rapid mold, visible rot, or collapsing attic areas.

If you see any of the above, contact a roofing professional immediately to limit damage and safety risks.

This guidance should help you decide what you can safely handle and when to hire a pro. Next, review the seasonal roof maintenance checklist (spring, summer, fall, winter) to plan regular care, insurance considerations, cost estimates, and replacement timing.

Insurance, inspection costs and when to replace instead of repair

Typical inspection costs and time

  • Free roof inspections — many local contractors, including Blue Rhino Roofing, offer no-cost, no-obligation inspections.
  • Paid inspection range: $50–$200 for detailed reports or third-party inspections. (Range flagged: unsourced estimate; actual prices vary by provider and scope.)
  • Typical inspection time: 30–90 minutes for a standard single-family home; larger or multi-story roofs take longer.
  • Inspectors may provide a written summary, photos, and a repair vs. replace recommendation.

Insurance tips and documentation

  1. Document everything immediately. Take date-stamped photos and video of all roof damage from multiple angles (close-up and wide). Capture interior leaks and any damaged belongings.
  2. Collect proof of age and prior work. Keep or photograph receipts, warranties, and previous inspection reports.
  3. Get a written contractor estimate before the adjuster arrives, but don’t sign authorization for work until you understand the claim outcome.
  4. File the claim quickly. Most policies have time limits for reporting storm damage.

What not to say to an adjuster (concrete dos and don’ts)

  • Do NOT say: “I think the roof is XX years old” if you aren’t sure — provide documentation instead.
  • Do NOT say: “It was fine before the storm” without proving the roof’s pre-storm condition; vagueness can be used to deny coverage.
  • Do NOT say: “I want full replacement regardless of damage” — this can complicate the scope; let documented damage guide the decision.
  • Do NOT sign any estimate or release that assigns your claim or payment to a contractor without fully understanding the terms.
  • Do say: “I have photos, prior invoices, and a written contractor estimate,” and offer copies. Be factual, calm, and concise.

Repair vs replacement — when replacement is the better option

  • Widespread shingle failure (large areas of missing, cracked, or granule-free shingles).
  • Multiple or large leaks that indicate sheathing or structural water damage.
  • Roof age + storm damage: if roof is near the end of its expected life (e.g., older asphalt shingles) and storm damage is extensive, replacement is often more cost-effective.
  • Repeated repairs for the same issues — if repairs are frequent, replacement may save money long-term.
  • Roof deck or structural damage discovered during inspection — replacement (and deck repair) is usually required.
  • Insurance total-loss determination — if the insurer declares the roof a total loss, replacement will be covered per your policy terms.

Local code and permit notes for Houston/Katy

Check city and county requirements before work begins. In Houston and Katy, permits and inspections may be required for roof replacement or structural repairs; contractors must be licensed and follow local building codes. Ask your contractor to pull permits and provide permit numbers or you can verify with the city/county permitting office.

For state-level guidance on wind and hail claims, see: Texas Department of Insurance windstorm/hail guidance

Next, we’ll move into attic and interior checks to find hidden leaks and damage before scheduling repairs or replacement.

Attic and interior checks that reveal roof problems

Attic checklist

  • Wet or dark stains on roof sheathingDetection: use a flashlight to inspect rafters and decking for damp, dark patches or mold. What it suggests: active leaks or long-term moisture. Severity: should fix — call a pro if stains are widespread or growing; small, isolated stains may be monitored after a DIY seal/repair if you’re confident.
  • Rotting or soft woodDetection: poke suspect areas with a screw driver; soft or crumbling wood means decay. What it suggests: prolonged moisture exposure and weakened structure. Severity: must fix by a professional.
  • Frass or insect activityDetection: look for sawdust piles or insect tunnels in wood. What it suggests: water-damaged wood inviting pests. Severity: professional assessment recommended.
  • Mold, mildew, or musty odorsDetection: visual mold patches or a persistent damp smell when doors are opened. What it suggests: chronic moisture, often from leaks or poor ventilation. Severity: remove or remediate quickly; hire a pro if mold covers large areas.
  • Missing, damaged, or displaced insulationDetection: uneven thickness, gaps, or insulation packed into eaves. What it suggests: air leaks and heat transfer that stress roofing materials. Severity: DIY replacement possible for small areas; consult a pro for whole-attic issues.
  • Stains on the underside of shinglesDetection: dark streaks or water spots visible from inside the attic beneath the roof. What it suggests: active or prior roof leaks. Severity: professional roof inspection and repair usually required.
  • Light visible through the roof deckDetection: during daylight, look for pinpricks or beams of light on the attic floor. What it suggests: holes or gaps in roofing that will allow water in. Severity: serious — schedule a pro repair.
  • Sagging or uneven roof deckingDetection: look along rafters for bowed or sagging areas; feel for bounce walking the attic floor (careful). What it suggests: structural issues from long-term water damage or failed supports. Severity: urgent pro intervention.

Ventilation and insulation issues

Poor attic ventilation or inadequate insulation can shorten roof life by trapping heat and moisture under shingles, accelerating shingle aging and encouraging rot — but exact effects vary by roof type, climate, and installation. Improving ventilation and insulation reduces thermal stress, prevents ice damming in cold climates, and lowers moisture-related decay.

Signs ventilation or insulation is failing:

  • Hot attic in summerDetection: attic temperature much higher than outside air on a sunny day. Indicates inadequate ventilation or insulation.
  • Condensation on rafters or sheathingDetection: moisture beads or frost in cool seasons. Suggests poor airflow or vapor barrier problems.
  • Ice dams (in cold climates)Detection: icicles and roof-edge ice build-up. Often caused by warm attic air melting snow on the roof.
  • Uneven indoor temperatures / high energy billsDetection: rooms that are consistently hotter or colder than others and rising HVAC costs. Points to insulation gaps or leaks.
  • Displaced insulation near vents or eavesDetection: insulation pushed away from vents or packed into tight spaces limiting performance.

Quick guidance: small insulation fixes (adding batts, sealing small gaps) are often DIY-friendly; correcting ventilation layout (adding ridge vents, powered attic vents) or fixing widespread insulation failure should involve a contractor.

Interior home signs

  • Ceiling stains or blistering paintWhat it indicates: active or prior leaks above that may be roof-related.
  • Peeling wallpaper or bubbling paint near exterior wallsWhat it indicates: trapped moisture from leaks or poor attic ventilation.
  • Warped or sagging ceiling drywallWhat it indicates: prolonged water exposure; may mean structural damage.
  • Mildew or musty odors in upper rooms or hallwaysWhat it indicates: ongoing moisture ingress, often from attic or roof leaks.
  • Staining around light fixtures or attic accessWhat it indicates: water following wiring paths or soffit/attic penetrations.

For each interior sign: if the issue appears small and isolated, you can inspect the attic and roof yourself; if damage is spreading, structural (sagging), or mold is extensive, hire a professional roofer and/or remediation specialist.

Keep a photo log of attic and interior findings (dates, locations, and photos) — this helps contractors diagnose problems and supports insurance claims. Next, we’ll cover a seasonal roof maintenance checklist tailored to local conditions and timing.

Houston/Katy and Gulf Coast considerations: heat, humidity and hurricane prep

Climate impact on roofs

The Gulf Coast climate—hot summers, high humidity, and frequent storms—accelerates common roof problems. Prolonged heat and UV exposure softens asphalt shingles and speeds granule loss; high humidity and shaded areas encourage algae and moss growth, which can discolor shingles and trap moisture. Combine those with strong winds and driving rain during storm season, and roofs in Houston/Katy require more frequent, region-specific maintenance than in milder climates.

Hurricane-season prep checklist

Pre-season tasks with timing and priority to reduce damage risk and speed recovery.

  1. Six to eight weeks before hurricane season — Inspect and repair: walk the roof (or hire a pro) to check for loose, missing, or curling shingles; replace or secure them. Priority: high.
  2. Six weeks before — Clear gutters and downspouts: remove debris so water drains freely and check for loose hangers. Priority: high.
  3. Six weeks before — Trim trees and remove dead limbs: cut back branches that overhang the roof to reduce fallen-limb damage. Priority: high.
  4. One month before — Secure roof-mounted items: check satellite dishes, solar panels, and vents; tighten fasteners and reinforce flashings. Priority: medium.
  5. One month before — Check attic ventilation and insulation: reduce heat buildup and moisture that accelerate shingle deterioration. Priority: medium.
  6. Two to four weeks before — Stock emergency supplies and documentation: collect roof photos, model/serial numbers for installed items, and vendor contact info; prepare tarps, roof nails, and a ladder. Priority: medium.
  7. Two weeks before — Schedule a professional inspection (if needed): get a contractor to assess flashing, ridge caps, and any suspect areas so repairs can be completed before storms. Priority: high.
  8. Week of potential storms — Final walk-through and secure loose items: re-check gutters, loose shingles, and attic for signs of leaks. Priority: high.

Post-storm inspection steps

After conditions are safe, follow these immediate checks and documentation steps. Do not climb on a roof until you are certain it is safe.

  • Immediate safety checks:
  • Do not go on the roof if wind is still strong, debris is present, or the surface looks unstable.
  • Check the attic for signs of active leaks (wet insulation, dripping, or daylight through roof boards).
  • Inspect gutters and ground around the house for missing shingles, broken tiles, or large debris.
  • Quick exterior checks (from the ground and ladder where safe):
  • Look for missing, lifted, or torn shingles, damaged flashing, and displaced ridge caps.
  • Note sagging rooflines or areas with standing water.
  • Check chimney flashing and roof penetrations for gaps.
  • Photo and documentation steps:
  • Take clear photos of all damaged areas from multiple angles; include wide shots showing location and close-ups of problem spots.
  • Photograph model/serial numbers for solar or mechanical components and any visible damage to vents or gutters.
  • Time-stamp photos when possible and keep a written log of observations and dates.
  • Safety reminders:
  • Wear fall protection when working on ladders or the roof; use a partner to hold ladders.
  • Avoid touching damaged electrical equipment and stay clear of downed power lines.
  • If structural damage is evident (sagging sheathing, large openings), contact a professional and avoid occupying affected areas.

Local permitting and building code tips

Before doing roof repairs or replacements after a storm, check with your city or county building department for local permitting and code requirements—Katy, Harris County, Fort Bend County, and neighboring municipalities can have different rules on permit types, contractor licensing, and wind-resistance standards. Document required permit numbers and approved materials; some areas require specific nail patterns, underlayment, or hurricane straps for permitting. If work is covered by insurance, verify whether the insurer requires permits or specific contractor certifications before authorizing claims.

Documenting roof condition, tools to use, and other homeowner tips

How to document for insurance and maintenance

  1. Take wide photos of the entire roof from at least two sides to show overall condition.
  2. Take close-up photos of damage: missing shingles, cracked flashing, granule loss, rust, and punctures.
  3. Photograph attic areas from inside to show leaks, water stains, and insulation damage.
  4. Date-stamp every photo (camera or phone settings).
  5. Use consistent file naming: YYYYMMDDlocationtype (example: 20260724backyardwide.jpg).
  6. Save a digital copy and a backup (cloud or external drive).
  7. Keep receipts and inspection reports in one folder (digital + physical).
  8. Log the date and brief note for each entry (what you saw, where, and who inspected).

Before/after photo gallery (data idea) — place here:

  • Include a small gallery showing the same shot angles before and after repairs: wide, close-up, attic view.
  • Suggested captions: date, location on roof, repair contractor name, and brief note of work completed.

Tools and safety gear list

  • Camera or smartphone with date-stamp capability
  • Measuring tape (25 ft)
  • Telescoping ladder rated for exterior use
  • Work gloves (cut-resistant)
  • Nonslip shoes or roofing boots
  • Hard hat
  • Safety harness and lanyard (when working on roof)
  • Flashlight for attic inspection
  • Moisture meter (optional)
  • Marker and notepad or phone notes app
  • Zip ties / plastic bags to secure loose debris temporarily

Solar panels and roof maintenance

Inspect around solar panel mounts for flashing gaps, rust, and cracked seals. Check for shading from new tree growth and for water pooling near panel edges. Avoid stepping on panels; use professional access routes when possible. For any panel-area concerns, contact a licensed solar roofer.

Emergency warnings and temporary fixes

  • If there is active leaking, get people and pets away from the wet area until safe.
  • Turn off electrical power to affected circuits if water is near outlets — call an electrician if unsure.
  • For immediate protection, lay a blue tarp over the damaged roof area:
  • Secure tarp starting at the highest point and work downhill.
  • Anchor tarp with soft battens or roof-safe fasteners.
  • Do not create trip or fall hazards inside or on the roof.
  • Small temporary seal: use roofing-grade tape or a patch on flat areas only.
  • Do not attempt major structural repairs yourself. Avoid walking on steep, wet, or heavily damaged roofs.
  • If damage is severe or unsafe, call a professional immediately.

For more context and to schedule a professional inspection, see Blue Rhino Roofing and Solar resources and services at https://bluerhinoroofing.net/. Add the before/after photo gallery above to the homeowner file for insurance and maintenance records.

How roof maintenance ties into residential roofing best practices

Maintenance and warranty/lifespan

Regular maintenance helps preserve a roof’s service life and keeps warranty conditions valid by preventing small issues from becoming covered exclusions. Simple tasks like clearing debris, checking flashings, and documenting repairs provide the evidence manufacturers or insurers may require if a claim arises.

How maintenance informs replacement decisions

Routine inspections reveal whether problems are isolated repairs or signs of widespread deterioration. That information makes the difference between scheduling a targeted repair or planning a timely replacement to avoid emergency failures and higher downstream costs.

Energy, ventilation and long-term cost impacts

A well-maintained roof and properly functioning ventilation reduce heat buildup, improve attic performance, and can slow material degradation—helping lower heating and cooling strain over time. These operational benefits translate into longer asset life and more predictable maintenance budgeting.

For a no-cost evaluation that shows how maintenance needs affect your roof specifically, request a free inspection: Free Roof Inspection — Blue Rhino Roofing.

Free roof inspection — schedule a professional review

What the free inspection includes

  • Exterior walk-around to check shingles, flashing, vents, gutters and visible damage
  • Attic check (when safe and accessible) to inspect ventilation, insulation, and signs of leaks
  • Photographs of findings for your records and to document problem areas
  • Written summary with recommended next steps and an estimate if repairs are needed
  • Typical inspection time: about 20–45 minutes, depending on roof size and accessibility

How to schedule

Scheduling is quick and available for homeowners in Katy and the greater Houston area (within our local service radius). To arrange an inspection or learn more about follow-up services, visit our pages for residential roof repair, roofing resources, or gutter services — or call our office to set a convenient time. We’ll confirm availability and any on-site safety steps before the visit.

What to have ready

  • Home address and best contact phone number
  • Recent storm dates or any events that may have caused damage
  • Known issues (e.g., leaks, missing shingles, sagging gutters) and any photos you’ve already taken
  • Preferred days/times for a visit

If you’re unsure about your roof’s condition, schedule a free inspection and we’ll provide a clear, neutral assessment and next steps.

Frequently Asked Questions

  • Q: How often should I inspect my roof?

A: Inspect at least twice yearly — and after any major storm. For scheduling and timing details, see inspection frequency & timing.

  • Q: What are the safest ways to check my roof?

A: Use binoculars or ground-level inspections first; leave high or steep work to pros. Safety methods and recommended precautions are in inspection methods and safety.

  • Q: How should I document damage or wear I find?

A: Take date-stamped photos, note locations, and keep a simple log. Best practices and tools are listed under documenting tools and tips.

  • Q: Can I fix roof problems myself or should I hire a professional?

A: Minor maintenance (cleaning gutters, replacing a few shingles) can be DIY; structural, leak, or high-access repairs should be handled by a licensed roofer. Guidance on DIY vs. professional repairs is at diy vs professional repairs.

  • Q: Are there special maintenance needs for Houston, Katy, and the Gulf Coast area?

A: Yes — expect higher wind, storm, and humidity exposure, so inspect more carefully after storms and watch for storm-related damage and moisture issues. Regional considerations are covered in Houston/Katy/Gulf Coast considerations.

Frequently Asked Questions About Roof Maintenance

How often should I inspect my roof if I live in Houston or Katy?

Inspect at least twice a year, aiming for spring and fall, and after any major storm. Increase checks to three or four times a year once the roof is 10 years or older, and schedule a professional inspection more often as shingles approach the 15–20 year range. For local timing and a suggested inspection calendar see the inspection frequency and timing guidance to match Gulf Coast weather and hurricane season.

Can I safely inspect my roof myself or should I always hire a pro?

You can perform safe ground inspections with binoculars, take attic checks, and handle minor maintenance like clearing gutters from a stable ladder position. Avoid climbing when the roof is wet, steep, visibly damaged, or after high winds, and do not attempt complex repairs or work near electrical lines. For step-by-step safety tips and an attic checklist consult the inspection methods and safety guidance and call a professional if conditions feel unsafe.

How do I document roof damage for an insurance claim?

Take clear, dated photos from multiple angles: wide shots to show extent and close-ups of damaged areas. Photograph attic evidence such as stains or daylight through the deck, keep a written log of weather events and inspection dates, and save all receipts for repairs or temporary tarps. Avoid admitting fault to adjusters and contact your insurer promptly. Additional photo and documentation techniques are outlined in documenting, tools and tips.

What does the '25% rule' mean for roof repairs?

The 25% rule is a common guideline some insurers and contractors use: if damage covers 25 percent or more of the roof surface, replacement is often recommended rather than spot repairs. Applicability varies by insurance policy, local building codes, and the type of damage, so confirm how your insurer applies the rule before deciding. See the detailed explanation and contractor questions in the DIY vs professional repairs guidance.

How soon should I check my roof after a hurricane or severe storm?

Prioritize personal safety and only inspect when it is safe to do so. Once conditions allow, document and photograph visible damage immediately and note the storm timing. If you see active leaks, sagging, or structural concerns, contact a professional right away for an emergency response. Post-storm steps and safety reminders are covered in the Houston, Katy and Gulf Coast considerations guidance.

Schedule your free roof inspection

If you are unsure about roof condition after seasonal wear or a storm, schedule a free inspection that includes an attic check, photos and a written summary so you can act with confidence. Book a time for a professional review at residential roof repair and have peace of mind for your Katy or Houston home.

Shawn, owner of Blue Rhino Roofing

Shawn

Owner, Blue Rhino Roofing, Katy, TX

Shawn leads Blue Rhino Roofing, a BBB A+ accredited, Texas-licensed roofing company based in Katy. He's on the roof and on the phone, and known for telling homeowners the straight truth about whether they need a repair or a replacement.

Stay ahead of Texas weather.

Book a free roof check-up with photos and a simple maintenance plan.

No-pressure consult BBB A+ & Texas licensed You'll talk to the owner
Call Shawn Free Inspection