
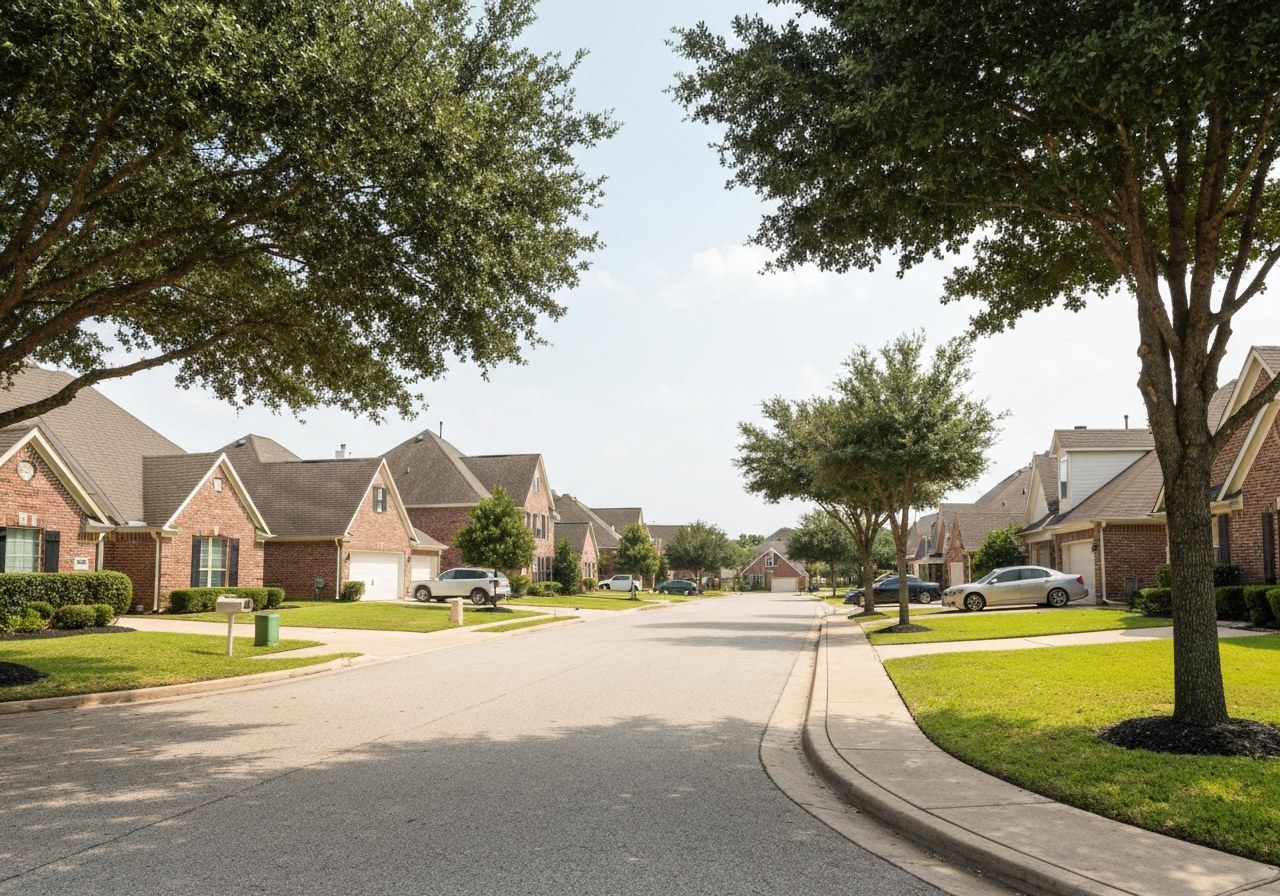
Homeowners frequently face unclear bids, unverifiable credentials, and high-risk sales tactics when hiring a roofing contractor in the greater Katy area. These issues create delays, unexpected costs, and exposure to liability and warranty gaps.
Because roof work affects safety, insurance claims, and home value, verifying credentials and comparing itemized estimates matters to your pocket and to long-term protection of the property. This guide gives you practical checklists and scripts so you can verify licensing and insurance, compare multiple written estimates on an apples-to-apples basis, spot storm-chasers, and manage the project from permit to final walkthrough.
In this article, we will cover verifying licensing and reputation, who will perform and supervise the work, how to read and compare written estimates and warranties, a printable licensing checklist, essential project questions to ask, cost and payment terms, red flags after storms, practical pre-hire and on-site checklists with a sample estimate template, how local Katy-based contractors help, final walkthrough and closeout documentation, and how to schedule a free inspection within a 30 mile radius of Katy.
Begin by confirming a contractor is properly licensed and insured so your inspections, claims, and warranties rest on a secure foundation.
How to choose a roofing contractor — quick overview
Short intro paragraph
Choosing the right roofing contractor protects your home and your wallet. This quick overview highlights what matters most so you can hire with confidence. Read on for a short checklist of what to expect and ask for.
What you’ll learn
- Checklist of qualifications to check (licensing, insurance, bonds, and local permits).
- Sample estimate items to expect on a bid (materials, labor, permit fees, cleanup, warranty).
- Key questions to ask during estimates and inspections (timeline, crew, subcontractors, change orders).
- How to spot and avoid common scams (pressure-only sales, suspiciously low bids, lack of written contract).
- What to expect from local providers—free roof inspections, financing options, and a clear quality guarantee.
Local scope and relevance
This guide is tailored for homeowners and businesses in Katy, Sugar Land, Cypress, Richmond and communities within a 30‑mile radius of Katy, TX.
First: verifying licensing and reputation.
Verifying licensing, insurance and local reputation
Why licensing and insurance matter
Hiring a licensed, insured contractor protects you from liability, ensures the contractor meets state standards, and gives you a formal path for complaints or enforcement.
Insurance covers jobsite injuries and property damage; licensing proves the contractor has the required qualifications and legal authority to work in Texas.
Documents to request
- State contractor license (copy of the license and license number)
- Certificate of insurance (COI) — general liability (shows policy number, limits and effective dates)
- Certificate of insurance (COI) — workers’ compensation (or proof that the company carries workers’ comp)
- Bond (if the job or city requires a surety bond)
- Manufacturer certifications (for roofing systems, shingles, or solar equipment that carry special warranty requirements)
How to verify
- Use the Texas contractor license lookup: search the state database to confirm the license number, status and any disciplinary actions.
- Texas contractor license lookup: https://vo.licensing.tdlr.texas.gov/
- Call the insurer listed on the COI to confirm the policy number, limits and that the policy is active for your project.
- Sample script: "Hi — I'm calling to confirm coverage for [Contractor Name]. The COI shows policy number [xxxxxx] with [Insurer Name]. Can you confirm the policy is active and the limits shown are accurate for general liability and workers' comp?"
- Check license status with the licensing board for complaints, suspensions or expirations (use the TDLR verify pages above or call their office).
Always document the verification: save screenshots of the license lookup, a copy of the COI, and notes from your phone call with the insurer (include date, time and the person you spoke with).
Checking local reputation
Start with online reviews, but dig deeper to spot patterns that show consistent quality or repeated problems. Look for recent, photo-backed projects and how the contractor responds to complaints. Request local references and ask to see finished jobs in neighborhoods near yours.
- Sources to check:
- Google Reviews (look at recency and photo evidence)
- Facebook (business page reviews and community comments)
- Nextdoor (neighborhood recommendations and warnings)
- Better Business Bureau (see business profile and complaint history) — Better Business Bureau guidance on hiring contractors: https://www.bbb.org/all/home-improvement/how-to-hire-a-reliable-and-trustworthy-general-contractor
- Local references supplied by the contractor (ask for addresses so you can view the work)
- Actionable signals to watch for:
- Date clustering of reviews (many reviews posted within a short time can indicate a solicited batch)
- Photos of completed work (confirms workmanship and materials)
- Responses to complaints (timely, professional responses are a good sign)
- Consistent service area (contractor should have multiple jobs near Katy/Sugar Land if they claim local focus)
- Verified local references (neighbors you can contact directly)
Local examples and red flags
In the Katy and Sugar Land markets, reliable local contractors often show multiple nearby projects and have neighborhood references you can visit. Red flags include contractors who avoid giving a local reference, provide only P.O. box addresses, or have repeated complaints about missed timelines and unexpected change orders.
If you see multiple complaints for the same issue (poor cleanup, roof leaks after install, or unreturned warranty calls), treat that as a strong warning sign. Ask follow-up questions and verify that any warranty work will be handled locally and promptly.
Next, we'll move from vetting credentials to the practical steps for planning and executing your roofing project so you can compare bids and finalize a contract.
Who will do the work: employees, subs, permits and on-site supervision
Who performs the work
Most reputable roofing companies use a mix of company employees and licensed subcontractors. Ask specifically who will be on your roof and what portions of the job each party will perform.
Sample question to ask the contractor:
- "Who will be on site each day — company employees or subcontractors? Which parts of the job will each perform, and who is responsible for quality control?"
Tip: Get names or crew IDs whenever possible so you can confirm identity and ownership of workmanship later.
Subcontractors and insurance
Short checklist to verify subcontractor coverage:
- Request current Certificates of Insurance (COI) from the GC and any subs.
- Confirm general liability, workers’ compensation, and auto liability are included.
- Verify policy effective dates cover the full project timeframe.
- Confirm the COI lists you (the homeowner) and the general contractor (GC) as additional insured when applicable.
- Ask for subcontractor contact and license numbers.
Model wording to request proof (copy/paste):
- For the general contractor: "Please provide a current Certificate of Insurance naming [Homeowner Name], [Property Address] and Blue Rhino Roofing (or the contractor’s business name) as additional insured on the general liability policy. Also include workers’ comp and auto liability coverage details."
- For subcontractors: "Please provide current COIs for all subcontractors who will work on my property. Each COI must list [Homeowner Name], [Property Address] and Blue Rhino Roofing as additional insured and show policy effective dates that cover the project duration."
Permits, inspections and local code compliance
- Determine who will pull permits — contractor or homeowner. Most reputable roofers pull permits for you.
- Contractor submits permit application to the local building department and schedules required inspections.
- Inspections occur at key stages (e.g., tear-off/decking inspection, final roof inspection).
- Contractor provides copies of permits and inspection sign-offs to the homeowner once available.
Typical permit timeline for Houston/Katy area: varies by jurisdiction — expect roughly 1–3 weeks for permit issuance in many Houston-area jurisdictions; some smaller cities or unincorporated areas may be faster or slower. Always confirm with your contractor and/or local permitting office for a precise estimate.
Tear-off, decking inspection and pricing
Before replacing the roof, the crew should inspect the existing decking and document conditions that affect cost.
Key assessment and documentation steps:
- Inspect decking immediately after tear-off for rot, mold, or soft spots.
- Photograph any damaged decking and create a dated photo log.
- Provide a written assessment and cost estimate for decking replacement to the homeowner.
- Obtain homeowner approval for additional decking work before proceeding.
- Prepare a signed change order that lists scope, materials, and final price for any decking replacement.
- Keep copies of photos, signed change orders, and decking inspection reports in the project file.
Site supervision and communication
Expect a single, named point of contact (POC) for the project — typically a project manager or lead foreman.
What to require:
- The POC’s name, phone number, and preferred contact hours.
- A clear communication cadence (example: daily progress text at 4:30pm and a phone update at major milestones; written notification before any scope changes).
- Emergency contact protocol for off-hour issues.
This removes confusion and ensures accountability for timelines, quality, and cleanup.
Property protection and cleanup
Common on-site protection measures:
- Tarping around HVAC units, vents, landscaping, and windows.
- Plywood or boards to protect walkways, doorways, and vulnerable surfaces.
- Magnet sweeper used after each day to remove nails and metal debris.
- Designated dumpster placement away from structures and driveways to prevent damage.
- Daily broom and leaf-blower cleanup and a final walkthrough with the homeowner.
- Post-job nail sweep and visual inspection before final acceptance.
Add the following images from data_ideas in this section:
Bridge to costs and warranties
Knowing who does the work, who supervises it, and how permits and decking issues are handled will directly affect costs and warranty coverage. Next, we’ll cover how to verify licensing, insurance, and local reputation so you can compare bids with confidence.
Comparing written estimates and understanding warranties
What an itemized written estimate should include
- Labor — costs for removal, preparation, installation, and cleanup labor.
- Materials (by brand & model) — shingles, underlayment, flashing, fasteners, vents, etc., listed with brand and model where possible.
- Underlayment — type and brand (synthetic, felt, ice & water shield if applicable).
- Flashing — locations covered (chimneys, valleys, skylights, step flashing) and materials.
- Tear-off — number of existing roofing layers to be removed and related disposal charges.
- Decking replacement — allowance or per-sheet price for replacing damaged roof decking.
- Disposal — dumpster or haul-away fees and landfill charges.
- Permits — permit fees and who pulls permits (contractor or homeowner).
- Cleanup — description of job-site cleanup, final inspection, and magnet sweep for nails.
How to compare apples-to-apples
Compare estimates side-by-side using the following guidance, then run through the checklist.
- Ask for the same scope on every bid: same tear-off level, same number of decking sheets replaced, same vent and flashing scope, same product lines.
- Request unit prices where possible (per square or per sheet) to confirm fair pricing on add-ons.
- Confirm warranty details and who is responsible for registration (homeowner vs contractor).
Checklist — compare each estimate for:
- Unit prices (per square, per sheet, per linear foot) rather than only lump sums.
- Exact scope of work (tear-off layers, decking replacement allowance, flashing locations).
- Explicit exclusions (work not included such as structural repairs, siding, painting).
- Brands and model numbers for major materials (shingles, underlayment, vents).
- Warranty terms and whether warranty registration is required (who will register — contractor or homeowner).
- Cleanup and final inspection responsibilities.
- Timeline and projected start/completion dates.
Warranties explained
Separate the two warranty types and what they mean for you.
Manufacturer (material) warranty
- Covers defects in shingles or other manufactured materials.
- Typical length: manufacturer coverage often ranges from 20–50 years (typical range).
- Common voiding causes: improper installation, use of incompatible underlayment or accessories, failure to register warranty if required.
- Homeowner action: keep copies of receipts, product labels, and warranty registration confirmation (if required).
Contractor (workmanship) warranty
- Covers the contractor’s installation work and labor.
- Typical length: workmanship guarantees commonly range from 1–10 years (typical range), depending on the contractor.
- Common voiding causes: unattended leaks, roof alterations by another contractor, failure to maintain ventilation/drainage.
- Homeowner action: report defects promptly in writing and follow required maintenance steps.
Comparison table — manufacturer vs workmanship warranties
| Warranty type | Coverage | Typical length (typical range) | What voids it | Homeowner action |
|---|---|---|---|---|
| Manufacturer (materials) | Defective shingles, granule loss, manufacturing flaws | 20–50 years (typical range) | Improper installation, incompatible accessories, failure to register | Keep invoice & product labels; register warranty if required; file claim with manufacturer |
| Contractor (workmanship) | Installation errors, flashing failures, improper sealing | 1–10 years (typical range) | Unauthorized repairs by others, lack of maintenance, post-installation damage | Notify contractor immediately in writing; document damage; allow inspection |
(Insert additional data comparison chart if needed)
Payment terms and financing
- Deposits: limit deposits where state law applies—ask for a written schedule. A reasonable upfront deposit is common, but large lump-sum upfront payments are a red flag.
- Progress payments: tie payments to clear milestones (e.g., start, midpoint, completion) and keep final payment until after inspection and cleanup.
- Acceptable payment methods: request contracts that accept checks, credit cards, or financing — avoid only-cash agreements.
- Financing: many contractors offer financing or partner with lenders; evaluate interest rates, term lengths, and total cost before signing.
- Insurance-claim coordination: if filing an insurance claim, confirm whether the contractor will provide estimates directly to your insurer and coordinate supplements — get this in writing.
Handling change orders and insurance claims
- Require written change orders for any scope changes, with itemized pricing and signatures from both parties.
- Keep documentation: photos, receipts, and dated communications for every change.
- For insurance claims: provide adjuster access, meet at the property if requested, and supply contractor estimates and material invoices.
- Get approval before work proceeds on changes covered by an insurance supplement.
- Resolve disputes by referencing the signed change order and contract terms; escalate to your insurer or a local consumer protection agency if necessary.
Next: Verifying licensing, insurance and local reputation
Licensing and insurance checklist (printable)
Quick intro
Before you hire a roofer, verify their legal and insurance credentials so you’re protected if something goes wrong. Use the short checklist below during estimates or phone calls — and download the printable PDF to take with you on-site.
Checklist
- licensed in TX and local city/county
- show license number
- provide COI general liability with limits
- provide COI workers' comp
- show bond
- provide manufacturer certifications
- show local physical address
- provide local references
How to record verification
- Take photos of licenses, COIs, bonds, and certifications (timestamped where possible).
- Note date, time, and who you spoke with when you called or met the company.
- Save copies of emailed documents and the installer’s contact details.
Next, move on to verifying the contractor’s local reputation and how they handle project details in "Verifying licensing, insurance and local reputation."
Essential project and process questions to ask every contractor
Experience and roof types
Sample question scripts:
- "How many roofs like mine have you replaced in the last year, and can you share photos or references from those jobs?"
- "Have you installed [asphalt shingles/metal/flat membrane] roofs in this neighborhood or on homes with my pitch and dormers?"
What an acceptable answer looks like:
- The contractor gives a clear number and timeframe (for example, "25 asphalt shingle replacements in the last 12 months") and immediately offers references or photos.
- They describe similar roof features they’ve handled (pitch, valleys, skylights, chimneys) and can name specific manufacturers or product lines they've installed.
What to verify:
- Ask for at least 2 recent project photos showing before/after and at least one local reference with a phone number or Google review.
- Request a copy of the installer’s product certifications (if using a specific shingle brand) or proof of manufacturer training.
Components replaced (flashing, drip edge, vents)
Ask the sample question:
- "Exactly which roof components will you replace or inspect as part of this job?"
Expected scope (what you should hear and expect in writing):
- Flashing around chimneys, valleys, pipes, and skylights will be replaced or re-flashed.
- Drip edge will be installed along eaves and rakes.
- Roof vents (ridge, box, or turbine) will be inspected and replaced if damaged; penetration boots (pipe collars) will be replaced.
- Underlayment (felt or synthetic) and starter shingles will be replaced.
- Removal and proper disposal of old materials, plus deck repair if rot or damage is found.
What to verify:
- Get a line-item scope in writing that lists each component (flashing, drip edge, vents, underlayment, starter strip, deck repairs).
- Ask for photos of areas of concern (e.g., rotted decking) and, after demo, photos showing the repaired deck before new roofing goes on.
- Confirm disposal method and ask for proof of shingle weight/tons hauled off if you want confirmation of full tear-off.
Timeline and weather handling
Sample question scripts:
- "What is your proposed start date, projected completion date, and daily working hours?"
- "How will you handle weather delays and rescheduling?"
What an acceptable answer looks like (use as numbered schedule you can rely on):
- A clear start date and an estimated completion date expressed in days (for example, "Start June 7; 2–3 days for a typical tear-off and re-roof of your 2,000 ft² home").
- Daily work windows and a statement about site cleanup each day.
- A weather plan: they explain thresholds (e.g., rain, wind over X mph) that will pause work and how they will protect the exposed roof if a storm comes.
Verification steps:
- Get the start and completion dates in the written contract (see contract must-haves).
- Ask for their contingency plan in writing — how they secure the roof overnight, tarping protocol, and how they communicate changes to you.
- Request that they log actual work days and provide a brief completion report with dates and photos.
Written contract must-haves
Use a written contract that includes, at minimum, the following numbered items:
- Detailed scope of work — itemized list of materials and components to be removed, replaced, or repaired (shingles: brand & product, underlayment type, flashing, drip edge, vents, deck repairs).
- Timeline — specific start date, estimated completion date, and work-hour expectations.
- Payment schedule — clear amounts, due dates, and what triggers each payment (e.g., deposit, start of tear-off, final payment upon sign-off).
- Warranty and guarantees — written workmanship warranty length and what it covers, plus manufacturer warranty details and any conditions to keep warranties valid.
- Change order process — how changes are approved, documented, and priced (require signed change orders for any work beyond the original scope).
- Insurance and licensing proof — contractor’s license number (if applicable), proof of general liability and worker’s comp insurance, and a clause requiring proof before work begins.
- Cleanup and disposal — how debris will be handled, who is responsible for gutter cleaning, nail sweep, and final site cleanup.
- Lien waiver and final acceptance — how you’ll receive lien releases and a final acceptance sign-off when the job is complete.
- Termination and dispute resolution — how either party can end the contract and the method for resolving disputes.
What to verify:
- Ask for the actual insurance certificates and verify coverage dates and limits with the insurer if you’re unsure.
- Ensure the contract references the exact product names and manufacturer warranty terms.
- Require that all verbal promises be added to the written contract as change orders or contract addenda.
Final walkthrough and punch-list
Before you sign off, the contractor should schedule a final walkthrough with you to inspect completed work together. Use a short checklist during the walkthrough: shingles installed correctly, flashing and drip edge present, vents and pipe collars sealed, gutters cleared, no nails in the yard, and photos of the finished roof. Note any small issues on a written punch-list, agree on completion dates for those items, and do not make final payment until punch-list items are resolved and you receive lien waivers and warranty paperwork.
Cost inclusions, exclusions and payment terms explained
Typical inclusions and common exclusions
- Typical inclusions (what a full roofing estimate often covers):
- Roofing materials (shingles, underlayment listed separately if applicable)
- Removal and disposal of old roofing
- Labor and basic cleanup
- Flashing, drip edge, and vent work shown line-item
- Standard warranty information (labor and material durations)
- Permit fees when the contractor states they will pull permits
- Common exclusions (items often excluded or billed separately):
- Structural repairs (rot, sheathing replacement, framing) — usually quoted only if found
- Major decking replacement beyond localized patches
- Upgraded or specialty underlayments and ice-and-water shield beyond standard coverage
- Skylight replacement, chimney rebuilds, or large siding/soffit repairs
- Landscaping protection, tree work, or fence repairs if damaged during work
- Permit or inspection fees if the estimate lists them separately
- Disposal of hazardous materials (rare) or special waste handling
Decking, underlayment and permit fees
Decking replacement, premium underlayment products, and permit fees are often charged separately and should appear clearly on your estimate. A transparent estimate will:
- Show decking work as either a line-item for "replacement per square foot" or as a conditional quote that becomes firm only after inspection.
- List underlayment type and price (standard vs. premium, ice-and-water shield) so you know what’s included.
- Itemize permit fees if the contractor is pulling permits, or explicitly state that permits are the homeowner’s responsibility.
If an estimate lumps these costs into one vague number, ask for a line-by-line breakdown before signing.
Deposit policies and homeowner protection
Avoid absolute deposit rules; instead, use guidance and protective practices. Commonly accepted practice is to keep an initial deposit under 30% of the total job cost for residential roofing. Alternatives and protections to consider:
- Ask for payment milestones tied to project stages (e.g., deposit, 50% at tear-off completion, final payment on satisfactory completion).
- Request lien waivers upon each payment to prevent subcontractors or suppliers from filing liens.
- Use written change orders for any scope changes and require all payment terms in the signed contract.
- Consider escrow or trust accounts for larger projects when available.
- Verify the contractor’s payment methods and avoid paying large sums in cash; get receipts and a contract that includes payment schedule, start/end dates, and warranty terms.
Dispute resolution and workmanship issues
If problems arise, use a clear, documented escalation path. Follow these numbered steps and gather the listed documentation:
- Contact the contractor promptly
- Explain the issue in writing (email is best) and request a timeline for corrective work.
- Document the issue
- Gather photos and video, dated and showing the problem from multiple angles.
- Keep copies of the contract, proposal, warranties, and all communications (texts, emails, invoices).
- Request a written repair plan
- Ask the contractor to provide a written scope and timeline for remediation and any warranties on the repair.
- Escalate if unresolved
- If the contractor doesn’t respond or fix the issue within the agreed time, send a formal complaint letter (certified mail recommended).
- Use third-party resolution
- File a complaint with local licensing board or consumer protection agency; consider mediation or arbitration if the contract requires it.
- Last resort: small claims or legal action
- If damages exceed what agencies/mediation can resolve, you may pursue small claims court or hire an attorney.
Documentation to gather:
- Signed contract and any change orders
- All invoices, receipts and lien waivers
- Photographs/videos with timestamps
- Copies of correspondence (email threads, texts)
- Inspection reports or third-party assessments, if obtained
Working with insurance
If you’re filing an insurance claim, be cautious about assignment of benefits (AOB). With AOB, you sign over your insurance claim to the contractor so they deal directly with the insurer — this can speed payment but carries risks:
- It can limit your control over the claim and make you dependent on the contractor’s actions.
- Contractors with AOBs have in some cases pursued aggressive claims or litigation without homeowner consent.
Recommended practices:
- If presented with an AOB, read it carefully and consider consulting an independent advisor or your insurer before signing.
- Keep a copy of every insurance communication (emails, adjuster reports, claim numbers, denials/approvals).
- Give your insurer permission to share info with the contractor only in writing and retain a complete file for your records.
- Ask the contractor to provide regular written updates on any insurer interactions and retain duplicates for yourself.
Next, learn how to spot red flags when verifying licensing, insurance and local reputation.
Red flags, storm‑chaser tactics and what to do after severe weather
Common red flags
- No license or vague answers — contractor can't or won't provide a license number or proof of insurance.
- Pressure sales — claims like “today only” discounts or urgent scare tactics to sign immediately.
- Unmarked trucks or no business address — crews arrive in plain vehicles and give only a cell number.
- Cash‑only or large upfront deposits — requests for full payment or very large deposits before work starts.
- No written contract or only verbal promises — estimates, timelines and warranties not provided in writing.
How storm‑chasers operate
Storm‑chaser contractors typically appear quickly after major storms. Tactics include canvassing neighborhoods, offering fast, low‑cost fixes or “special” pricing, and asking for large deposits to hold materials or start work. Their timeline usually follows this pattern: within 24–72 hours they contact homeowners or knock on doors; within a week they may perform temporary repairs or tarping; over the next few weeks they collect payments and may either cut corners or disappear before completing permanent work. Because they move from area to area, follow‑up service and warranty enforcement are often difficult or impossible.
Safe steps after a storm
- Document the damage — take clear photos and videos of all affected areas (roof, gutters, siding, interior water stains). Keep timestamps if possible.
- Temporary tarping to prevent further damage — if the roof is exposed, arrange temporary coverings. Follow official guidance: FEMA guidance on emergency roof tarping and documenting storm damage. Only let qualified professionals install tarps.
- Call your insurance company — report the claim, provide your documentation, and ask what their adjuster will need. Don’t sign contractor paperwork before talking to your insurer.
- Contact a local, licensed contractor for a written estimate — get at least two estimates, check licenses and references, and get a written contract detailing scope, materials, timeline and payment schedule.
Reporting and local resources
- City consumer affairs or code enforcement — file complaints about unlicensed or high‑pressure contractors with your city or county consumer protection office.
- Better Business Bureau (BBB) — Greater Houston — check ratings and file complaints about poor contractors.
- Your insurance agent — ask for preferred or vetted contractors and for guidance on claims handling.
For specific next steps, move on to verifying licensing, insurance and local reputation — practical checklists and sample estimates will help you compare contractors and avoid common scams.
Practical checklists and a sample written-estimate template
Pre-hire checklist
- Verify license and insurance — ask for license number and proof of general liability and workers’ comp; write down policy expiration dates.
- Check references and recent work — request 3 recent local references and note dates/addresses for drive-by verification.
- Confirm business details — get company name, physical address, phone, and a website or social profile.
- Get a written estimate — require a detailed, line-item written estimate before hiring (use the sample_estimate template in the downloadable packet).
- Confirm warranties and guarantees — get warranty terms in writing for both materials and workmanship.
- Ask about subcontractors — confirm who will perform the work and whether subcontractors are insured.
- Request project timeline — get start and completion dates and how delays are handled.
- Payment terms and financing — agree on deposit amount, payment schedule, accepted methods, and any financing offerings.
- Permit responsibility — confirm who pulls permits and provides permit receipts.
- Get communication plan — establish a primary contact and preferred daily check-in method.
On-site/project checklist
- Jobsite protection — confirm protection for landscaping, siding, and gutters (tarps, plywood, tree guards).
- Supervision — verify a qualified supervisor will be on site and reachable during work hours.
- Safety gear and practices — ensure crew will use fall protection, ladders set safely, and keep a first-aid kit on site.
- Daily cleanup — require daily debris removal and magnet sweep for nails at the end of each workday.
- Material staging — confirm where materials and dumpsters will be placed to minimize property impact.
- Neighbor consideration — discuss noise, parking, and access with nearby homes if needed.
Final walkthrough checklist
- Complete inspection with contractor present — walk the entire roof, attic (if accessible), gutters, and property perimeter.
- Confirm scope items finished — verify every line item on the written estimate has been completed.
- Check flashing, vents, and penetrations — confirm flashing is sealed and vents/shingles are properly integrated.
- Inspect drainage and gutters — ensure gutters and downspouts are intact and clear of debris.
- Roofing debris and nails — perform a magnet sweep and visual check for debris; confirm dumpster removal.
- Photograph completed work — take final photos of roof from multiple angles and of any repaired areas.
- Collect final paperwork — get final invoice, lien waiver(s), warranty documents, and permit sign-off if applicable.
- Confirm final payment terms — verify remaining balance, acceptable payment methods, and receipt process.
Sample written-estimate template
- Client name, address, and contact — space for client information and job site address.
- Contractor name, license number, business address, and insurance proof — include phone and email.
- Scope of work (summary) — short description of work to be performed.
- Tear-off / disposal — number of layers to be removed and disposal method (dumpster/truck).
- Shingles: brand, model, color, and coverage area — leave fields for manufacturer, product line, and square footage.
- Underlayment type — specify product (synthetic/mineral) and areas covered.
- Flashing and penetrations — list flashing materials and noted penetrations to be replaced or resealed.
- Decking replacement — line item for any plywood/decking replacement with estimated square footage.
- Ventilation upgrades — specify ridge vents, soffit vents, or other ventilation work.
- Permits and inspections — itemize permit fees (if contractor obtains permits) and inspection coordination.
- Cleanup and nail/sweep policy — describe daily cleanup and final magnet sweep procedure.
- Warranty details — list material and workmanship warranty lengths and coverage conditions.
- Project timeline — start date, estimated completion date, and typical work hours.
- Payment schedule — deposit amount, progress payments (if any), and final payment terms.
- Change order process — how unforeseen work will be quoted and approved.
- Total estimate — subtotal, taxes, fees, and total (include note: estimates only).
- Signatures and date — client and contractor signature lines and date of agreement.
If you include broad cost guidance in the estimate fields, label them clearly as estimates only (for example: "Materials and labor: $2,000–$8,000 — estimates only") and avoid precise unsourced figures.
How to use the sample to compare bids
Use the downloadable sample_estimate PDF to ensure each contractor submits the same line-item information—compare like-for-like on materials, tear-off, decking, permits, cleanup, warranties, and payment schedule. Having identical fields makes it easy to spot exclusions, low-ball estimates, or missing warranties before you hire.
How a local Katy-based contractor helps — neighborhood-level advantages
Local knowledge and faster response
A contractor based in Katy brings familiarity with local weather patterns, common roof issues, and delivery routes, which speeds up diagnosis and repairs. For example:
- After a summer storm in Katy, a local crew can often inspect and stabilize damage the same or next day.
- In Sugar Land, familiarity with drainage and guttering issues means faster, targeted fixes after heavy rain.
- In Cypress, crews know the neighborhoods most prone to wind-driven shingle loss and can prioritize those streets.
These localized responses reduce wait time and limit secondary damage from delayed repairs.
Permits, code familiarity and inspectors
Local contractors routinely work with Katy-area permitting offices and building inspectors. That means they understand which permits are required, how long approvals take, and what local inspectors expect, so projects move through the compliance process with fewer delays or rework items.
Warranty serviceability and neighborhood references
- Warranty repairs are quicker because the contractor is nearby and can reach the property fast.
- Neighbors in the same subdivision often provide ready references or examples of completed work.
- Local suppliers and subcontractors reduce lead times for replacement materials.
Intersection with broader site focus
A neighborhood-focused contractor still performs standard residential scopes — see the site’s overview of [Residential Roofing services](/residential-roofing/) for common project types and materials.
Next, we’ll cover verifying licensing, insurance and local reputation.
Final walkthrough, warranty registration and job completion documentation
Final walkthrough checklist
- Walk the roof with the crew (or have them walk it with you): verify roof covering, flashing, vents, and ridge work look uniform and properly installed.
- Inspect gutters and downspouts: confirm they’re free of debris, aligned, and securely attached.
- Check flashing and penetrations: inspect around chimneys, skylights, pipes, and HVAC boots for tight seals and proper flashing.
- Review attic/underside: look from the attic for signs of daylight, proper ventilation, and no new leaks or insulation disturbance.
- Confirm cleanup: verify all nails, shingles, and debris were removed from the yard and roof; check for magnetic nail sweeps if used.
- Walk property perimeter: check landscaping, fences, vehicles, and other structures for damage; photograph any issues immediately.
- Test gutters/downspout flow and flashing details with a light water run-off (if safe) to confirm drainage.
- Review warranty and materials list on-site: confirm the installed products match what was agreed and note any manufacturer names and model numbers.
- Ask the crew to point out maintenance items and seasonal checks you should perform going forward.
- Sign the completion form only after you’re satisfied with the work and all punch-list items (if any) are noted with expected completion dates.
Warranty paperwork and registration
Ask the contractor for copies of all manufacturer warranties and the contractor’s workmanship/quality guarantee before you sign off. Request the warranty numbers and written proof of each warranty (PDFs or photos of the warranty cards) and confirm who will register the warranties — you or the contractor. If the manufacturer requires owner registration, register promptly and keep confirmation emails or registration receipts. If the contractor will register for you, ask for the registration confirmation or registration number so you can verify directly with the manufacturer.
Also: keep a digital folder (PDFs/photos) of all warranty documents and registration confirmations—this makes insurance claims and future resale far easier.
Payroll and employment proof (optional)
Homeowners sometimes request payroll records, proof of W-2/1099 payment, or contractor-subcontractor agreements to verify that workers were paid and to reduce risk of future liens or claims. This is especially common for larger jobs or when subcontractors are used. You can request payroll/employment proof as part of your closeout packet if you want extra protection; contractors should provide redacted documents that protect employee privacy while showing payments were made.
Job closeout documents to collect
- Final invoice — itemized and showing final payment terms.
- Lien waiver — signed release showing subcontractors/suppliers have been paid or will not file liens.
- Photos — final “as-built” photos of the completed roof and any repaired areas (high resolution).
- Warranties — manufacturer product warranties and the contractor’s workmanship warranty with durations and terms.
- Permit sign-offs / inspection approvals — copies of final permit inspections and city/county sign-off documents.
Be sure to keep both physical copies and a scanned/digital folder of these items for insurance claims, maintenance records, and resale disclosure.
Ready for the last checks? Next, verify the contractor’s licensing, insurance, and local reputation before you make final payment.
Schedule a free roof inspection
What the free inspection includes
- Visual assessment of roof surfaces, flashing, gutters and visible attic areas for signs of damage or wear
- Photographs of problem areas and overall roof condition for your record
- Written report summarizing findings, condition rating, and estimated remaining life (if applicable)
- Recommended next steps, including prioritized repairs, replacement options, and an estimated cost range
How to request an inspection
You can request a free inspection by phone, email, or our online form. When you contact us, please have the following ready to speed scheduling and improve the initial assessment:
- Service address (including ZIP code)
- Any recent photos of the roof or leaking areas (if available)
- Preferred dates and times for the appointment
- A short note about recent storm damage or ongoing leaks (if applicable)
What to expect during and after the inspection
- Arrival and check-in: The inspector will arrive in company vehicle, show identification, and confirm the property and scope with you.
- On-site inspection: A visual evaluation of the roof, gutters, flashing and accessible attic areas; photos and notes are taken. (The inspector will avoid destructive testing unless you request it.)
- Report delivery: You’ll receive a written report with photos and clear recommendations within a specified timeframe (usually within 48–72 hours).
- Follow-up: A team member will contact you to review the report, answer questions, and explain available next steps including repair estimates or replacement options.
Neutral note on financing and quality guarantee
We offer financing options to help spread the cost of approved repairs or replacements and back completed work with a quality guarantee on labor and materials. For more about our company and commitments, see About. To confirm whether we serve your address, check Service Area. For additional reading on roof care and common repairs, see our Roofing Resources.
If you live in Katy, Sugar Land, Cypress, Richmond or anywhere within a 30-mile radius of our service area, request your free inspection now by calling our office, emailing us, or submitting the online form on our website — have your address, any photos, and preferred dates ready.
Frequently Asked Questions
Q: How do I choose a roofing contractor?
A: Choose a contractor with proper licensing, insurance, local references, and a clear written estimate; prioritize companies that offer free inspections and a quality guarantee. See: Verifying licensing, insurance and local reputation.
Q: What questions should I ask before hiring a roofer?
A: Ask about license and insurance, project timeline, materials, warranties, and whether they provide a written estimate and proof of permits. See: Verifying licensing, insurance and local reputation and Understanding warranties and timelines.
Q: How should I compare multiple roofing estimates?
A: Compare scope of work, materials, labor warranties, timelines, and total costs, not just the bottom-line price; ask for itemized bids so you can match apples to apples. See: Getting multiple written estimates.
Q: What kind of warranty or guarantee should I expect?
A: Expect both a manufacturer warranty on materials and a workmanship guarantee from the contractor, with terms and duration spelled out in writing. See: Understanding warranties and timelines.
Q: How can I verify a roofer’s reputation and past work?
A: Check local references, online reviews, photos of completed jobs, and ask for contactable past customers; confirm licensing and insurance with local authorities. See: Verifying licensing, insurance and local reputation.
Frequently Asked Questions About Choosing a Roofer
Can I check a contractor’s license and insurance online in Texas, and where do I look?
Yes. Use the Texas Department of Licensing and Regulation to verify a contractor’s registration and license status by name or license number. Ask the contractor for Certificates of Insurance for general liability and workers compensation, then call the insurer using the policy number on the certificate to confirm the policy is active and the limits match what you were told. Keep copies or photos of the license and COIs before work begins and note the issuing name and policy numbers for your records.
What is a reasonable deposit for a roof replacement and when should final payment be due?
A reasonable deposit is typically enough to cover materials ordered but not so large that it leaves you exposed. For full roof replacements, many reputable roofers ask for a deposit between 10 and 30 percent; requests for more than 50 percent upfront are a red flag. Structure the contract so remaining payments are tied to clear milestones and the majority of payment is due at final inspection and after you receive signed lien waivers and warranty paperwork. Pay by traceable methods and get a detailed final invoice showing work completed and any change orders.
How do I know if my roof can be repaired or needs a full replacement?
Start with a visual inspection and photos showing the extent and pattern of damage. Local signs that often mean replacement is the better long-term choice include widespread shingle granule loss, multiple active leaks, sagging or soft decking, and shingles that are nearing the end of their expected life. Isolated damage from wind or a falling limb can often be repaired. A qualified roofer will inspect decking from the attic and from the roof, document findings with photos, and give a written recommendation explaining whether repairs will restore watertight performance or whether a full replacement is the more durable option.
What should I do immediately after a storm to protect my roof and insurance claim?
Take photos from the ground and inside the attic to document visible damage, keep temporary tarps or plywood suggestions to cover exposed areas if safe to do so, and contact your insurer to report the damage. Avoid hiring any contractor who pressures you to sign right away; get at least one local, licensed roofer to inspect and provide a written report with photos for your claim. If temporary tarping is needed, get a written estimate for the tarp work and keep receipts. Proper documentation and a local contractor’s assessment will strengthen your claim and protect the roof until permanent repairs are completed.
Are storm-chaser contractors illegal and how can I report them?
Not all out-of-area contractors are illegal, but many storm-chaser behaviors are unlawful when they operate without local licensing, misrepresent insurance relationships, or take large cash deposits and disappear. If you suspect illegal activity, gather the contractor’s business name, truck photos, license numbers, contracts, and receipts and report them to local law enforcement, the county or city consumer protection office, and the Texas Attorney General’s office. You can also file a complaint with the Better Business Bureau and inform your insurance adjuster so they are aware. Keeping good documentation and working with a known local roofer helps you avoid these risks and protects your claim.
Schedule a free roof inspection
Request a no-cost roof inspection and receive a written report with photos, recommended next steps, and a clear estimate. We serve homeowners in Katy, Sugar Land, Cypress, Richmond and within a 30-mile radius. Use the short online request form or call our office, ask about financing options, and rest easy with our company quality guarantee and full documentation for insurance claims.

Shawn
Shawn leads Blue Rhino Roofing, a BBB A+ accredited, Texas-licensed roofing company based in Katy. He's on the roof and on the phone, and known for telling homeowners the straight truth about whether they need a repair or a replacement.